You can connect a USB disk, including SD card disks, to your NAS and use it for different purposes. For example, you can transfer files to or from your NAS. Or you can use it as a storage location for NAS backups.

Using USB Disk With Synology NAS
You can use USB disks to transfer files to or from your NAS. Or you can use it as a storage location for NAS backups.
For file transfer, you use the File Station or USB Copy applications on your NAS or control the process from your computer; you can use the Hyper Backup application for backup.
You might want to look into the USB Copy application if you regularly transfer files between a USB disk and your NAS. With USB Copy, you can customize and automate the process. Please refer to Using USB Copy on Synology NAS.
Since DSM mounts each partition of a connected USB disk as a shared folder, you can access its contents from every device on the network that connects to the NAS and assign proper permissions to the shared folder.
You manage the USB disk from Control Panel, not Storage Manager.
Connect & Eject
A USB disk is a removable storage. This means that DSM will automatically mount the disk when connected. Similarly, you must unmount or eject the disk before physically removing it.

There are three ways to eject a USB disk from the DSM desktop if you are an administrator. For non-admin users, there is an option to remove, but it is not enabled by default.
Eject
You will find an External Devices icon on the DSM desktop in the taskbar’s top right corner. Click on the icon, and you will see all devices listed. Notice the eject symbol at the right of each device. See the screenshot above.
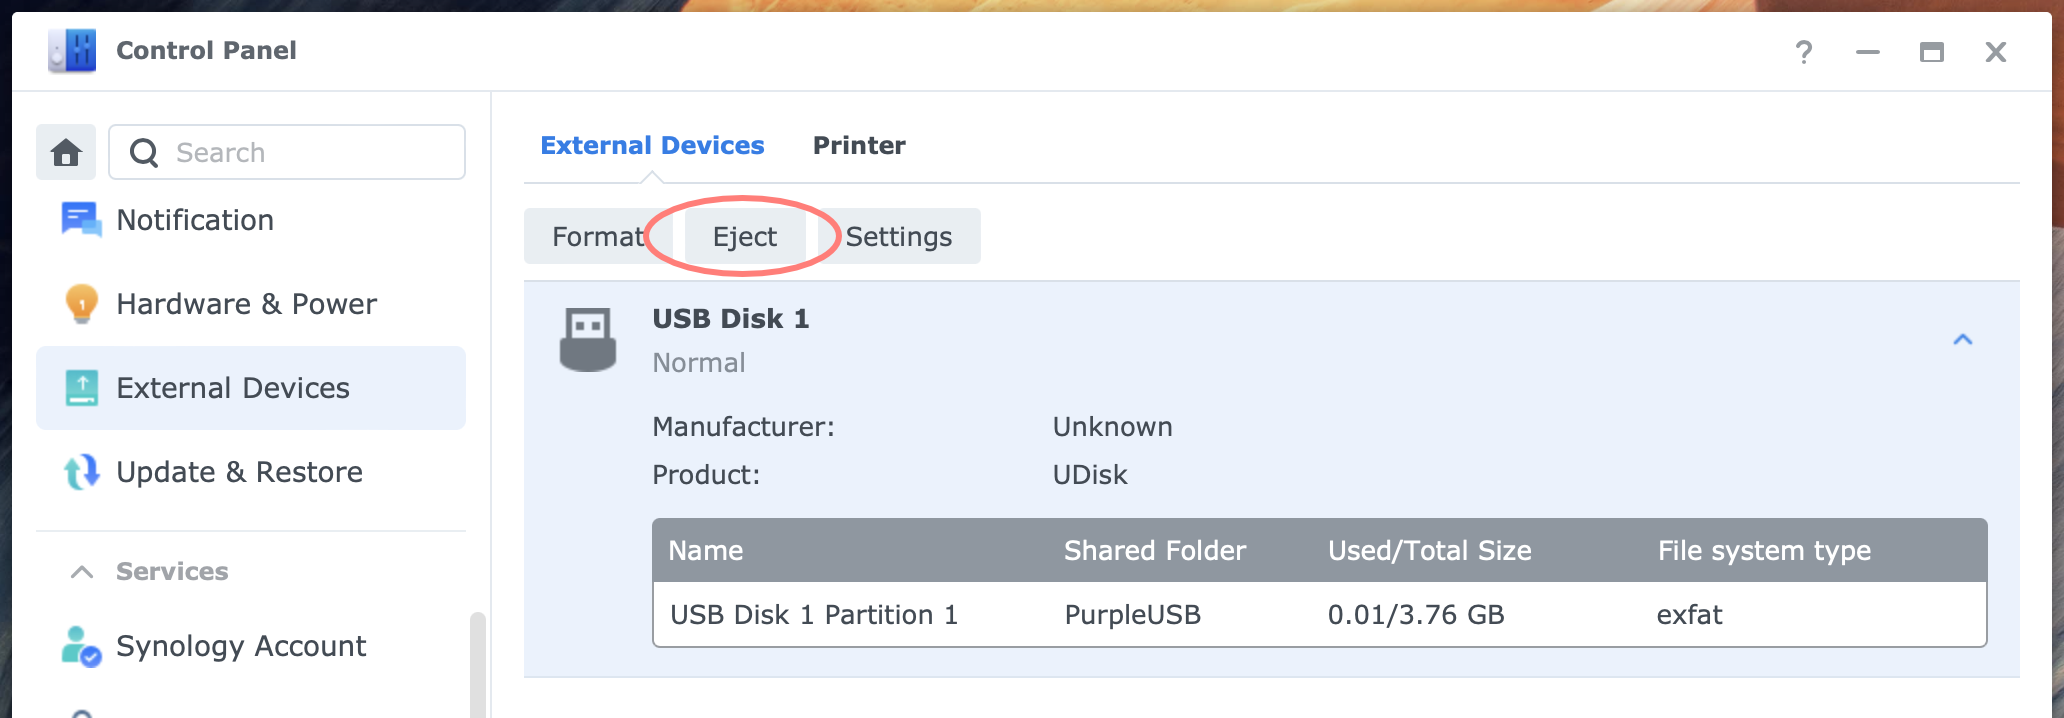
A second option is to open Control Panel > External Devices. Select the USB disk to eject and click on the Eject button.
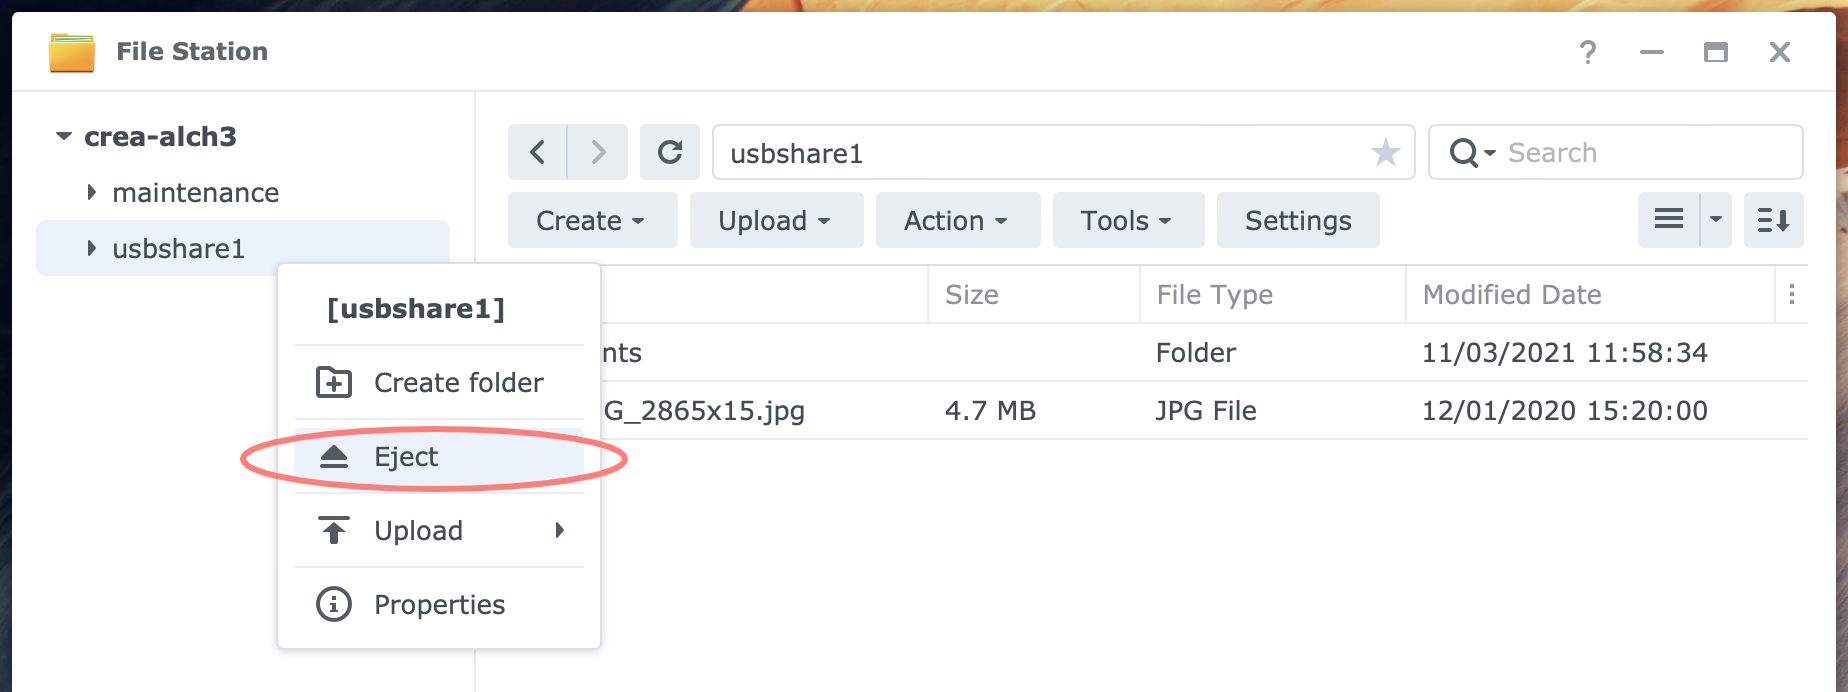
The third and last option is from File Station. Right-click on the shared folder for the USB disk and select Eject. This works in the File Station application on the DSM desktop and from the browser version of File Station.
Wait a few seconds after the command before detaching the NAS disk to let the device unmount.
Permission to eject
Before DSM 7, only administrators could remove a USB disk, as described above. From DSM 7 onwards, you can allow non-admin users to remove USB devices. You configure this in Control Panel > External Devices > Settings button > Advanced tab. Enable the option to Allow non-admin users to eject USB devices.
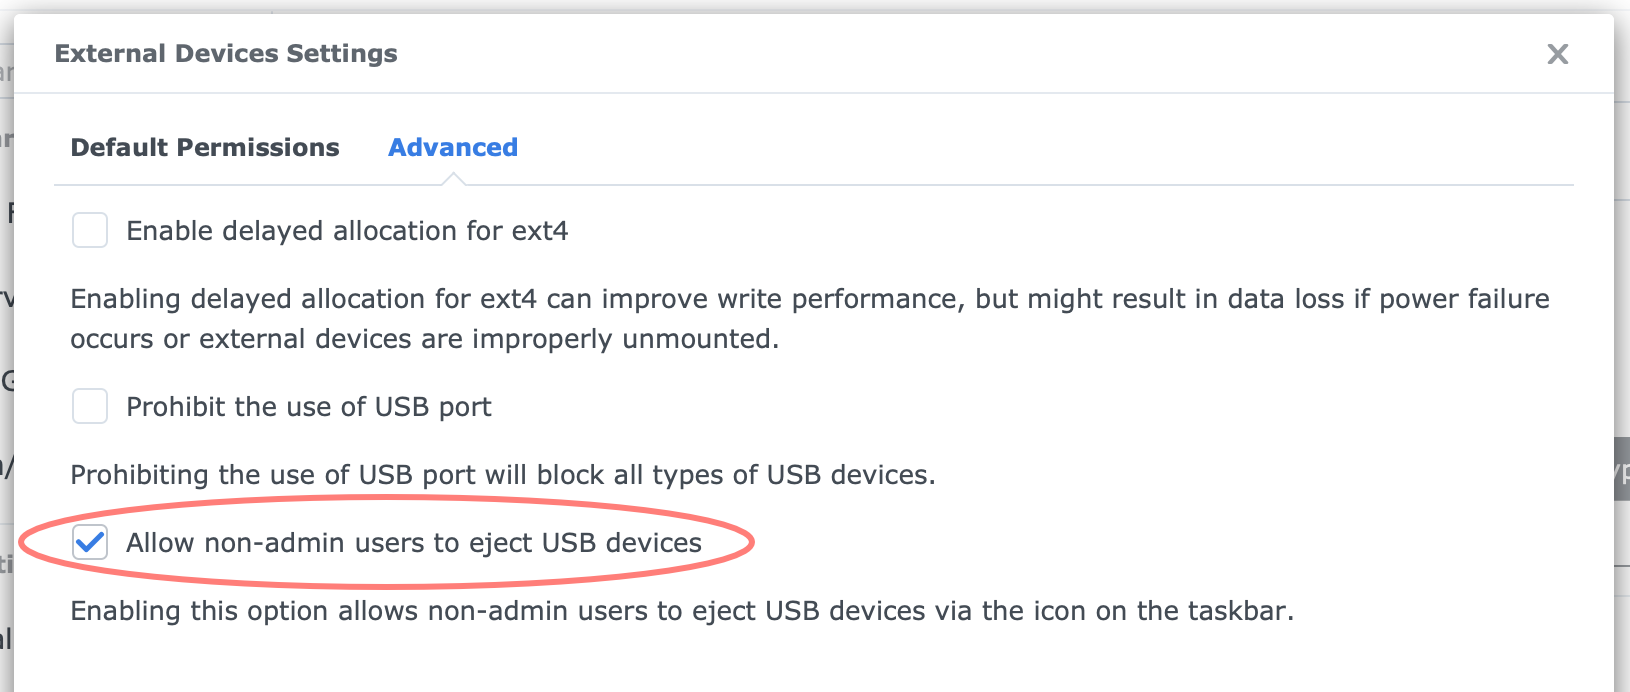
The icon for External Devices on the DSM desktop will now appear for every user.
Shared Folder Name
DSM automatically assigns a shared folder name to the USB disk when connected. By default, the name is usbshare with a number as a suffix. The first USB disk you join at any given moment becomes usbshare1, and the next usbshare2, assuming usbshare1 is still attached.

If the USB disk has multiple partitions, DSM adds another number to the shared folder name after a dash, like usbshare1-1 and usbshare1-2, for the first USB disk with two partitions. Notice that each partition becomes a shared folder.
Rename
You can change the shared folder name from Control Panel. Open Control Panel > Shared Folder, and select the shared folder of the USB device. Click the Edit button and change the name on the General tab. Please keep it simple, without spaces or special characters, like BackupDisk.

I highly recommend this step because there are multiple benefits to doing this:
- DSM will use the same and unique name the next time you mount that USB disk. This frees you from the random usbshare names.
- It is easier to recognize which disk is mounted.
Renaming the shared folder name is highly recommended for backup purposes. Applications like Hyper Backup recognize the USB disk from their shared folder name. The backup will fail if the name changes because another USB disk was connected before the backup disk was mounted.
If the USB disk is used for backup or similar purposes where users do not need to see it from the computer, consider enabling Hide this shared folder in “My Network Places”.
Permissions
You can also set access permissions to the USB disk. In the Control Panel > External Devices > Permissions tab.
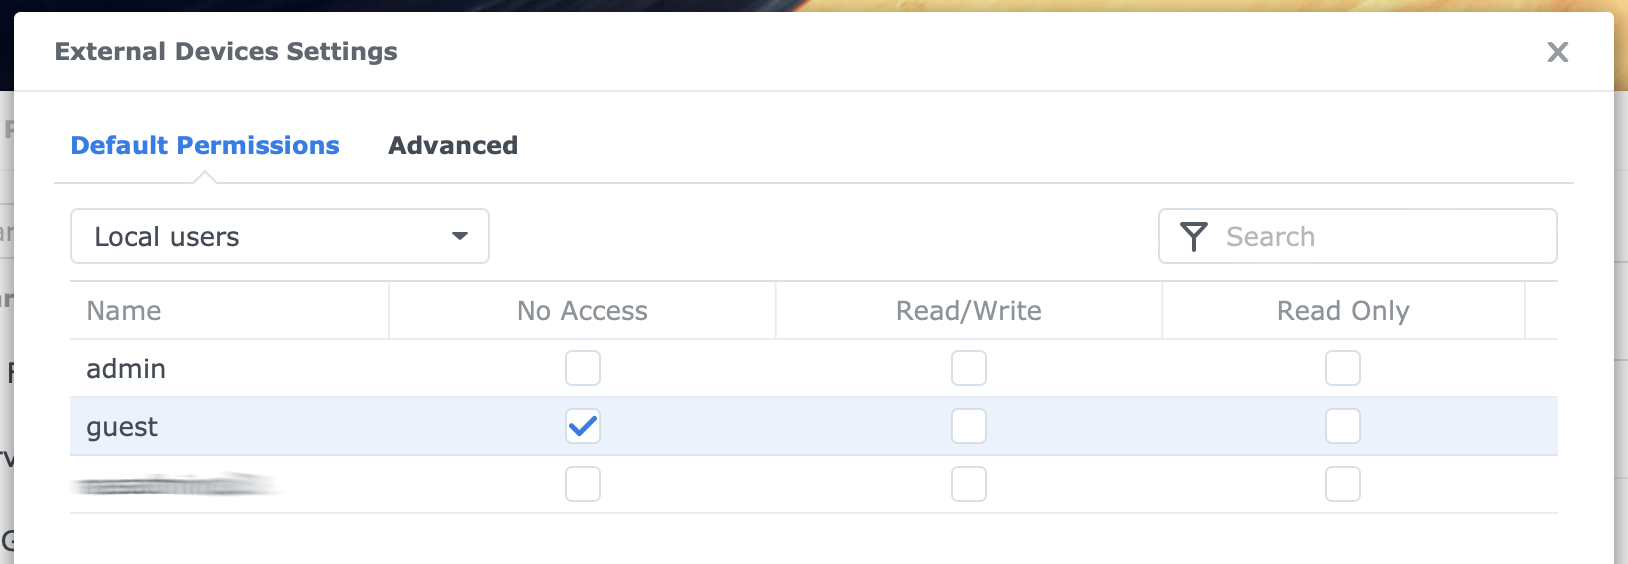
You can assign default permissions to users and groups for every USB disk on your NAS. Note that administrators group members always have Read/Write permissions.
Format
According to Synology documentation, supported file systems for external disks are Btrfs, Ext4, Ext3, FAT/FAT32, NTFS, HFS+, and exFAT. For exFAT, you need to install an additional package. The exFAT files system, unlike FAT32, supports files larger than 4 GB and can be used on both Windows and Mac operating systems.
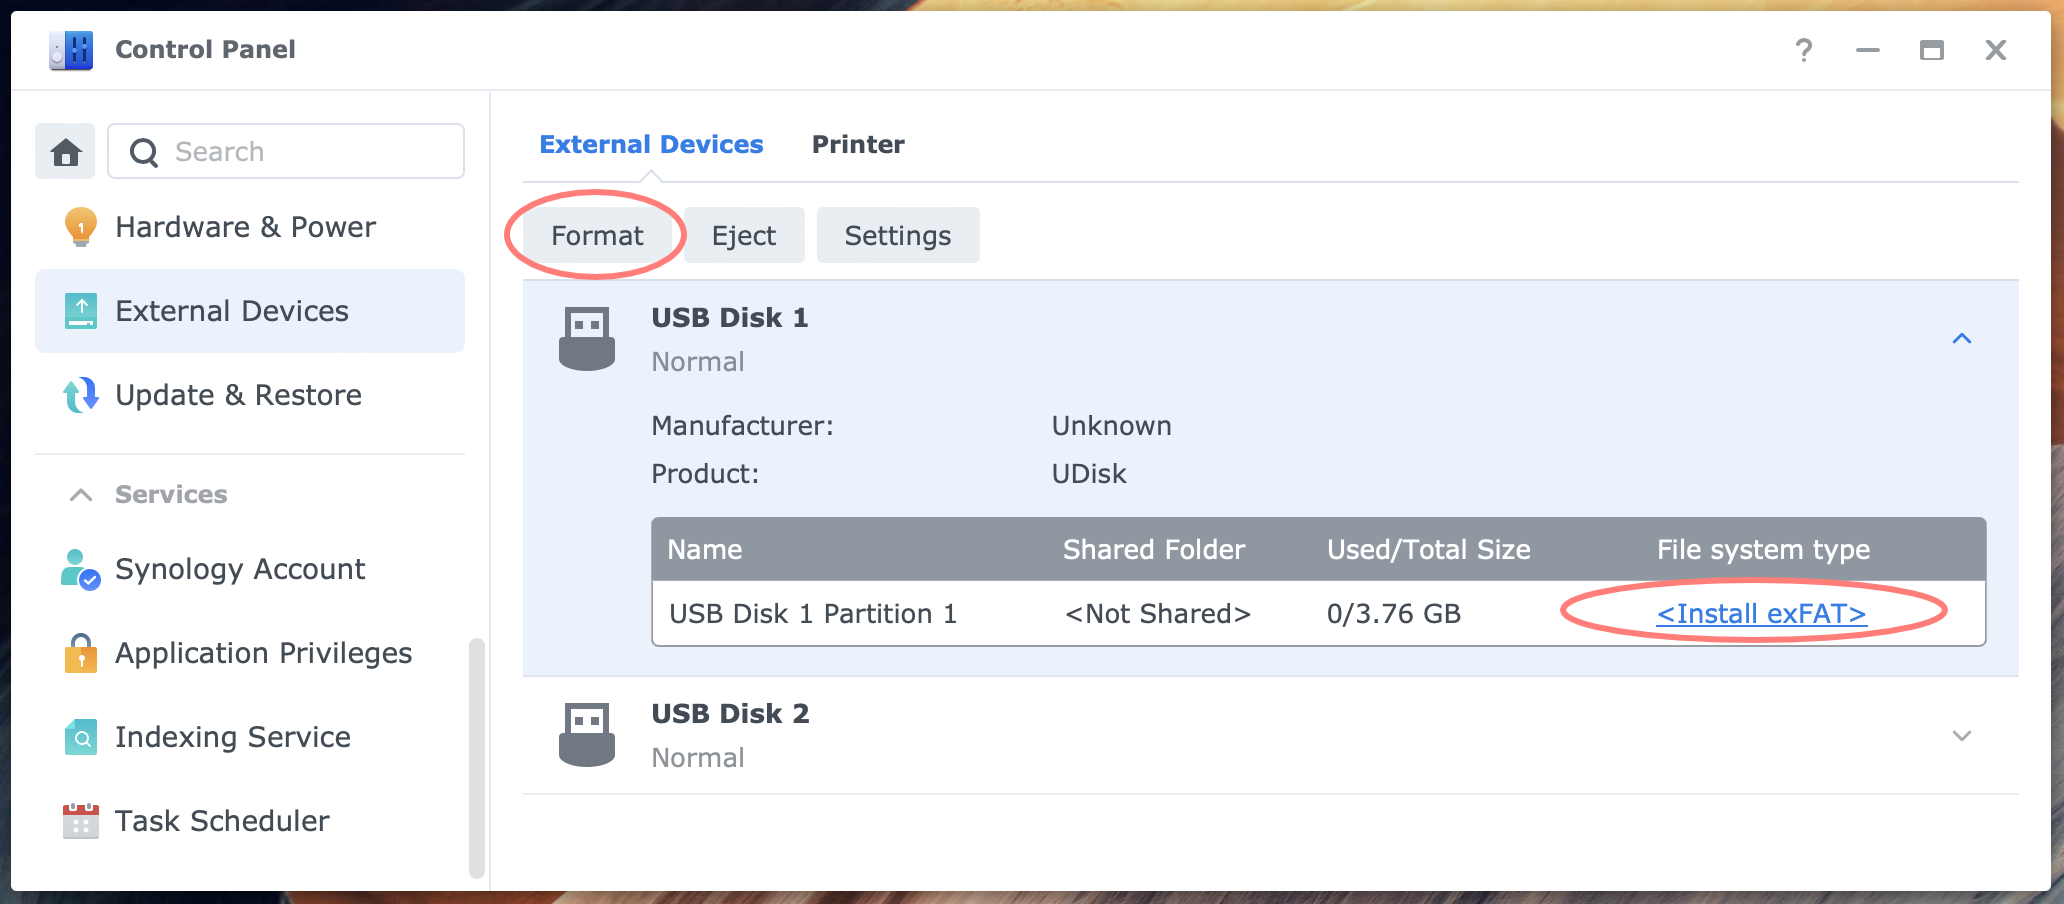
If you insert a USB disk formatted as exFAT and do not have the exFAT package installed, Control Panel will inform you with a link to the exFAT package in Package Center. The exFAT package is free of charge since DSM 7.0.
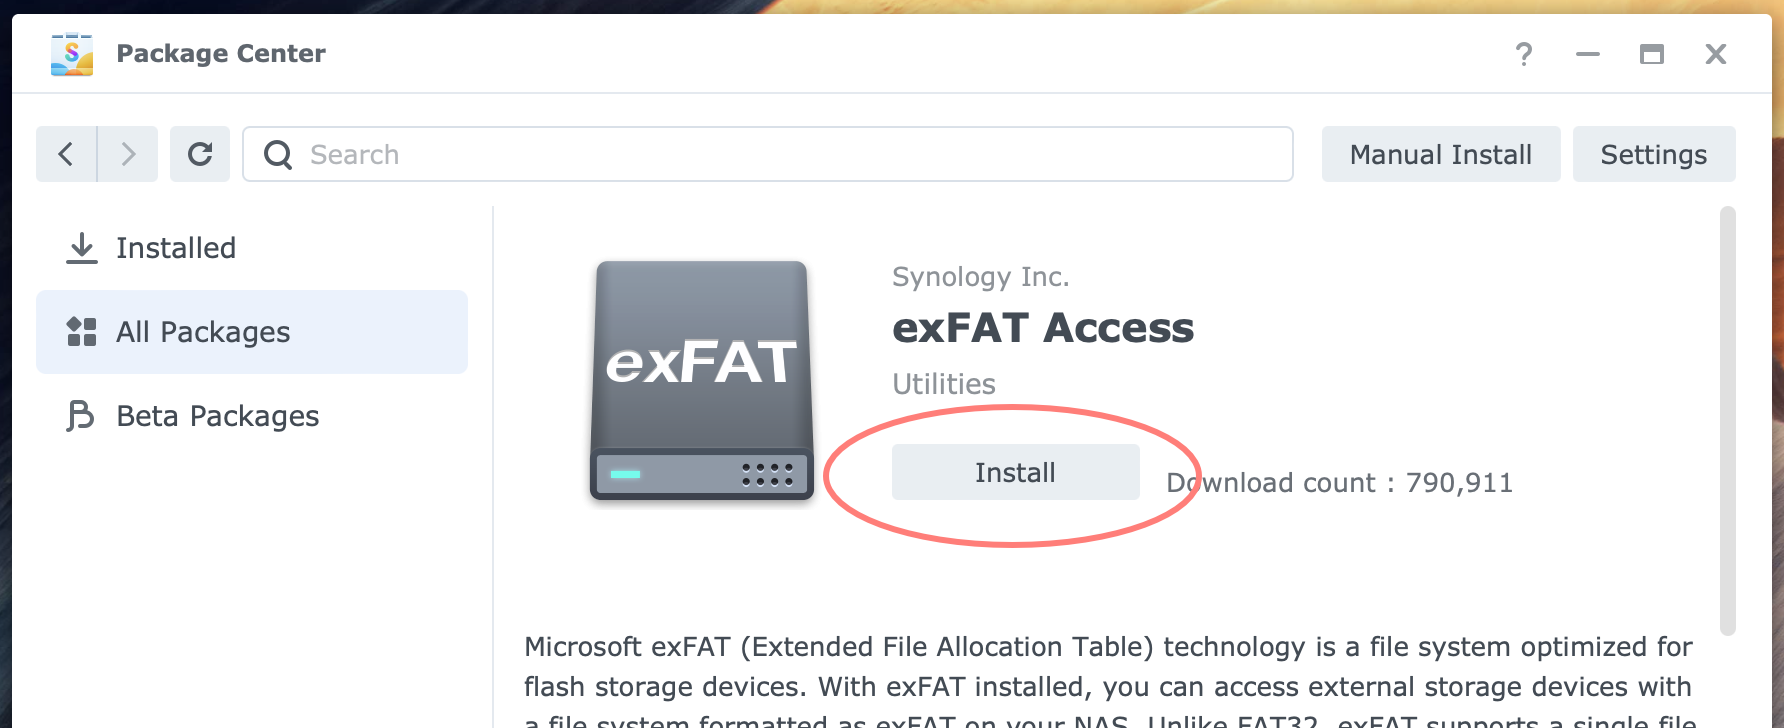
A Synology NAS can format a USB disk as Ext4 or FAT32, and exFAT is the exFAT package installed. Due to several limitations in FAT32, Ext4 is my preferred file system for backups. The exFAT file system has the advantage that Windows and Mac systems support it and support a single file larger than 4 GB.
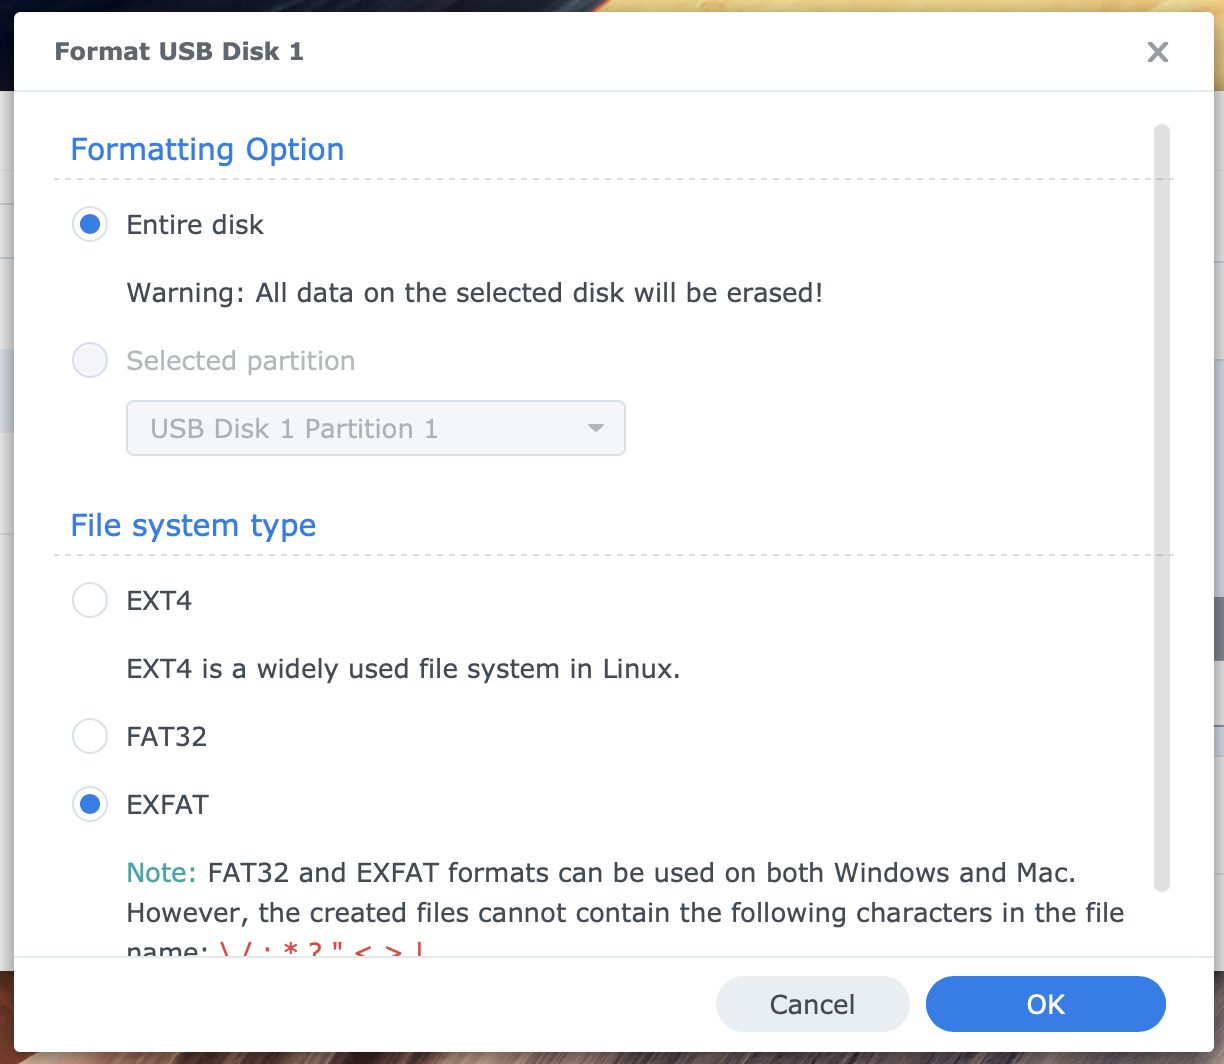
To format a USB disk with your NAS, connect the disk. Wait a few seconds for the USB disk to mount. In the meantime, open Control Panel > External Devices. Select the USB disk and click on the Format button at the top. Choose the preferred settings and click OK to start formatting.
Advanced Settings
Discussing USB disks on a Synology NAS would not be complete without mentioning the specific settings for USB devices. Note that DSM 7 introduced two new settings that do not exist in DSM 6.
At Control Panel > External Devices, click the Settings button. There are two tabs in the External Devices Settings dialog: Default Permissions and Advanced.
Default permissions
As the name suggests, you can define the default permissions for every USB disk that connects.

This potentially saves administrators a lot of work. Do you want to open external devices to all or specific users or limit it to administrators as the default?
Advanced
There are three settings in this tab.
The first, called delayed allocation, is a buffering to improve performance with external devices. As stated, there is a potential risk of losing information during a power failure. You can mitigate that risk with an uninterruptible power supply or UPS. Please refer to Configure UPS in Synology NAS for details.

The second option prohibits the use of the USB port. If it effectively turns off any USB port on the NAS. This is new in DSM 7.
The third and last option interests most home and small office users. Until DSM 7, non-admin users could not eject a USB disk. It is not enabled by default, but you can safely allow users to remove the device after a file transfer from the taskbar. This setting is also new in DSM 7.
Thanks for reading
This post is donation-ware, and I made it to help you. Please consider leaving a comment or even buying me a coffee if it did. I will be eternally grateful.
Paul Steunebrink / Storage Alchemist
