The Security Advisor is an application on the NAS. You can find it in the main menu. It is permanently installed. With the Security Advisor, you quickly acquire insight into all security-related settings on the NAS.

Using Security Advisor On Synology NAS
Every conscious NAS administrator takes security seriously. However, it is often difficult for the less experienced administrator to know where to start. Synology understands the challenge and came to the rescue with a solid application for every NAS: Security Advisor.
The program scans the NAS once a week, or you start a scan manually. In addition to scanning and reporting, it helps the administrator to solve any finding.
Baseline
The Security Advisor works with a security baseline as a reference to determine the NAS’s status. On first use, you choose one of the predefined security baselines. You can change the baseline later, if necessary, from the Advanced page.
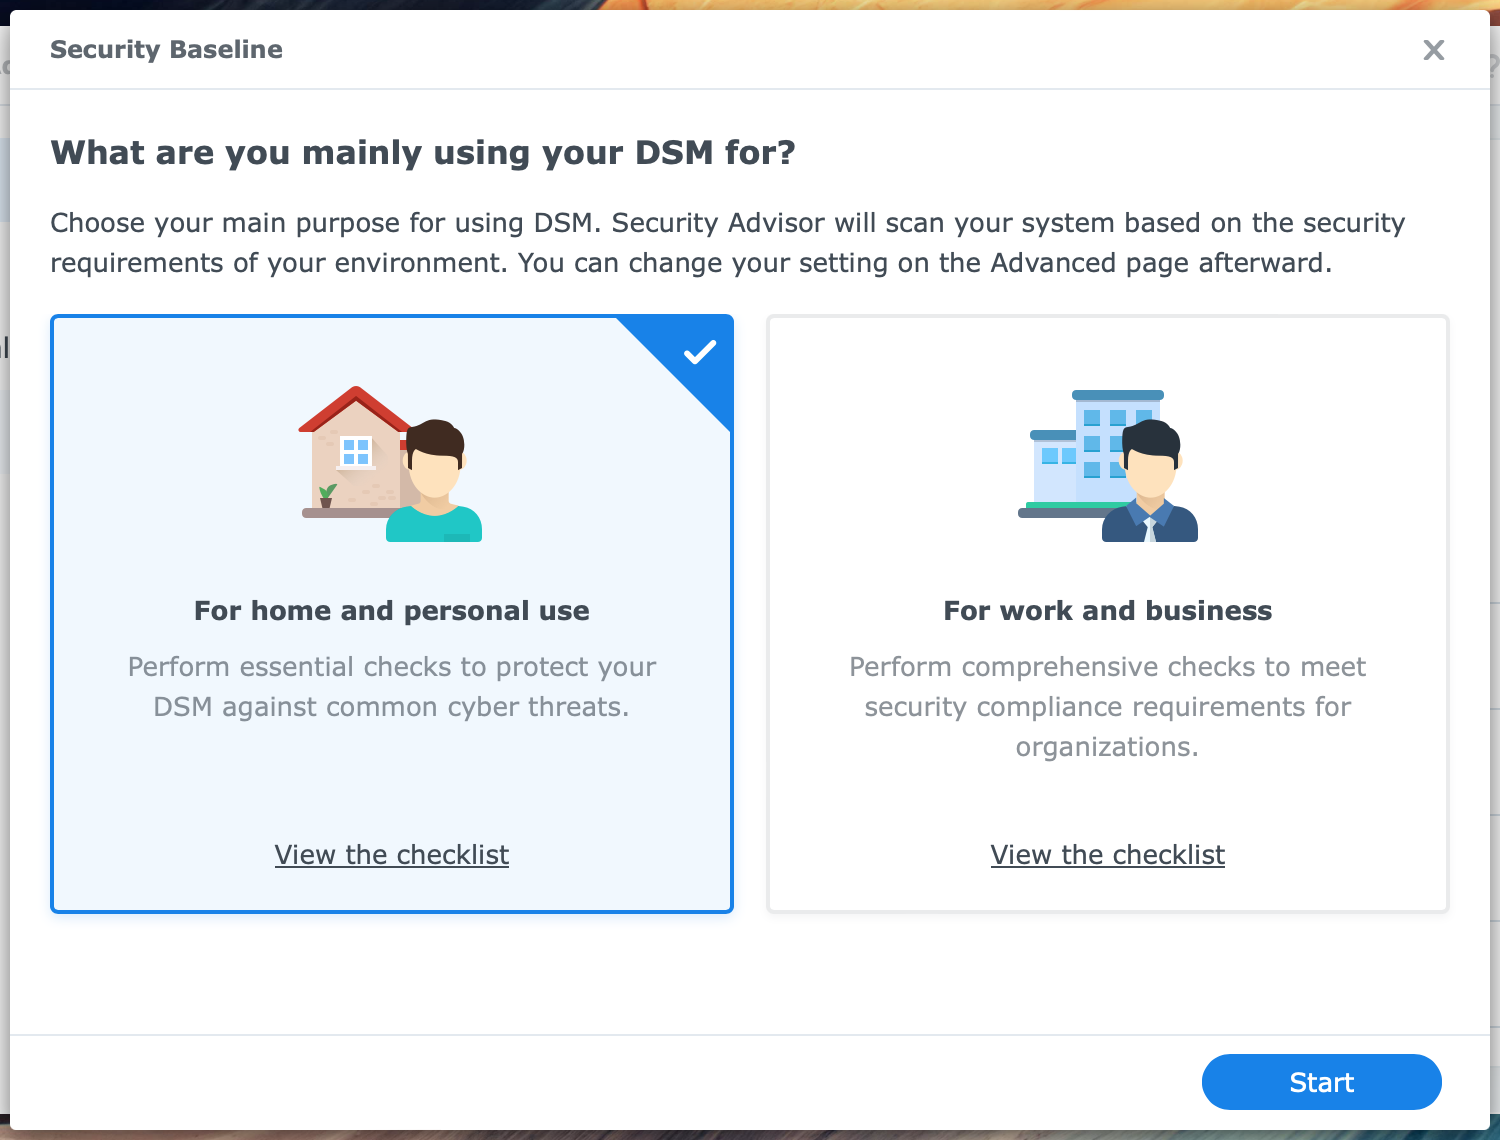
There are three baselines, depending on what you use the NAS for.
- For home and personal use
- this baseline checks 30 out of 47 events; it is best for personal use without external access
- For work and business
- this baseline checks 46 out of 47 events; it is ideal for professional use and external access
- Custom
- this baseline checks what you tell it to do
If you use the NAS at home but have opened the NAS to the Internet for external access, I suggest using the security baseline For work and business. This baseline tests more events and works to a more strict security profile. You can create a custom baseline, as I will explain later when I discuss the Advanced page.
Application Layout
The Security Advisor is well-organized in four pages: Overview, Results, Login Analysis, and Advanced. I will discuss each page below.
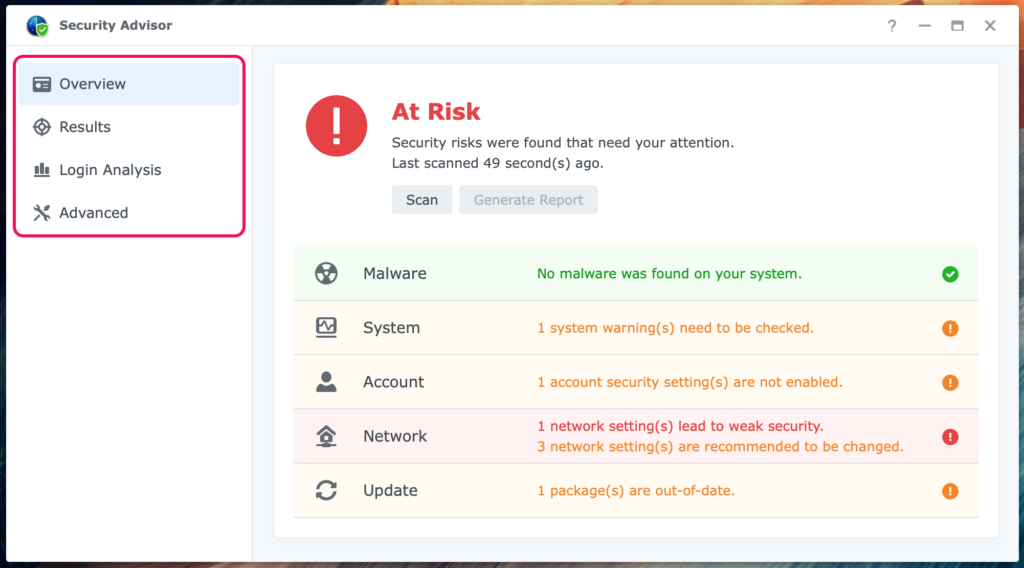
Together, this will give you a good understanding of this versatile tool.
Overview Page
At the top of this page, you see when the last scan was performed and the result: Scanning, Good, Warning, Out-of-date, or At Risk. You can also start a scan manually with the Scan button.

Status
There are five possible statuses:
- Scanning
- The Security Advisor performs a scan; please wait for the result.
- Good
- All items passed or failed events have an Info severity rating.
- Warning or Out-of-date
- At least one failed event with a Medium severity rating.
- At Risk
- At least one failed event with a High or Critical severity rating.

Below is the overall status. You will find statuses defined per category.
Category
The overall result is further clarified with five categories: Malware, System, Account, Network, and Update. You determine which has one or more failed tests based on the color of a category.
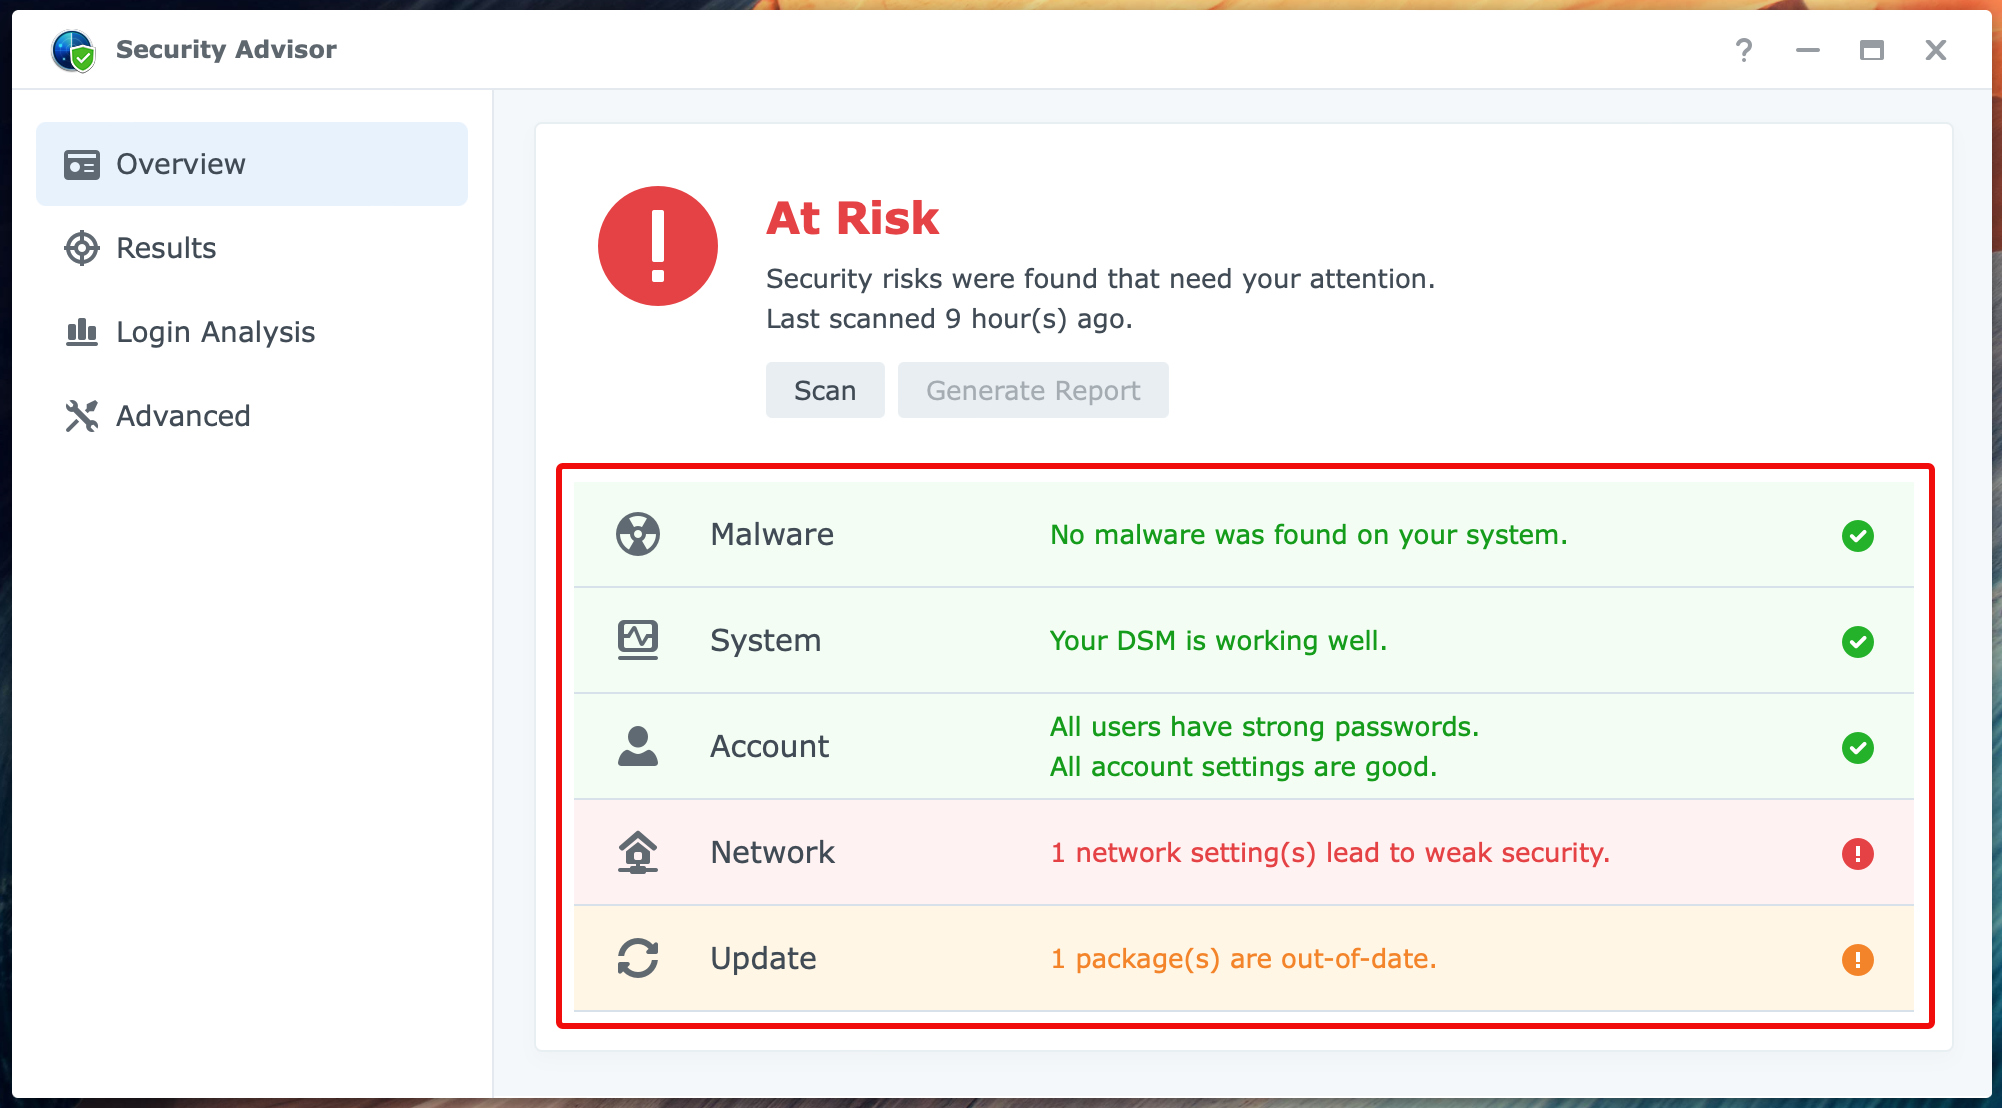
When you click on a category, it opens with all test events in that category and their results on the Results page.
Results Page
Similar to the separate categories on the Overview page, the Results page displays all events and their scan result in one list. Optionally, you can filter by category.

Select the category from the drop-down list in the top right corner.
Categories, status, and severity
Each event in the baseline has a severity rating. There are four different levels:
- Info
- Medium
- High
- Critical
After a scan, each event either passed (green checkmark) or failed (red exclamation mark). This is the event status.

The severity rating of a failed event determines the overall status after the scan on the Overview page, being either Good (green), Warning or Out-of-date (orange) or At Risk (red).
An Out-of-date status occurs when packages or DSM are not up-to-date. For more information on updating your Synology NAS, please refer to Understanding Synology NAS Updates.
Solving issues
When you open an event, you see details and a recommended action if the event failed during the scan. A link in the recommended action takes you to the right place to solve the issue.
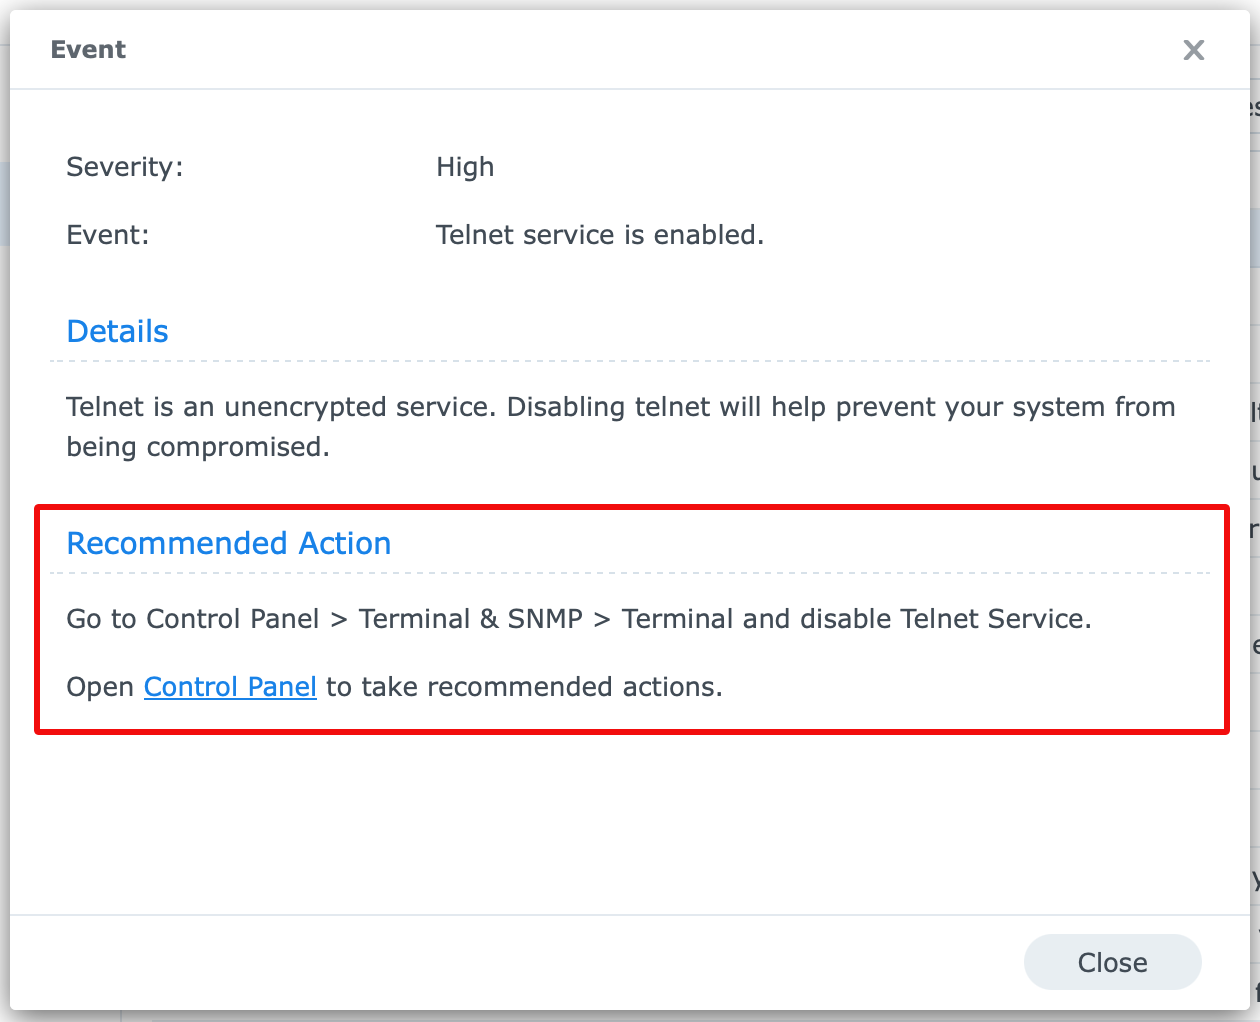
After solving the issue, close the event description, keep the event selected, and click the Scan button. The Security Advisor will scan only the selected events.
For help with account issues, like the default admin account or 2-factor authentication, please refer to Better Synology User Management, How To Disable Default Admin Account, or How To Enable 2-Factor Authentication.
Skip events
You will find a Skip button at the top of the Results page. When you select an event and click the Skip button, that event is removed from the baseline. If you worked with one of the two predefined baselines, Security Advisor will create a custom baseline without the selected event.
Historical reports
This option on the Results page may be unavailable. After you enable storing reports, which I discuss below, this option becomes active.

The Reports List shows the reports that are available in an HTML format. Click on the report path, and it will open in a browser. The Security Advisor generates reports on a daily or monthly schedule. You configure the report on the Advanced page. See the details below.
Login Analysis Page
This page may be entirely blank. The analysis of login behavior only applies to logins from public IP addresses. Sign in to DSM from a public IP address to enable this function. I copied the following paragraph from the DSM help screen.
Security Advisor analyzes each user's login information, including HTTP user-agent, IP address, and geographic location. When a new login activity is detected, Security Advisor will notify the system administrator and the user in question.
Suppose your NAS is accessible online, and you suffer false login attempts. In that case, you might find more information on this page regarding the country from which the attempt was initiated. Next, you can take preventive measures with your firewall, Auto Block, and Account Protection.
Advanced Page
On this page, you can configure application settings. These include the security baseline, the scan schedule, and report settings.
Security baseline
As mentioned earlier, you select a security baseline (home or work) on first use that the Security Advisor will use from that day on. However, you can change the chosen baseline on the Advanced page or create a custom baseline.
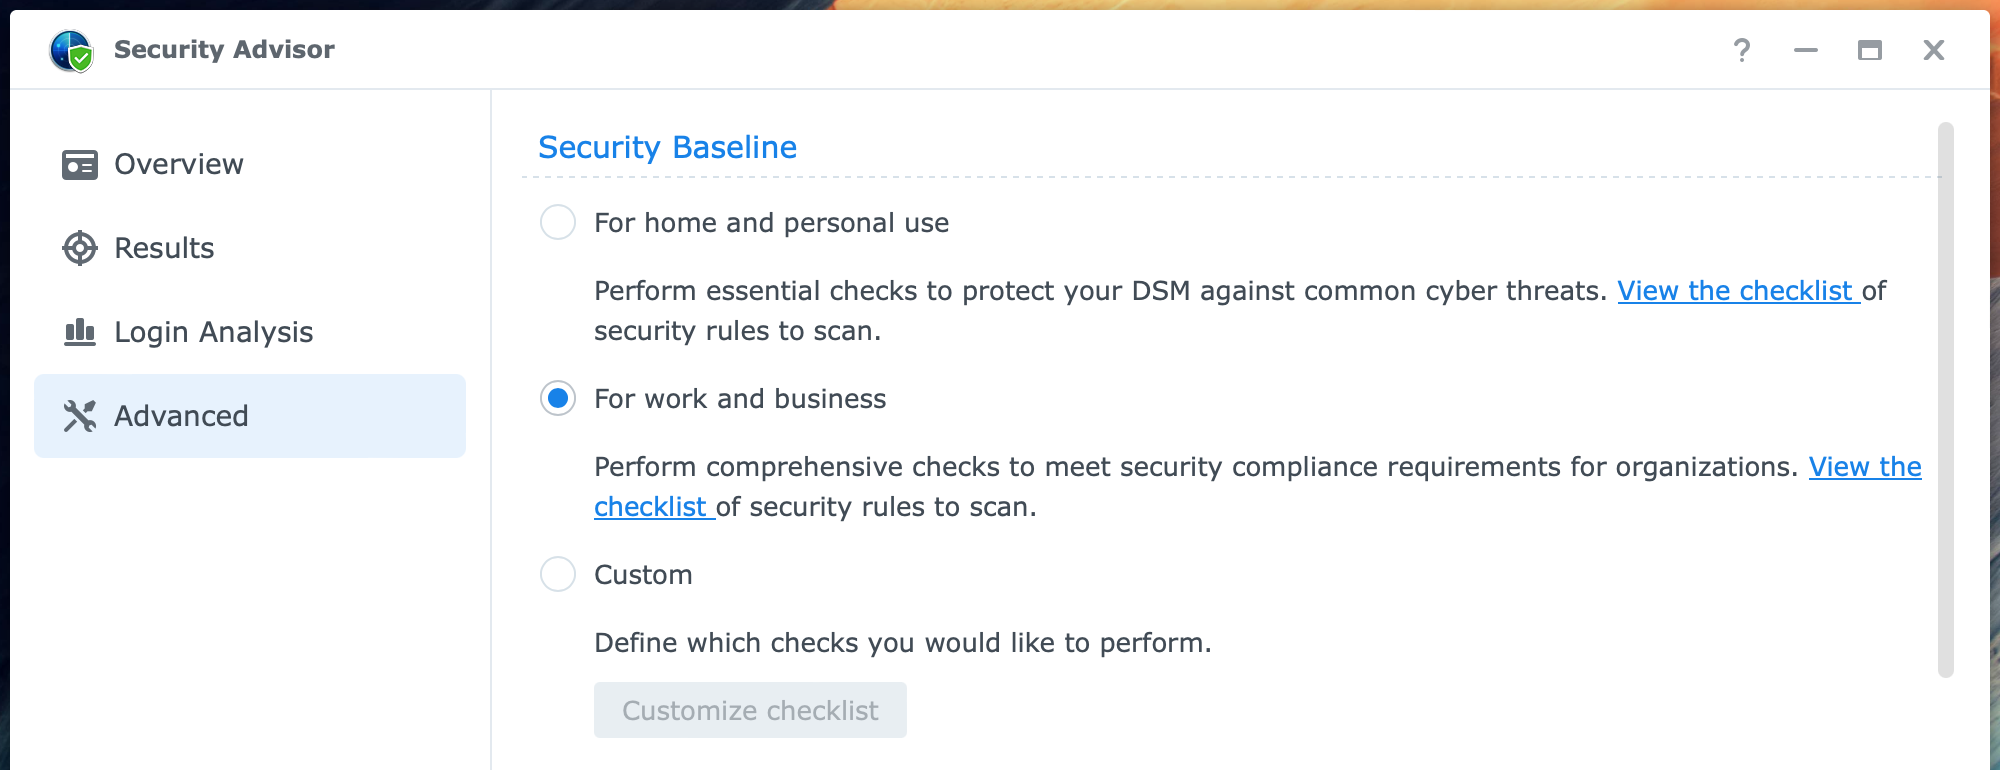
Changing the baseline would be helpful if you initially selected the home and personal use baseline but, later on, configured a form of external access. Both examples require a different baseline, typically the work baseline.
Scan schedule
The security scan runs weekly. Here, you configure the day of the week and time of day. You can disable the schedule if you are not interested in a weekly scan. See the screenshot below.
Report settings
These settings let you define the folder where the Security Advisor saves the reports and their frequency. When the application creates a new report, you can open it from the Results page > View historical reports button. With this option, you open the Reports List.
If you have notifications configured in your NAS’s Control Panel, Security Advisor will send you a notification like an email with a link to the new report.
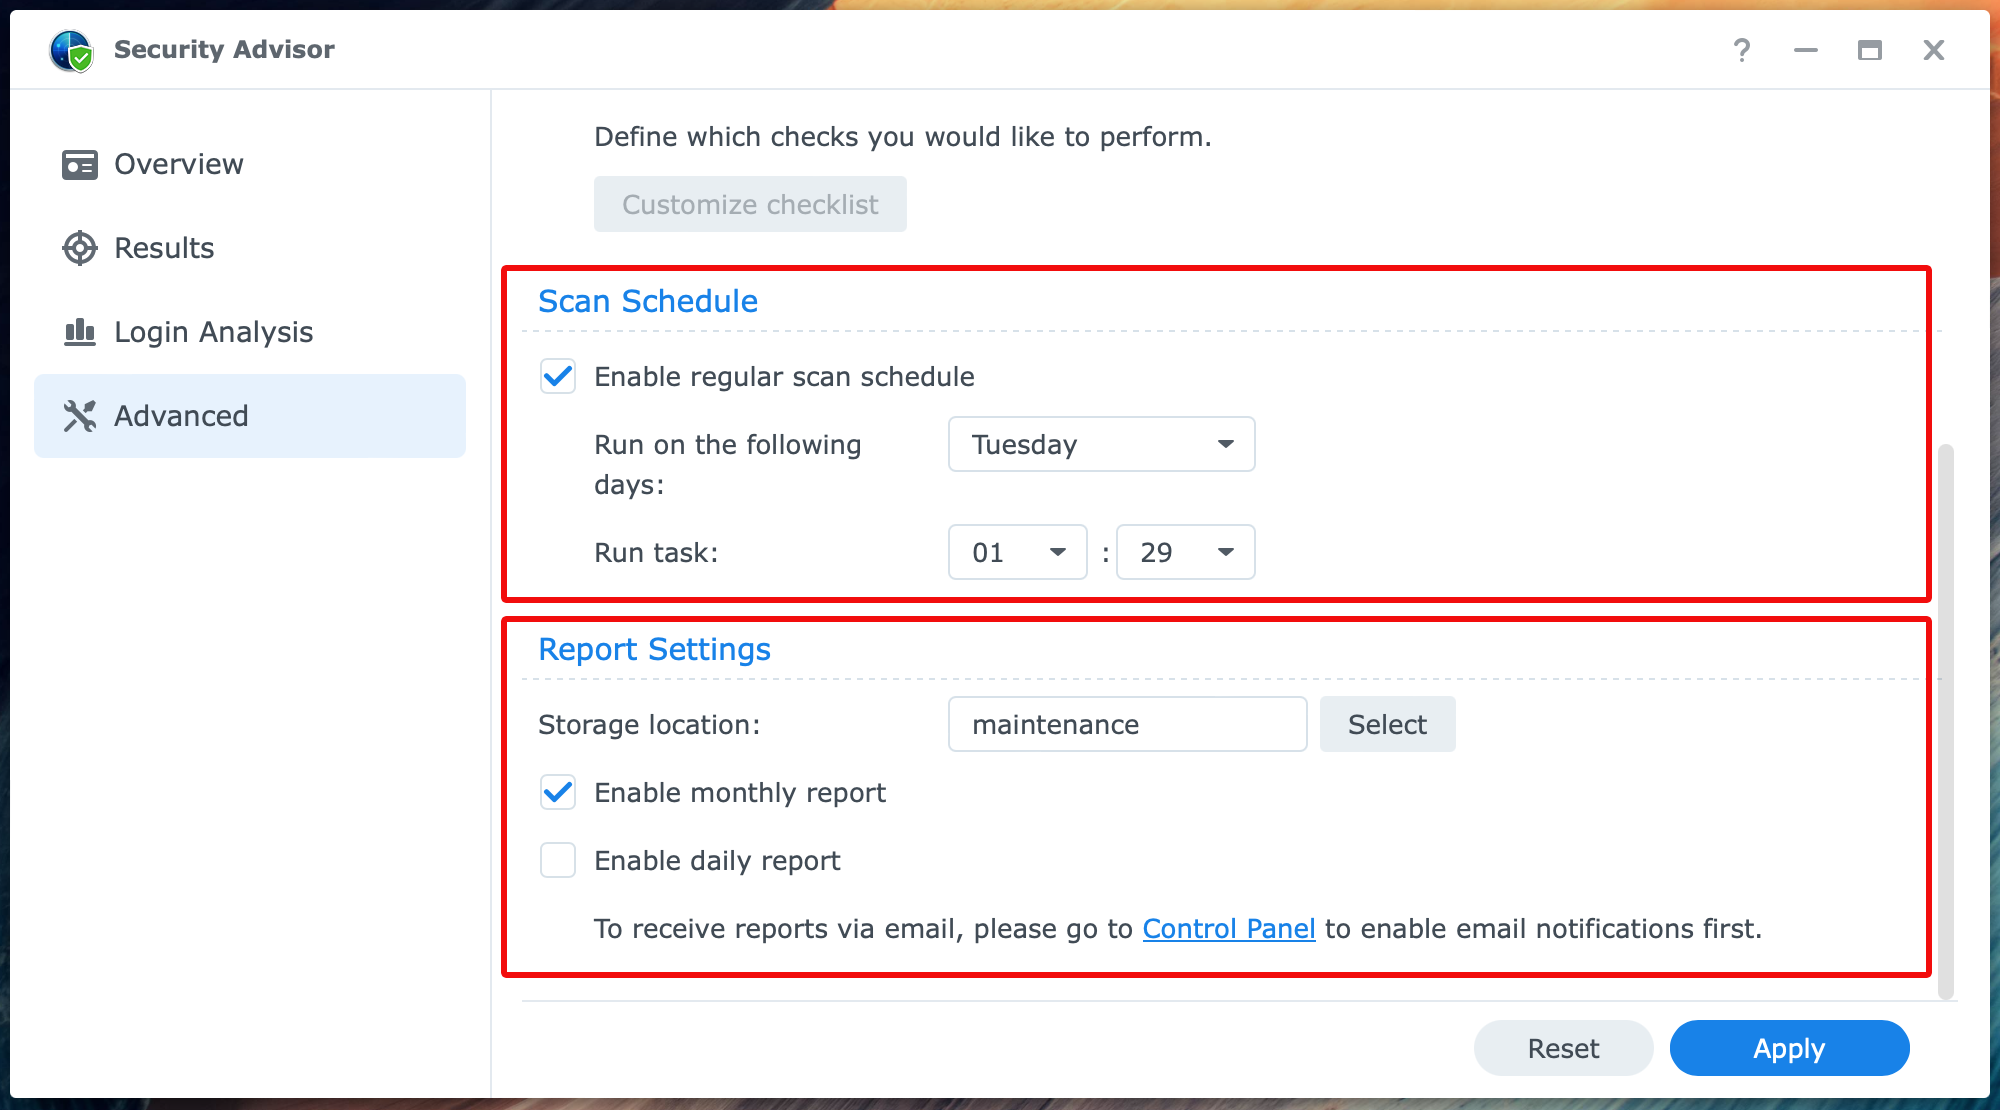
After setting the storage location, enable either the daily or monthly reports. I prefer monthly reports. When done, click the Apply button to confirm your changes.
The screenshot shows maintenance as a report storage location. This location refers to the maintenance shared folder I create on every NAS I manage. Security Advisor will create a sareport folder in the maintenance shared folder, where it keeps the reports.
I use the maintenance shared folder for other maintenance tasks like Storage Analyzer reports and log archival.
Thanks for reading
This post is donation-ware, and I made it to help you. Please consider leaving a comment or even buying me a coffee if it did help. I will be eternally grateful.
Paul Steunebrink / Storage Alchemist
