Using quota on Synology NAS is a very effective way to control who can store how much data on a specific volume or in a shared folder. Depending on the file systems of your volume, a Synology NAS offers different ways to set quota.

Using Quota On Synology NAS
Storage space on a NAS is limited. A Synology NAS offers disk quotas to control who can store how much and where.
On a Synology NAS, you can define disk quotas in different ways. How you define quotas depends on the file system you use on the volume: Ext4 or Btrfs, and each file system has its distinct approach. Therefore, I discuss quotas for each file system separately. For more on volumes, please reference Using Volumes on Synology NAS.
With quotas, there are two variables: the resource like volume or shared folder on the one hand and the user that uses the resource. A quota defines a relation between the two regarding how much space a user can occupy for a specific resource.
Maximum quota size
The main limitation of quota size is the volume size for either an Ext4 or a Btrfs volume. In addition, on an Ext4 volume, the maximum is 4095 GB if the volume is larger, while on Btrfs volumes, this limit does not exist.
Configure quota on an Ext4 volume
On a volume formatted with Ext4, you assign quotas on the volume level, not per shared folder like on a volume with Btrfs (see details below). You set a quota to a user or group per volume.
The result is that you determine how much space a user can use on that volume. You can not define how much a user can store in specific shared folders. Note that another volume on the same NAS has its quotas.
Per volume, you can set a quota per user or group. If you link a quota to a user and a group that the user is a member of, the NAS enforces the user quota. This scenario applies whether the user quota is larger or smaller than the group quota.
Note that members of the administrators group always have unlimited quotas on a volume.
To summarize, an Ext4 volume works with quotas per volume, and this can be sufficient but does not give you the fine-grained control you would like to have. Check out quotas on volumes formatted with Btrfs.
The user quota metaphor
Compare a quota on a volume to a bookcase where you can store 100 e-books. You can assign that quota to one user by providing a bookcase for those 100 e-books.
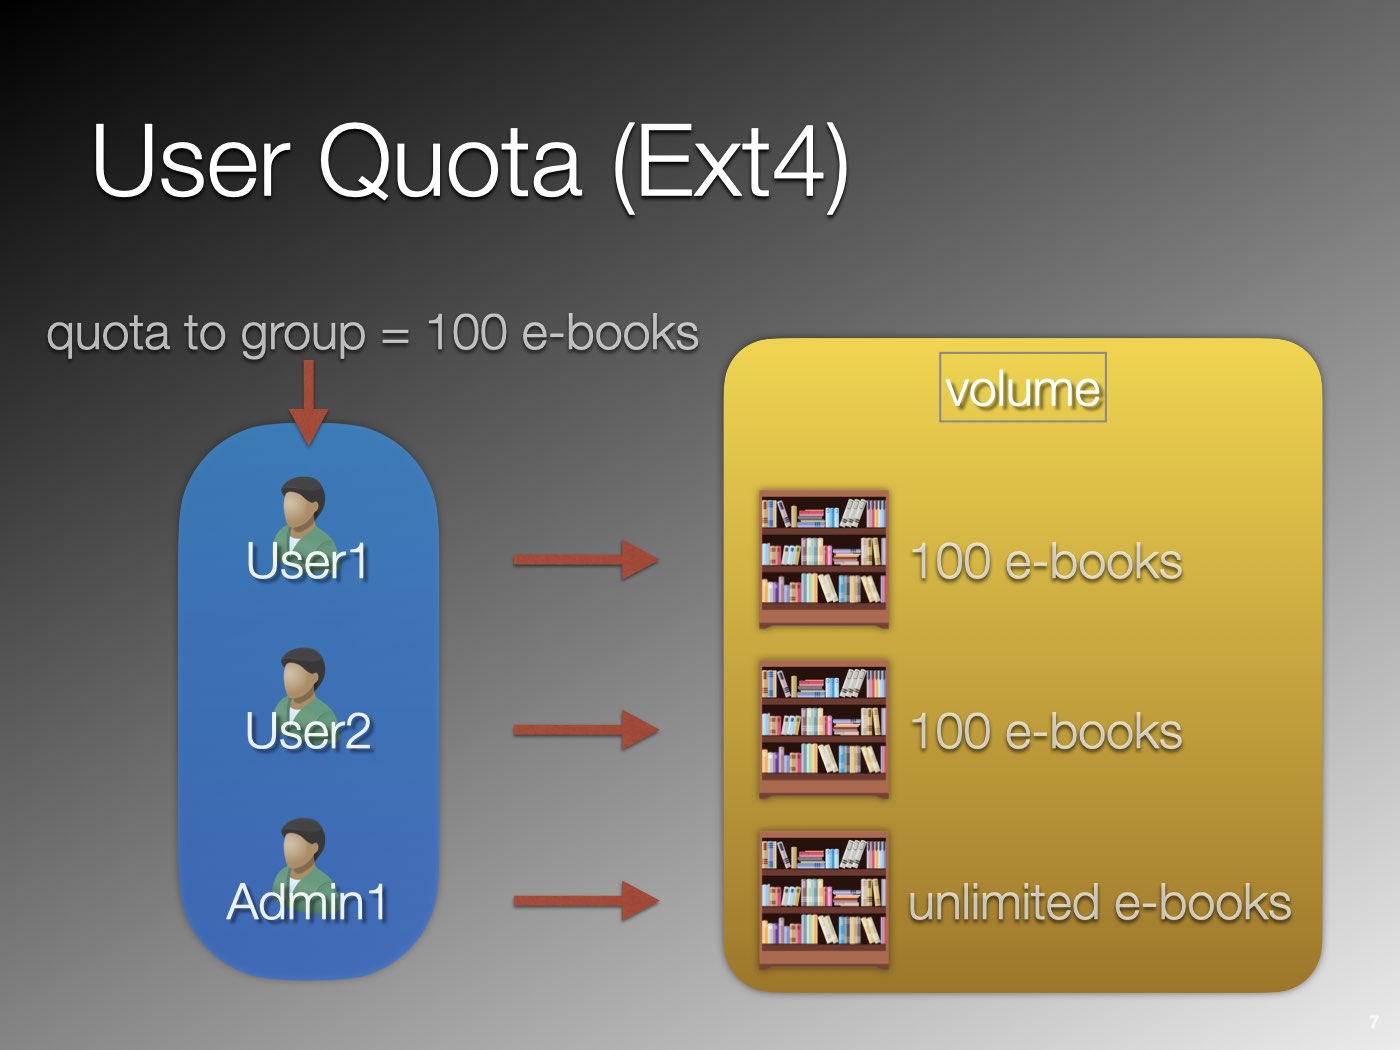
When you set that quota to a group of users, each user gets a bookcase to store 100 e-books.
Configure quota on a Btrfs volume
On a volume formatted with Btrfs, you assign quotas on the shared folder level, not the volume as with Ext4. Btrfs offers you two different approaches to accomplish this:
- user quotas based on shared folder
- shared folder quotas
It is important to understand their differences in when to use and how both methods interact.
User quota
This approach is similar to defining quotas on an Ext4 volume; on a user level. But instead of a volume, with Btrfs, you have much more control as you can tell how much space a user can use per shared folder. Note that the Ext4 volume-based quotas are not available on Btrfs volumes.
You assign a quota to a user or a group per shared folder, and members of the administrators group always have unlimited user quotas.
An example of user quota is the /homes shared folder. With a quota for the users group on the /homes folder, you quickly define how much data each user may store in their /home folder.
How a group quota works
If a group has a quota for a shared folder, for example, 500 GB, each user from that group has that amount to spend. A group’s quota is not cumulative, meaning all users have 500 GB together but are assigned individually to each user.
Only when you assign a quota for a specific user does it supersede the group quota, whether the user quota is smaller or larger.
In other words, the NAS assigns a quota to the user. If you set a quota for a group, you effectively give the quota to all group members.
The user quota metaphor
Compare a quota on a shared folder to a bookcase where you can store 100 e-books. You can assign that quota to one user by providing a bookcase for those 100 e-books.
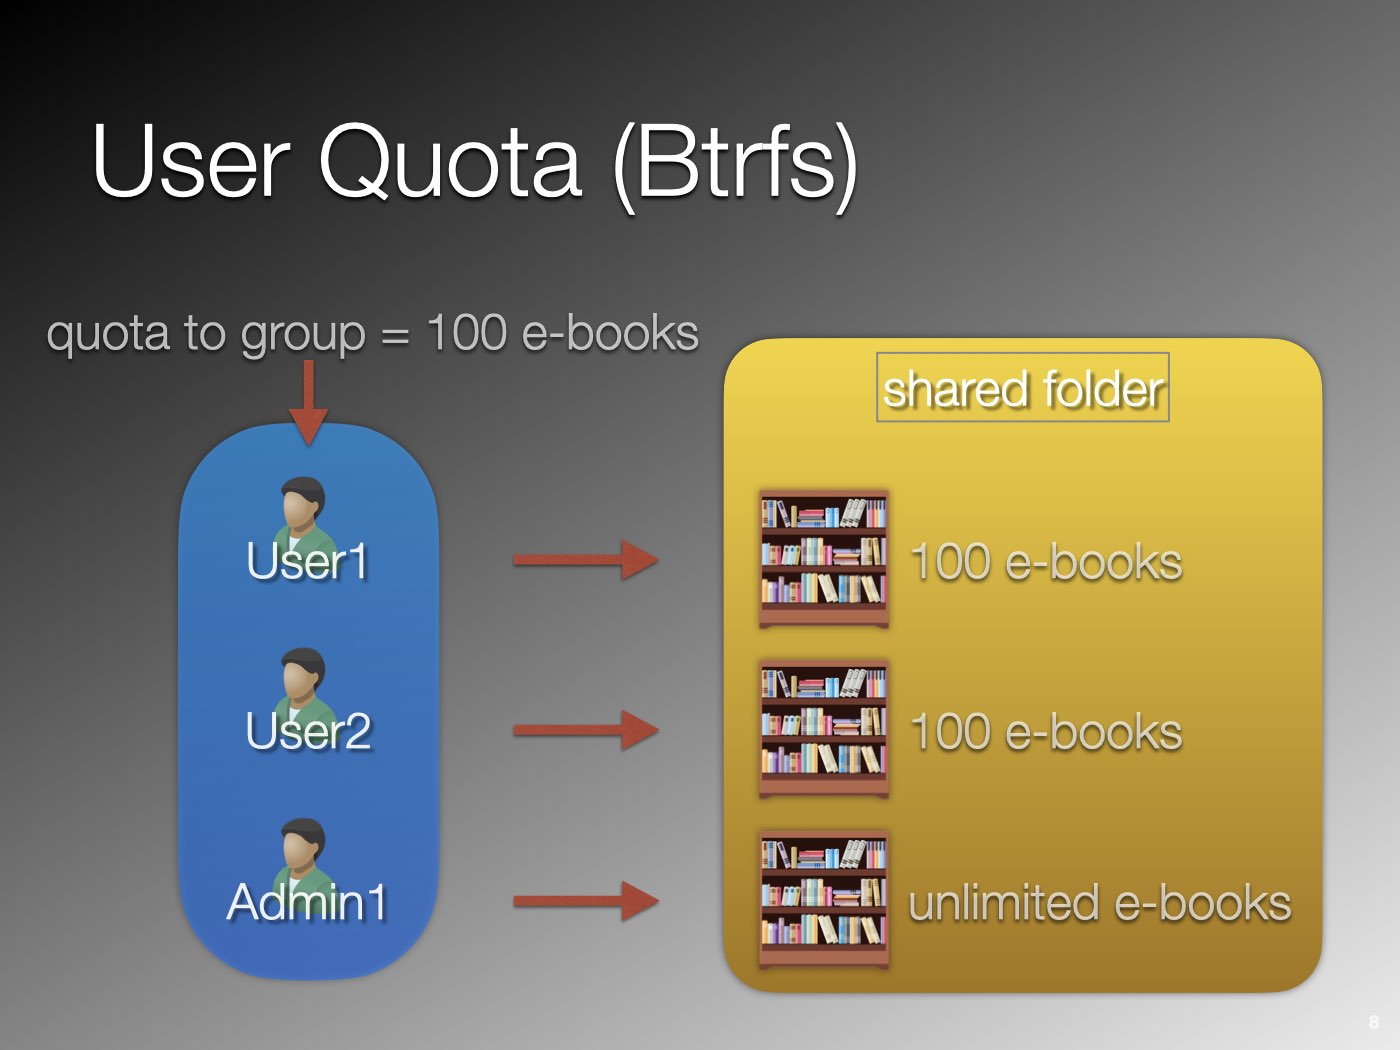
When you set that quota to a group of users, each user gets a bookcase to store 100 e-books.
Shared folder quota
Btrfs has a second approach that works differently. You can assign a quota to a shared folder to set its capacity. There is no link with a user or group, and this quota works independently from the user quotas and enforces it separately.
A shared folder quota is the opposite of a user quota. With a shared folder quota, you define the amount that all users can store in a shared folder. These users include administrators, which have no unlimited quota with this type of quota, and all users must share the space defined in the quota.
Shared folder quotas are an excellent method to limit the amount of data stored in a shared folder, independent of the user.
The shared folder quota metaphor
Compare a quota on a shared folder to a bookcase where you can store 100 e-books. When you directly assign that quota to the shared folder, all users using it must share that single bookcase to store all their books.
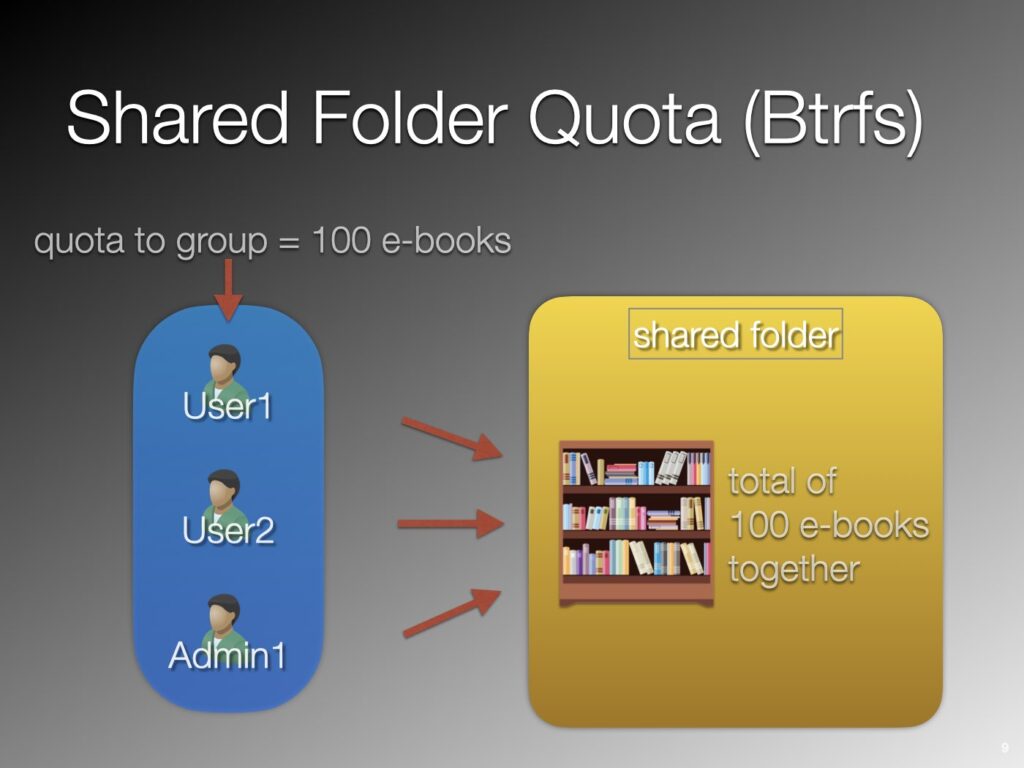
If one user stores 60 e-books in the bookcase, only space for 40 -ebooks remains for all other users combined.
Combining user and shared folder quota
What happens when you configure both the user and the shared folder quotas for the same shared folder? DSM enforces both quotas, and the most restrictive quota applies.
How To Configure Quotas
You configure quotas in Control Panel. The hands-on description below applies to DSM 7, but the process in DSM 6 is identical with minor differences in the user interface.
- User quota on Ext4
- User quota on Btrfs
- Shared folder quota on Btrfs
First, determine the file system on your volume if you are unsure. You can use Storage Manager to look that up. Next, if Btrfs, decide whether you want to apply a user quota or a shared folder quota. Last, continue reading with the appropriate section below.
User quota on Ext4
Log in to DSM desktop as an administrator and open Control Panel > User & Groups. At this point, you choose whether you want to apply the quota to a user or a group.
Group
Select a group that you want to assign a quota. Click on the Edit button, and select the Quota tab.
Select the volume, choose GB or MB from the drop-down list, and fill in a value on the Quota tab. Optionally, repeat this process for other volumes. Click Save. Repeat this process for different groups if necessary.
User
Select a user you want to assign a quota. Click on the Edit button, and select the Quota tab.
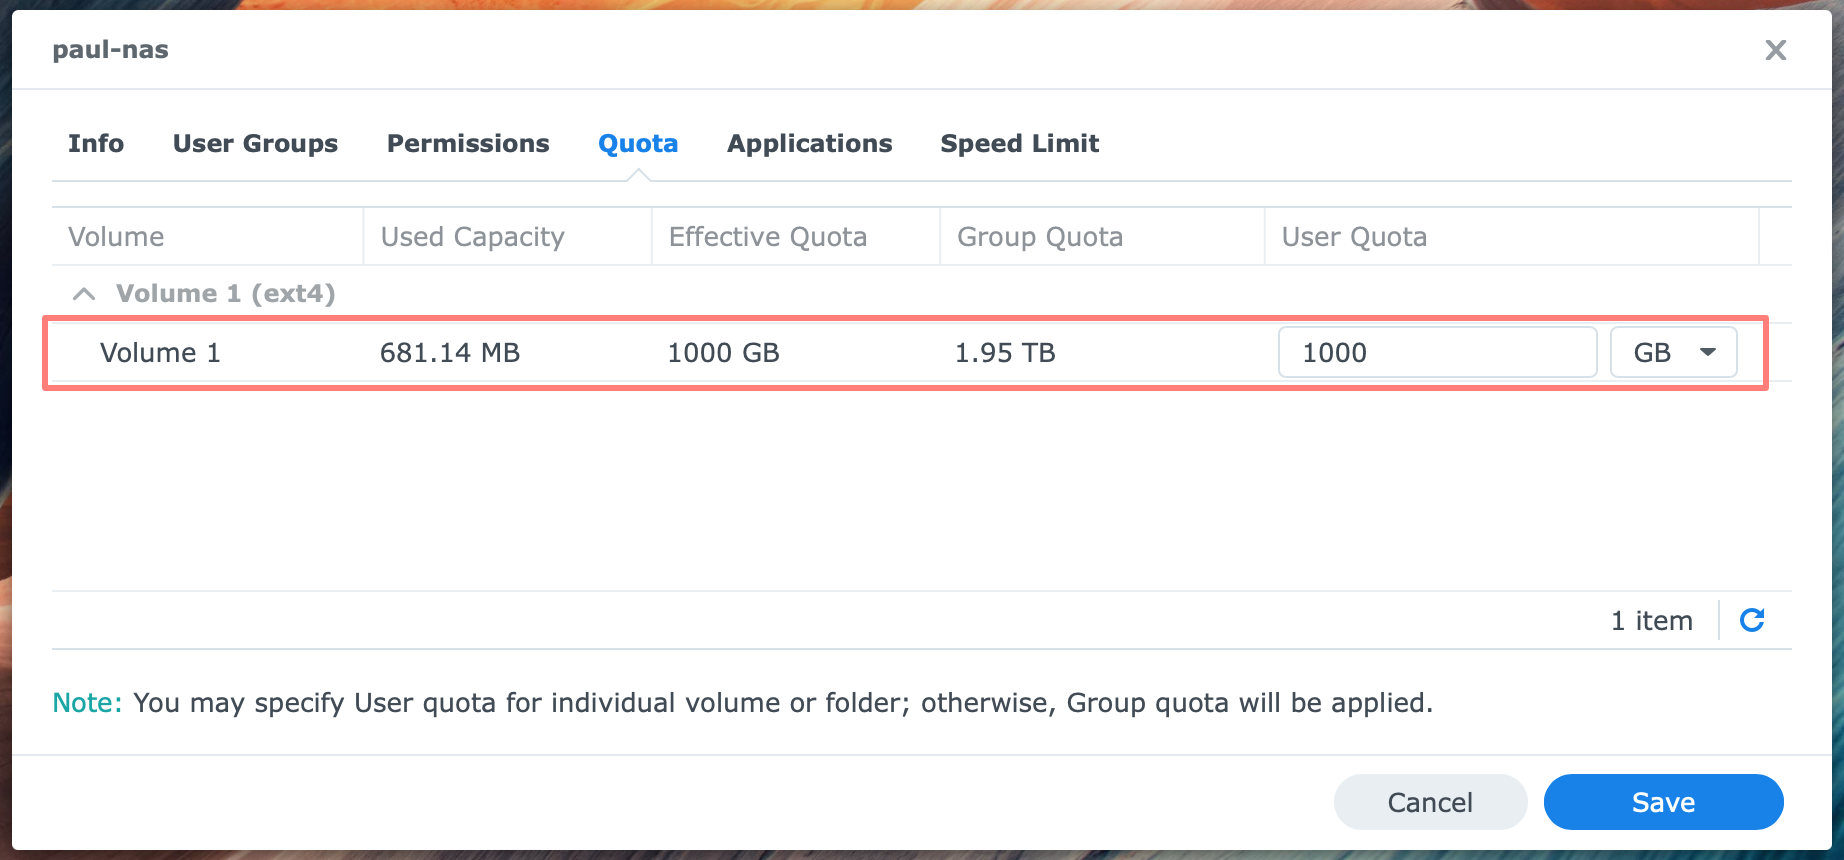
Select the volume, choose GB or MB from the drop-down list, and fill in a value on the Quota tab. Optionally, repeat this process for other volumes. Click Save. Repeat this process for other users if necessary.
Notice that you see a group quota on the user quota page, and the effective quota is also a user quota.
User quota on Btrfs
Log in to DSM desktop as an administrator and open Control Panel > User & Groups. At this point, you choose whether you want to apply the quota to a user or a group.
Group
Select a group that you want to assign a quota. Click on the Edit button, and select the Quota tab. On the Quota tab, select the shared folder, choose TB, GB, or MB from the drop-down list and fill in a value. Optionally, repeat this process for other shared folders. Click Save. Repeat this process for different groups if necessary.
User
Select a user you want to assign a quota. Click on the Edit button, and select the Quota tab. On the Quota tab, select the shared folder, choose TB, GB, or MB from the drop-down list and fill in a value.
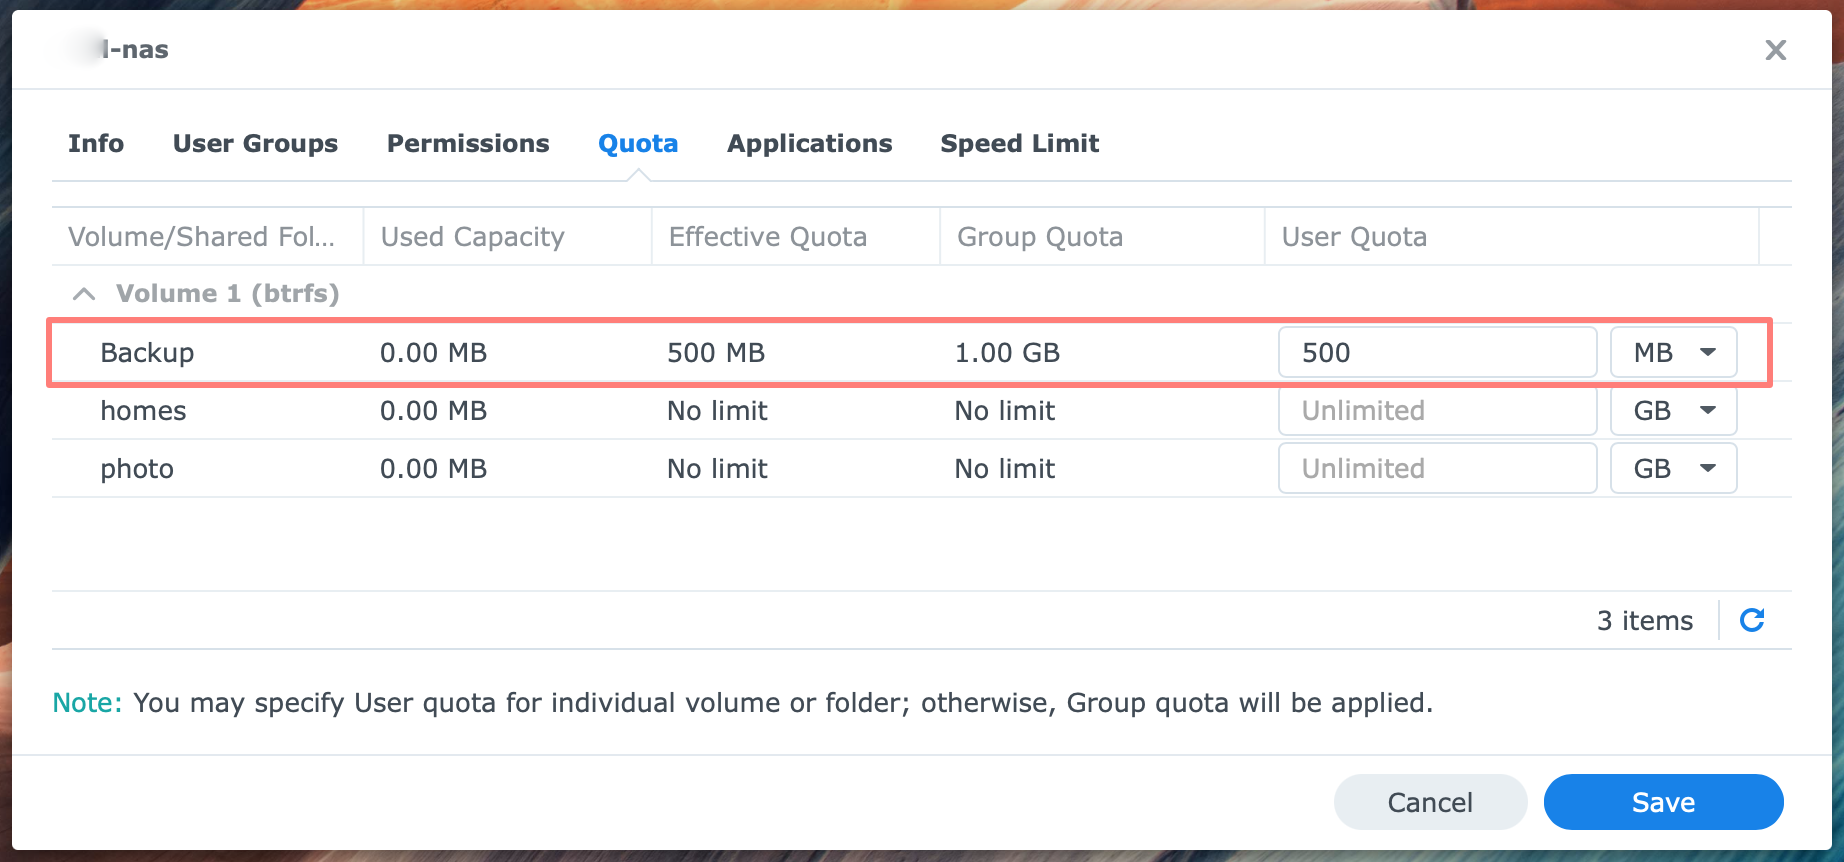
Optionally, repeat this process for other shared folders. Click Save. Repeat this process for other users if necessary.
Notice that you see a group quota on the user quota page, and the effective quota is also a user quota.
Shared folder quota on Btrfs
Log in to DSM desktop as an administrator and open Control Panel > Shared Folder. Select a shared folder and click the Edit button.
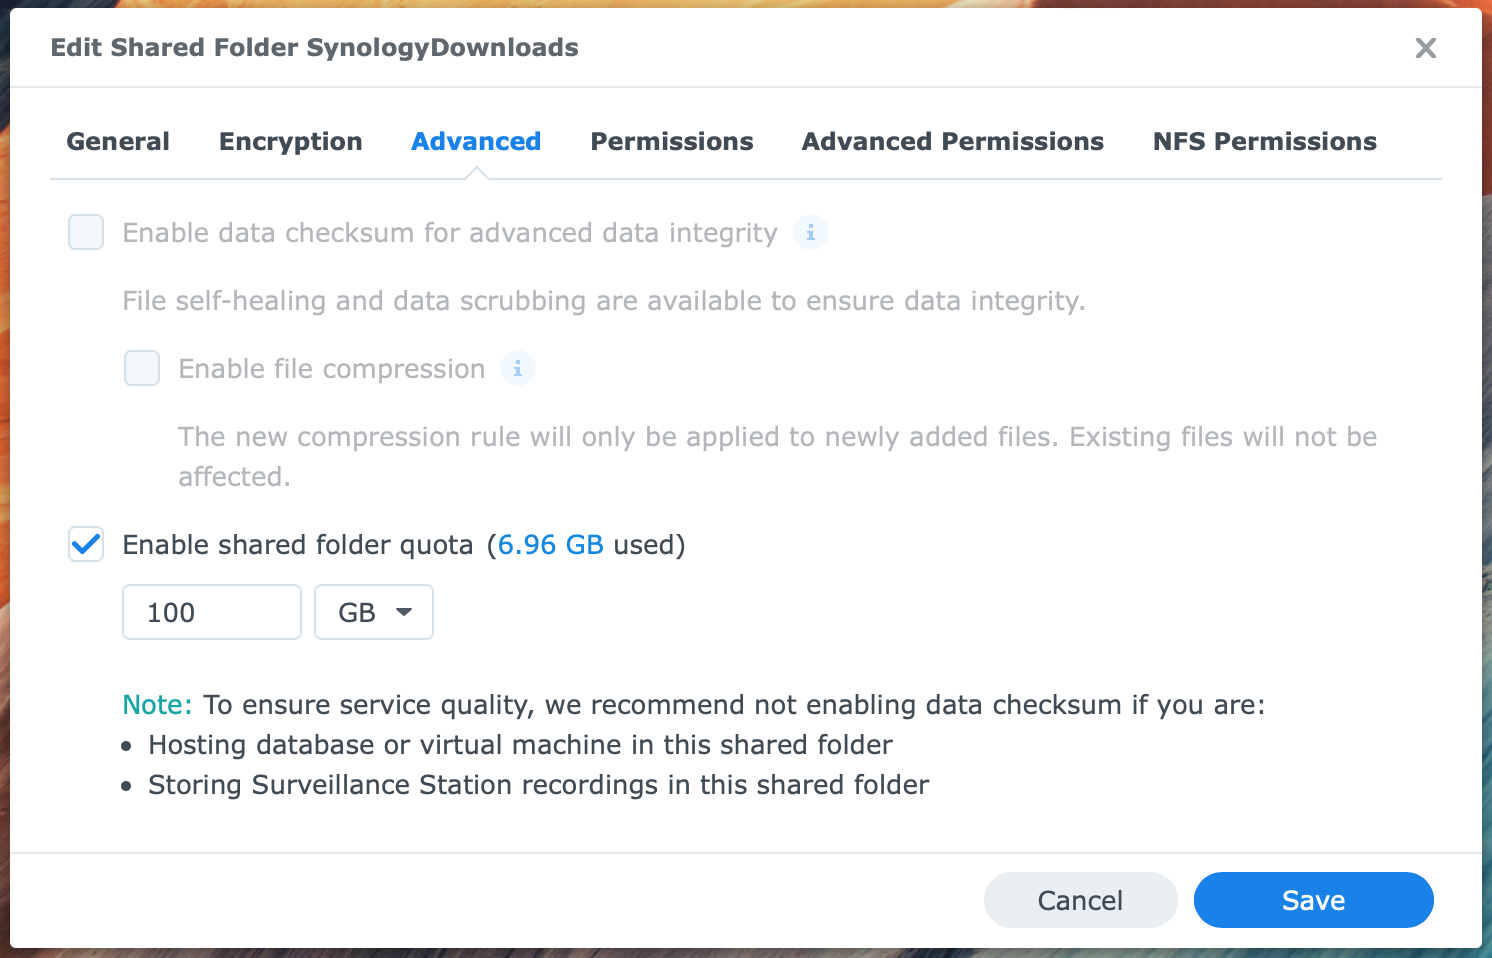
Go to the Advanced tab and check the Enable shared folder quota option. Select TB, GB, or MB from the drop-down list and fill in a value. Click Save. Repeat this process for other shared folders if necessary.
Thanks for reading
This post is donation-ware, and I made it to help you. Please consider leaving a comment or buying me a coffee if it did. I will be eternally grateful.
Paul Steunebrink / Storage Alchemist
