Installing virtual DSM on Synology NAS is simple and outlined in the steps below. DSM in a virtual machine is useful for testing new services, upgrades, or hosting services you prefer to separate from the main machine.

Installing Virtual DSM On Synology NAS
To install and run a virtual DSM machine on Synology NAS, you need the following:
- a Synology NAS model that can run the Virtual Machine Manager application
- the Virtual Machine Manager application on your NAS
- a virtual DSM package from Synology
- a virtual DSM license, of which you get one for free with selected Synology NAS hardware
For details on hardware requirements and installing the Virtual Machine Manager on your NAS, please refer to Using Virtual Machine Manager on Synology NAS.
You can download the virtual DSM (vDSM) software directly from the Synology website or within Virtual Machine Manager. I will outline the process below and explain which method to use when.
In Virtual Machine Manager, you will find a free virtual DSM license to map to your vDSM machine. If required, you can buy additional licenses.
Process of creating a virtual DSM
The steps in the process are:
- download and install a vDSM image
- create vDSM machine
- map license
- connect, set up, and configure vDSM
- create snapshot
- export
I discuss each step below in detail.
Use Cases And Limitations
Virtual machines, in general, and virtual DSM (vDSM) specifically have their use cases and limitations.
Use cases
What are the use cases of a vDSM machine? A few examples:
- testing and reviewing updates and upgrades, applications, functionality
- different version of DSM
- combining VPN Server and VPN client on a single host
- revert to a previous state; snapshots
- separation/segregation of administration and application-functionality
- separation against malware; better security
- using the benefits of a cluster
- multiple services on your server, and one needs maintenance and a reboot
Limitations
What are the limitations of a vDSM machine?
- no USB
- performance, depending on the hardware host, SSD cache helps
- reliance on the host (if the host goes down, the virtual machine goes down)
- license purchase versus hardware purchase
- no clear backup option
With all that said, let’s start creating a vDSM machine.
Download And Install A vDSM Image
Log into your DSM desktop and open Virtual Machine Manager. Before creating a virtual machine in Virtual Machine Manager, you must install an ISO file, a Disk Image, or a DSM Image. You do this on the Image screen.
Open the Image page. Notice it has three tabs:
- ISO file
if your source is an ISO file, like for a Windows virtual machine - Disk Image
if your source is a disk image created in another virtualization program - DSM Image
use this tab; it is for vDSM source files

From the DSM Image tab, click on the Add button. The Add DSM Image wizard starts.
- Choose an Installation File
Select where you want Virtual Machine Manager to get the installation file from. You can choose between From computer, From Synology NAS, or Download Virtual DSM Image.
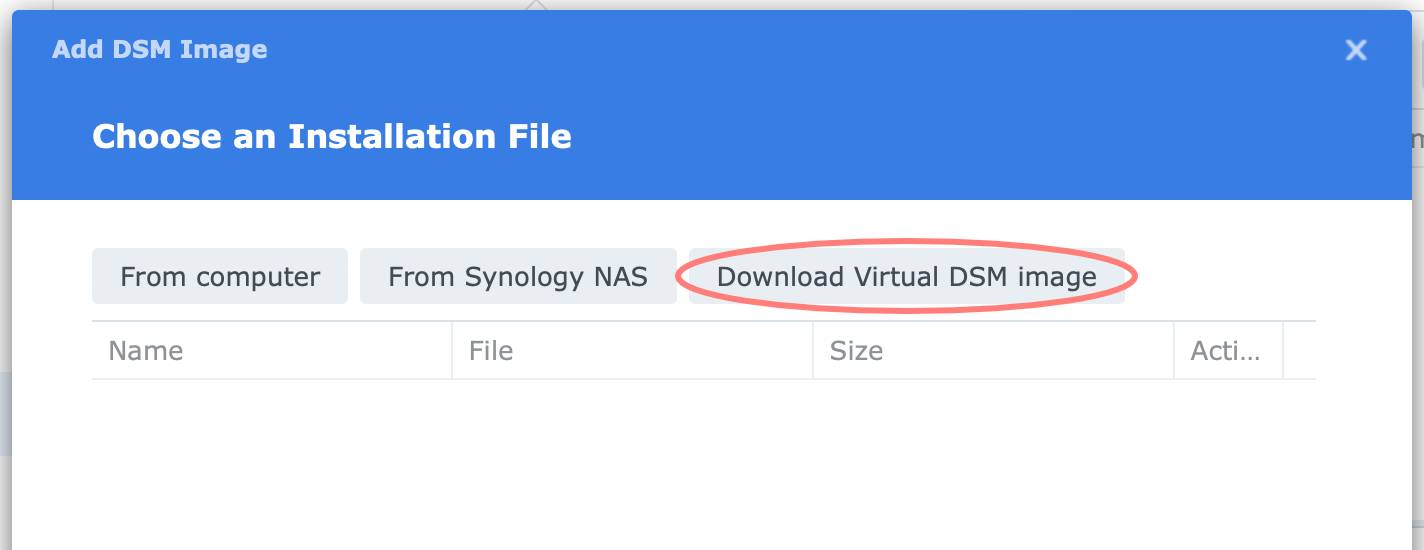
The last option is the most convenient and will download the latest image from Synology for you.
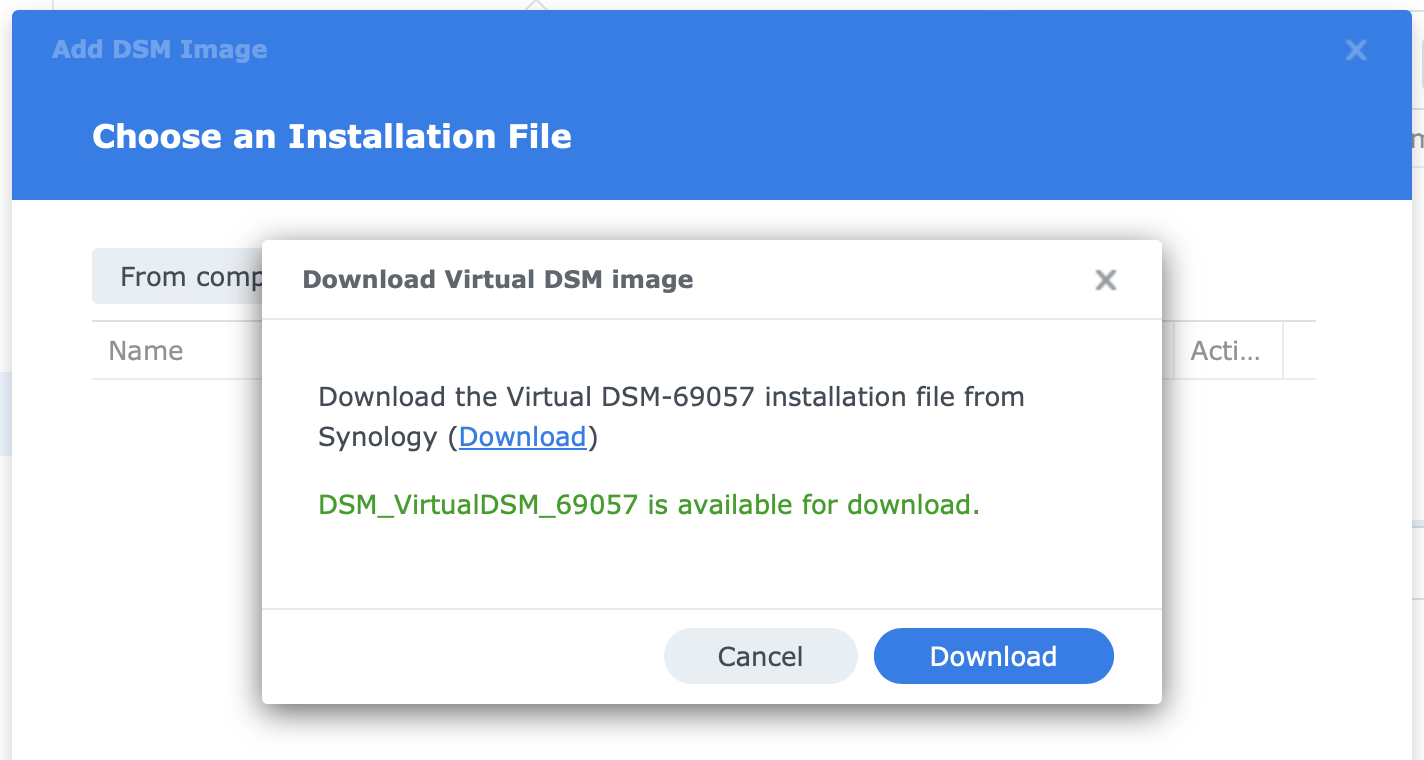
A pop-up message appears, notifying you that the download is available. Click Download. You return to the wizard and see the download listed.
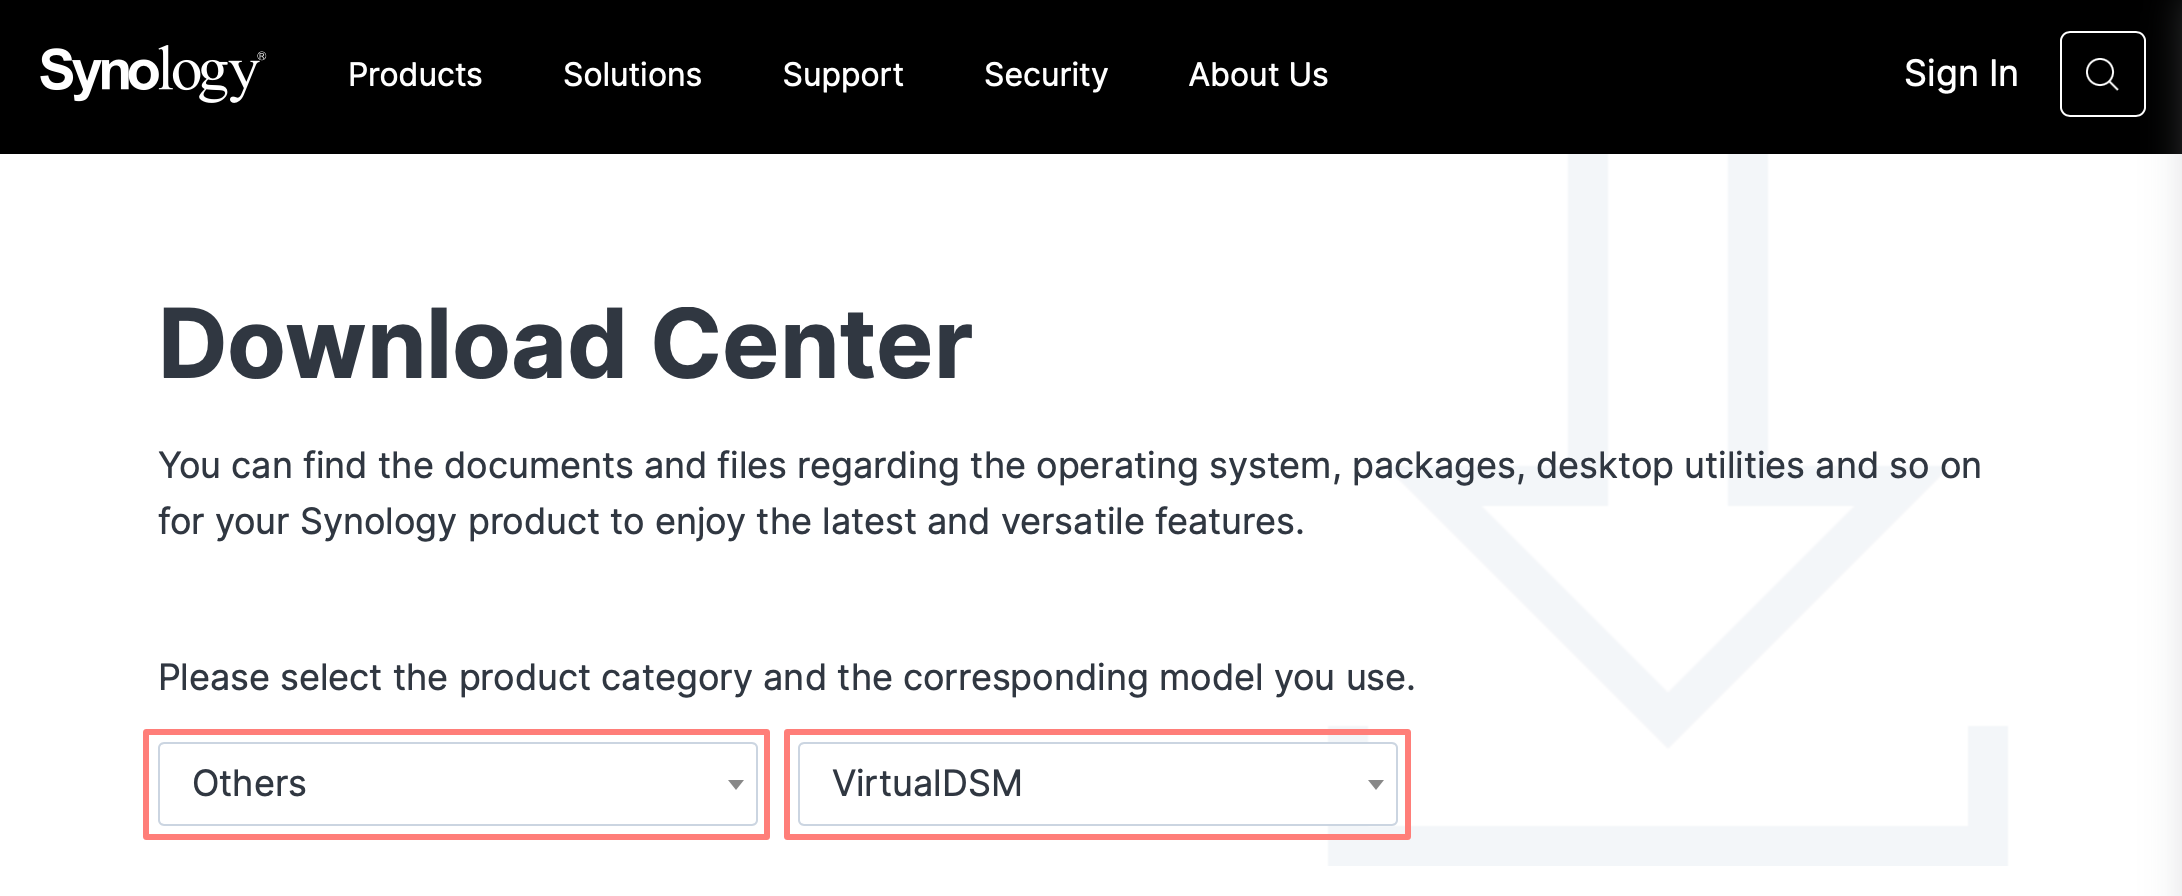
If you are more experienced or would like to use a specific version of the vDSM image, go to Synology Download Center. In the drop-down list Select product type, choose Others. In the drop-down list Select your Synology product, choose VirtualDSM.
Keep it on your computer when the download finishes, or save it on your NAS. In the wizard, choose either From computer or From Synology NAS.
Make your choice, follow the instructions on the screen, and click Next to continue with the wizard.
- Select Storage
Here, you select where Virtual Machine Manager will store the DSM image. During Virtual Machine Manager setup, you assigned one or more storage locations for images and virtual machines. Click Done to close the wizard.

The wizard closes, and you return to Image page. After a minute or two, you see your DSM image listed. This image contains the source for creating a vDSM machine.
Create The vDSM Machine
Go to the Virtual Machine page and click on the Create button.

The Create Virtual Machine wizard opens.
- Choose Operating System
- select Synology Virtual DSM
- Click Next
- Select Storage
during the Virtual Machine Manager setup, you created storage space on a volume of your NAS where Virtual Machine Manager stores the VMs;- select the storage location; if you have a single location, it is already selected
- Click Next
- Configure General Specifications
fill in the name of the vDSM machine, number of CPUs, amount of memory, VM priority, and a description (optional)- Name: use a brief descriptive name to recognize its purpose; it does not affect the server name of the virtual machine
- CPU: the value I select here depends on what the VM needs versus what is available on the host; in general, I use a value in the range of 1-2 for vDSM; 2 CPUs on a dual-core machine is not unusual; the VM-to-host balance is dynamic in contrast to how memory is allocated.
- Memory: as with CPU(s), you need to balance between VM and host; assigned memory is permanently allocated the moment the VM starts; many vDSM machines run fine with 1 GB
- VM priority: unless you have a specific reason to give one machine a higher priority over the other, you can leave this to normal; if you do not want to minimize the impact on the host, lower the priority or vice versa
- Description: for additional notes about the VM, its purpose, how it was set up, by whom, or whatever you do not want to tell your mother
- Click Next.
- Storage
- here, you select the DSM Image you downloaded earlier and that vDSM will use; if you have different vDSM images, select the preferred image
- in vDSM, each virtual disk becomes a volume; enter the size of the virtual disk in GB or TB; add more virtual disks if necessary
- Click Next.
- Configure Network
during Virtual Machine Manager setup up, the Default VM Network was created; use this network or a different network if you made an alternative earlier- select the network that the vDSM machine will connect to
- Click Next
- Other Settings
with Autostart, Virtual Machine Manager will automatically start the VM when you start the NAS.- configure Autostart: Yes / Last state / No
- Click Next
- Assign Power Management Permissions
when you allow a user or group permissions, he can manage the power settings of that VM, like power on and shut down; note that the user needs application privileges to VMM; please reference Using Virtual Machine Manager on Synology NAS [link] for details.- assign permissions to users or groups for power management
- Click Next
- Summary
review your settings- enable the option Power on the virtual machine after creation to start the installation of the VM immediately when you finish the wizard
- Click Done to close the wizard.

After closing the wizard, you return to the Virtual Machine page. Virtual Machine Manager creates the vDSM machine.
Note
You can change everything you configured in the Create Virtual Machine wizard later. Right-click the virtual machine, select Edit, or click the Action button > Edit. When the virtual machine runs, many options are not available. Shut down the virtual machine to edit them.
License The vDSM Machine
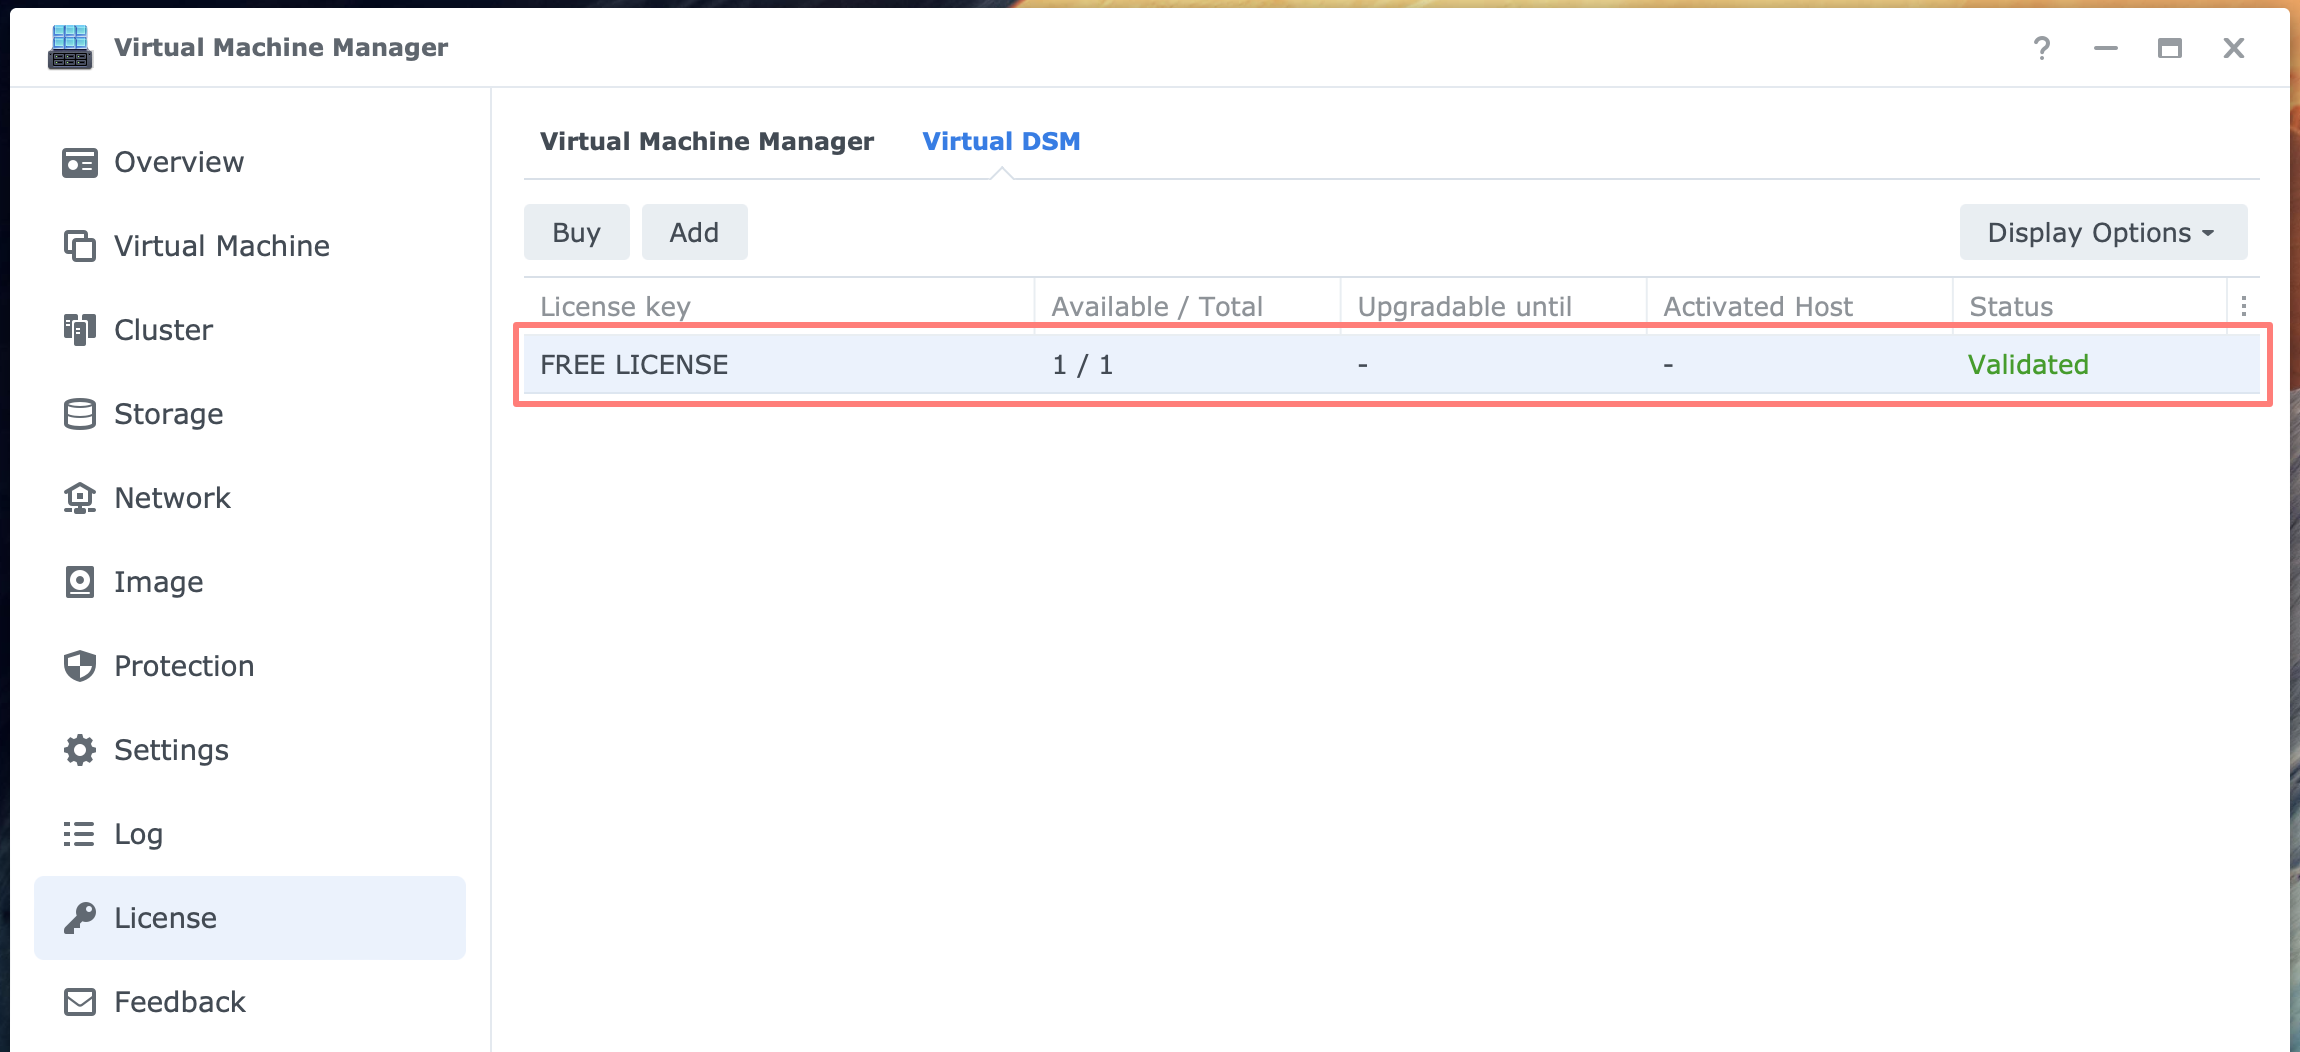
To start a vDSM virtual machine, you need a license. You can get one free vDSM license with your NAS. This is in the Virtual Machine Manager > License > Virtual DSM tab. You should see in the Available/Total column a value of 1/1 if you have not mapped a license.
Note that on this page, you can buy and add licenses. For both actions, you need your Synology account.
Virtual Machine Manager has a setting to automatically map a vDSM license to a vDSM when it starts up. You can find this in Virtual Machine Manager > Settings > Automatically map virtual DSM license. I suggest to enable this option.
You should be ready to start the vDSM machine you created earlier. Below, I explain how to map and unmap a vDSM license for future reference manually.
Map a vDSM license
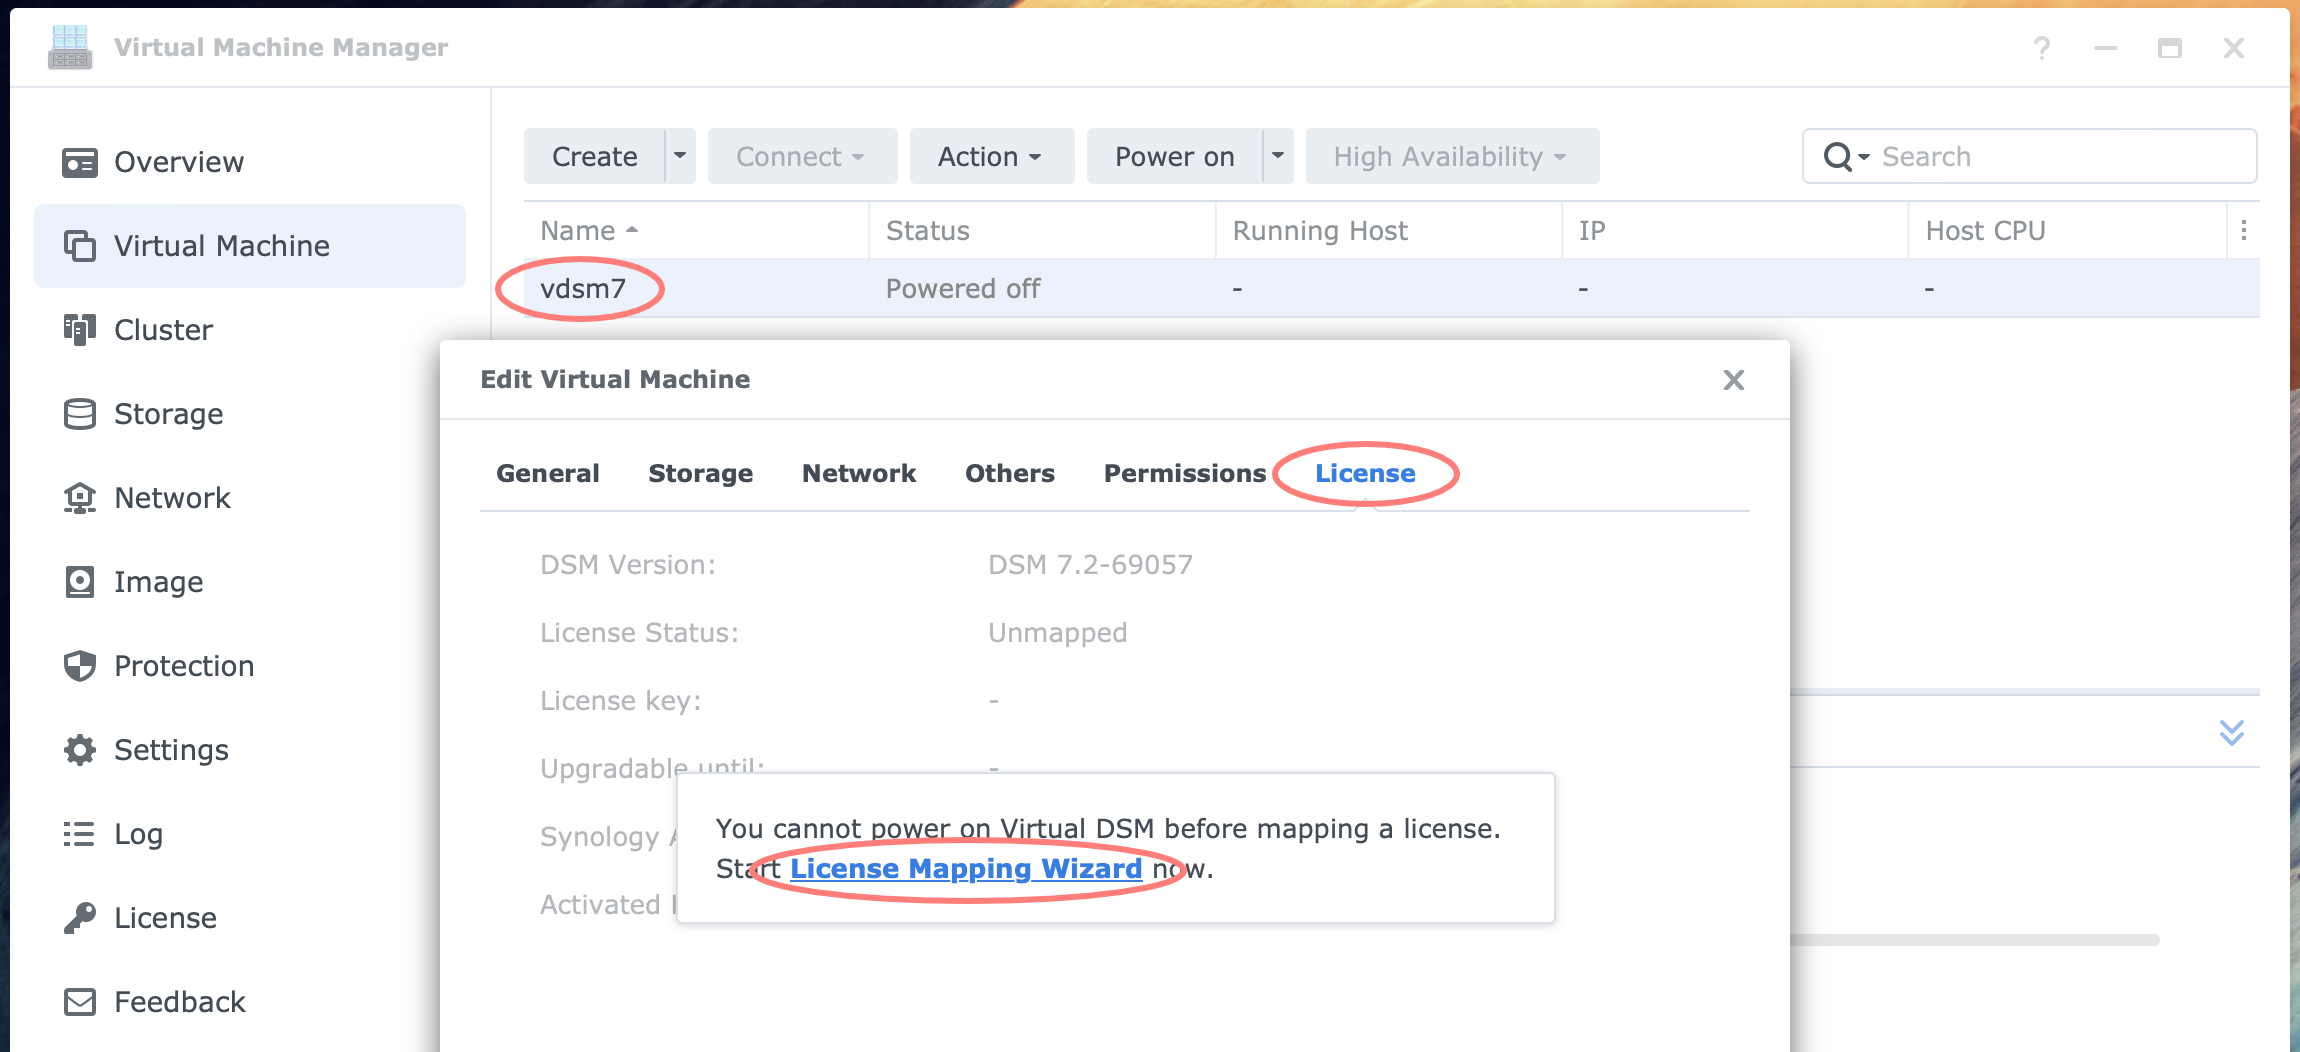
In the Virtual Machine Manager > Virtual Machine page, double-click on the vDSM machine. Go to the License tab. Assuming no license is mapped, click on the Start License Mapping Wizard now message. This starts the License Mapping Wizard.
- Choose a method to map license
- Use existing license
- Click Next
- Select license for mapping
- select the free license
- Click Next
- Summary
- Click Done
The License Mapping Wizard ends, and you return to the vDSM editing screens. Note that a license is now mapped. Close the screen with OK. You return to the Virtual Machine screen.
Power On The vDSM Machine
Select the vDSM machine and click on the Power on button if you did not start the machine after you finished the wizard.

Follow the status changing from Preparing, Powering on, to Running until an IP address appears. Select the new virtual machine and click the Connect button > IP address. A new browser tab opens. You will be guided through the DSM setup of the vDSM machine.
The DSM setup is similar to one on a physical machine.
Thanks for reading
This post is donation-ware, and I made it to help you. Please consider leaving a comment or even buying me a coffee if it did. I will be eternally grateful.
Paul Steunebrink / Storage Alchemist
