Running a WordPress website on your NAS includes maintenance. In the fourth and last part of this series you learn about backup, installing another WordPress instance, and how to suspend, reset or uninstall WordPress. At the end we touch the benefit of a local DNS server for your WordPress site.
Install WordPress on Synology NAS (part 4)
This is part 4 of a four-part series about hosting WordPress on Synology NAS. The four parts each cover a different aspect of the topic.
- Part 1 – introduction to WordPress on your NAS
highlight the different scenarios and necessary preparations - Part 2 – install WordPress from Synology
highlights the installation steps of this setup - Part 3 – install WordPress from WordPress.org
highlights the installation steps of this setup - Part 4 – WordPress maintenance (this post)
backup, second instance, suspend, reset and uninstall, internal DNS setup
WordPress Backups
When you install WordPress on Synology, you should take a moment to consider your WordPress backup. You have two options, the Server-side backup and the Inside-WordPress backup, and you can do either or both.
Server-side backup
Since you host your website, you can make a backup from the files and folders and the database that comprise your website.
The advantage of a server-side backup is that you can restore the website when it is broken, inaccessible, or removed. You can use Hyper Backup for this purpose.
The advantage of Hyper Backup is that it backs up your files, folders, and application data from Web Station and Maria DB.
Ensure that you add the /web and /web_packages shared folders, plus the MariaDB 10 and Web Station applications, to your backup task.
Please note that Hyper Backup suspends the operation of the Maria DB application during the backup. As a result, your website is temporarily unavailable.
For reference, look up my Hyper Backup datasheet.
With Hyper Backup, you can selectively restore a file or folder but only restore the entire Maria DB database. That may not be an issue if you have only one application that uses this database. Otherwise, other database-driven applications are affected by the restore as well.
Alternative database backup
An alternative for the Hyper Backup database backup is the database export with phpMyAdmin, a MySQL database management tool. phpMyAdmin lets you import databases selectively, and this tool does not temporarily suspend the operation of Maria DB.
For reference, look up my phpMyAdmin datasheet.
There are a few issues to take care of when you restore an entire WordPress website removed from your NAS.
Restore WordPress from Synology
Assume you have the backup mentioned above but removed the WordPress setup entirely. Just re-install the WordPress package from Package Center, which will install all dependencies, the other applications, and WordPress’s services. This installation includes the root and wordpress_user accounts in the database.
Do not perform the last step, the 5-minute setup in WordPress. It is not harmful if you do, but it is unnecessary.
Restore the backup, particularly the /web/wordpress folder (DSM 6) or /web_packages/wordpress folder (DSM 7) and the Web Station and MariaDB 10 application data. When the restore process finishes, your website is back again.
Restore WordPress.org setup
For a successful restore, install dependencies like Apache HTTP Server 2.4 and PHP 7.4. Note that both Web Station and MariaDB 10 recover during a backup restore.
Restore the backup, particularly the /web and /web_packages (DSM 7 only) shared folders and the Web Station and MariaDB 10 application data. When the restore process finishes, your website will be back again.
However, there may be a problem accessing the website or logging in when you have an SSL certificate. Check the virtual host configuration in Web Station and the linked certificate in Control Panel > Security > Certificate tab.

To fix this, go to Control Panel > Security > Certificate tab. Click the Configure button (DSM 6) or Settings button (DSM 7) and re-establish the certificate and service connection. The service represents the virtual host in Web Station.
Now your website should run as before.
Inside-WordPress backup
In addition to or instead of the server-side backup, you can make backups from within WordPress, the Inside-WordPress backup. You install a plugin in WordPress from your admin pages for this backup, also known as the Dashboard. This backup will only backup that specific website. If you have multiple WordPress instances running, install a plugin in each website’s admin pages and make a backup.
There are several good backup plugins, and UpdraftPlus is just an example. This is a popular backup plugin, and it lets you save both the database and the files. And the plugin is free with some paid options.

You can select which component you want to restore during a restore: database, themes, plugins, uploads, and other parts. Updraft restores the chosen piece entirely. For example, you restore the database, and the entire database for that website is fixed, but other databases on your NAS are not affected, like with the server-side backup.
The UpdraftPlus backup plugin can save the backup on your NAS in a dedicated folder between your WordPress folders or on a cloud service like Dropbox, OneDrive, or Google Drive. If you save it on your NAS, it would be wise also to do a server-side backup to another destination in case your NAS fails.
An Inside-WordPress backup is excellent for daily backups and in-between maintenance like plugin and WordPress updates.
Install A Second WordPress Instance
When you install WordPress on Synology, you might want to install multiple instances of WordPress. You create numerous WordPress websites on the same NAS for different domains.
Note that the WordPress from Synology installation, described in part 2, does not allow for a second instance.

Referring to the installation and configuration outlined in part 3, you skip all package installations and head over to the steps for installation of the WordPress folder. Create another folder in the /web shared folder and copy the WordPress files from the WordPress download to that folder.
Next, continue with the entire configuration process, including setting permissions, creating a new user in the database, installing the SSL certificate, adding a virtual host, and up to the WordPress 5-minute install.
The virtual host will determine which website is called upon based on the domain name. Configuring other ports in either the internet router or your virtual host in Web Station is unnecessary.
Note
As with the first website and the domain name you use, you must configure the domain name for other websites on your NAS accordingly.
Suspend WordPress
You might want to (temporarily) suspend the operation of your WordPress website without affecting the entire setup of the database, files and folders, and all configurations. There are several ways to achieve this, depending on what you want and which kind of installation you have.
Generic steps
You can stop forwarding ports 80 and 443 on your router to your NAS. Discontinuing forwarding suspends external access to your website(s), not internal access.
Note that this step affects other websites on your NAS and potentially other services that rely on the same ports, like updating SSL certificates.
Suspend WordPress from Synology
If you have a WordPress website set up with the WordPress package from Package Center, you can stop the service for that package. You can do this from Package Center. Please reference the WordPress datasheet for details.
Stopping the WordPress service affects only the WordPress website, not any other websites you might have, like Joomla or other web-based applications on your NAS.
Suspend WordPress.org installation
A WordPress.org installation is less easy to suspend. Stop the Apache HTTP Server 2.x or the MariaDB 10 service from Package Center. Please reference their respective datasheets for Apache or MariaDB.
Note that this affects other websites dependent on either of these services.
Reset WordPress
You have tested a WordPress installation, messed around with it, and would like to start again from scratch. You leave the entire underlying infrastructure intact but only refresh what WordPress created.
As with suspending WordPress, I explain how to reset it for the Synology and WordPress.org setup.
Reset WordPress from Synology
At first glance, this is a straightforward process, but there is a catch.
Uninstall the WordPress package from Package Center. Please reference the WordPress datasheet.
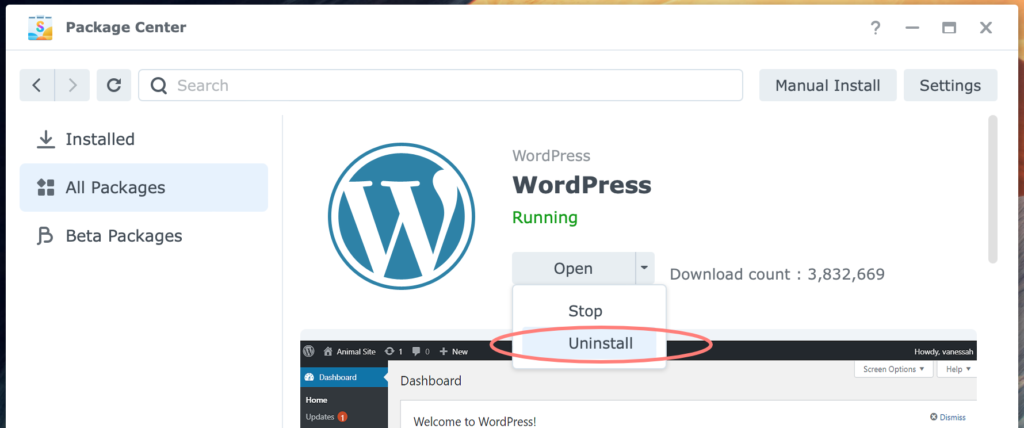
Provide the MariaDB root password when requested. This will drop the database and remove the wordpress_user.
Removing the WordPress package also deletes the database for that website.
Reset WordPress.org installation
As you’d expected, resetting the manually installed WordPress.org setup is manual. It involves two steps:
- remove the database user and drop the database
- refresh the WordPress folder
There is no preferred order in which you execute both steps.
Remove user and database
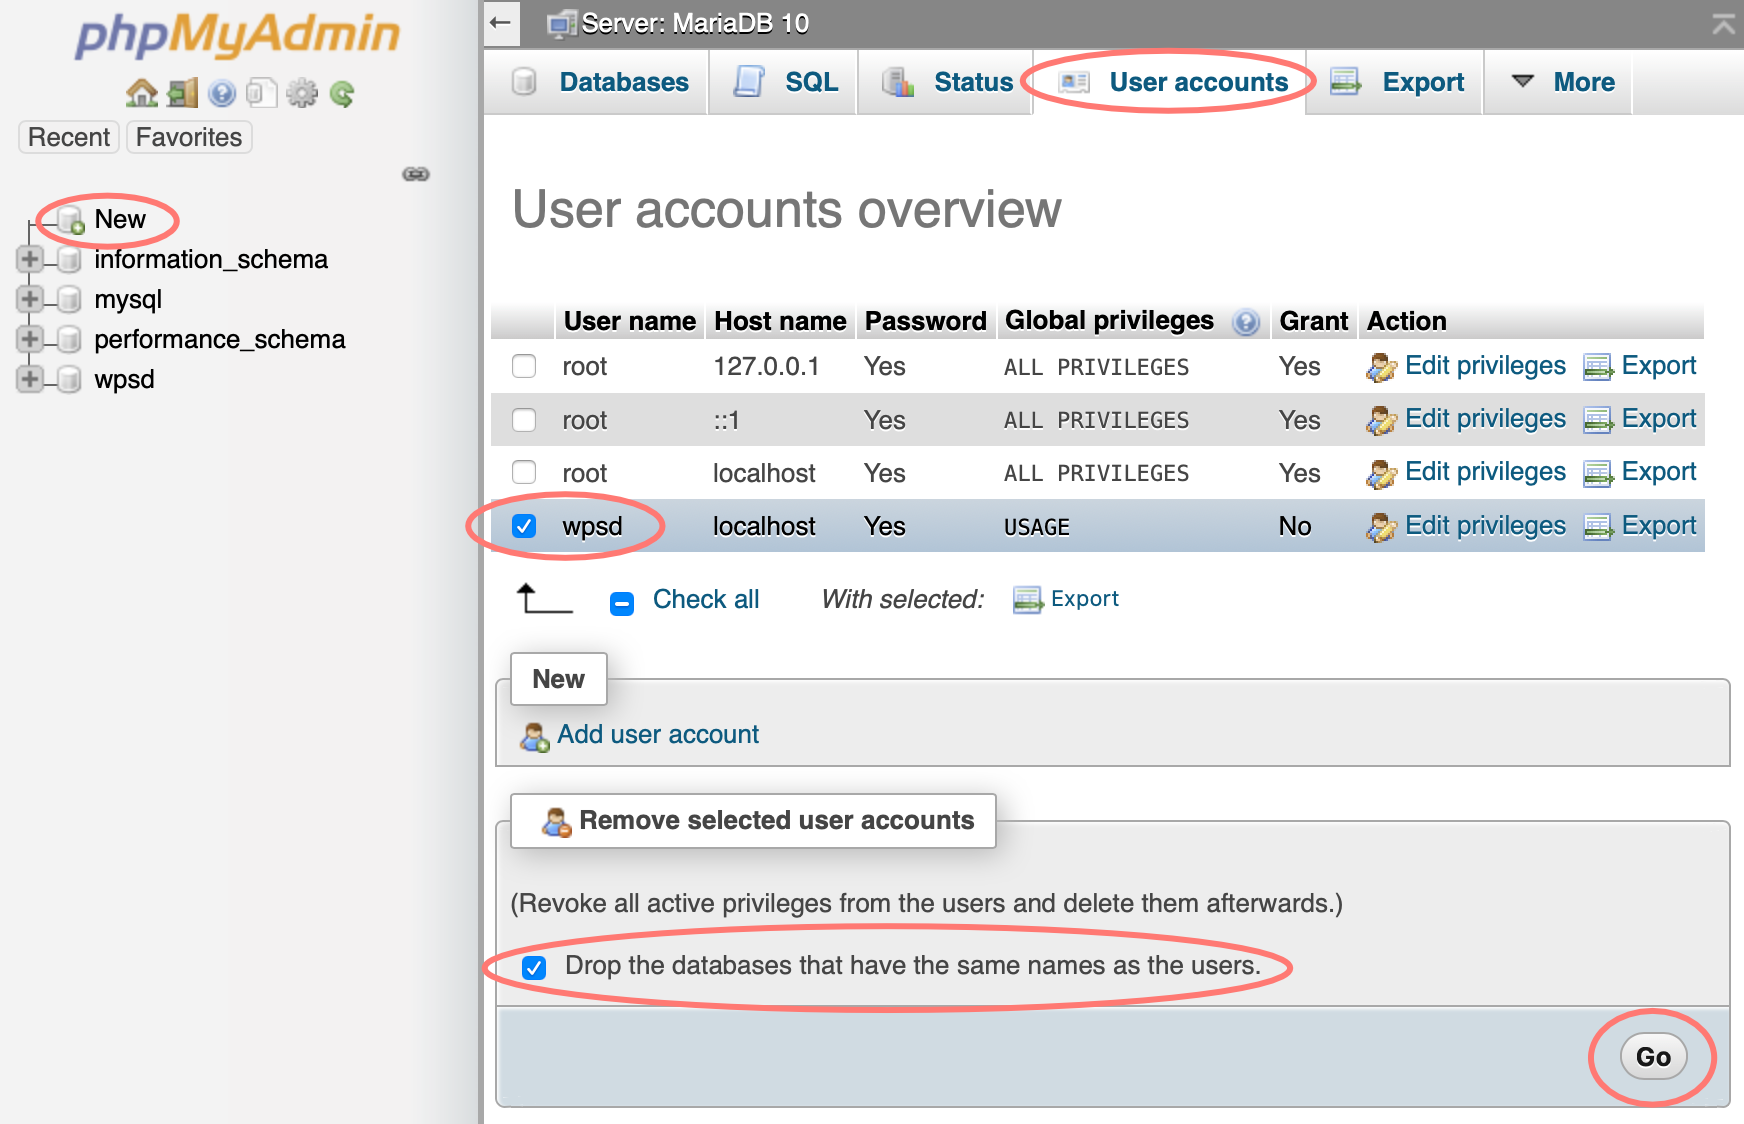
Log in to phpMyAdmin. In the left column, select New.
On the main screen at the right, select the User accounts tab. Select the user to remove. In my case, this is wpsd, but your name is probably different.
Under Remove selected user accounts, you enable the option Drop the database that have the same names as the user. Click Go.
You must drop the database separately if the user and the database do not have the same name. Continue in phpMyAdmin.
Select New at the top in the left column. On the main screen at the right, select the Databases tab. Check the database to remove or drop in SQL talk. Click on Drop, just below the list of databases. You get a pop-up – You are about to DESTROY a complete database! – and confirm with OK.
Next, create the database user again with the database described earlier under Create WordPress and user in part 3 of this series.
Refresh the WordPress folder
To refresh the WordPress files, go to the proper folder under the /web folder. For example, in part 3 of this series, I created /web/wpsd, but you can use your name for the subfolder. Remove all files and folders in that folder but leave the folder intact.
Next, download the WordPress zip from the WordPress.org download page, and unzip it on your computer. Next, copy the contents of the wordpress folder from the zip into the /web/wpsd folder (use your subfolder name) as described earlier in Copy WordPress files in part 3.
Add two lines of text to the wp-config-sample.php file described in Change wp-config-sample.php in part 3 of this series.
Continue with a fresh installation of WordPress. Follow the guidelines in part 3, WordPress pre-install.
Uninstall WordPress
If you like to take things a step further and plan to uninstall WordPress on Synology and dependencies thoroughly, uninstall the packages in the reverse order you installed them. Note that some packages offer the option to remove their data.
Start with the WordPress package.
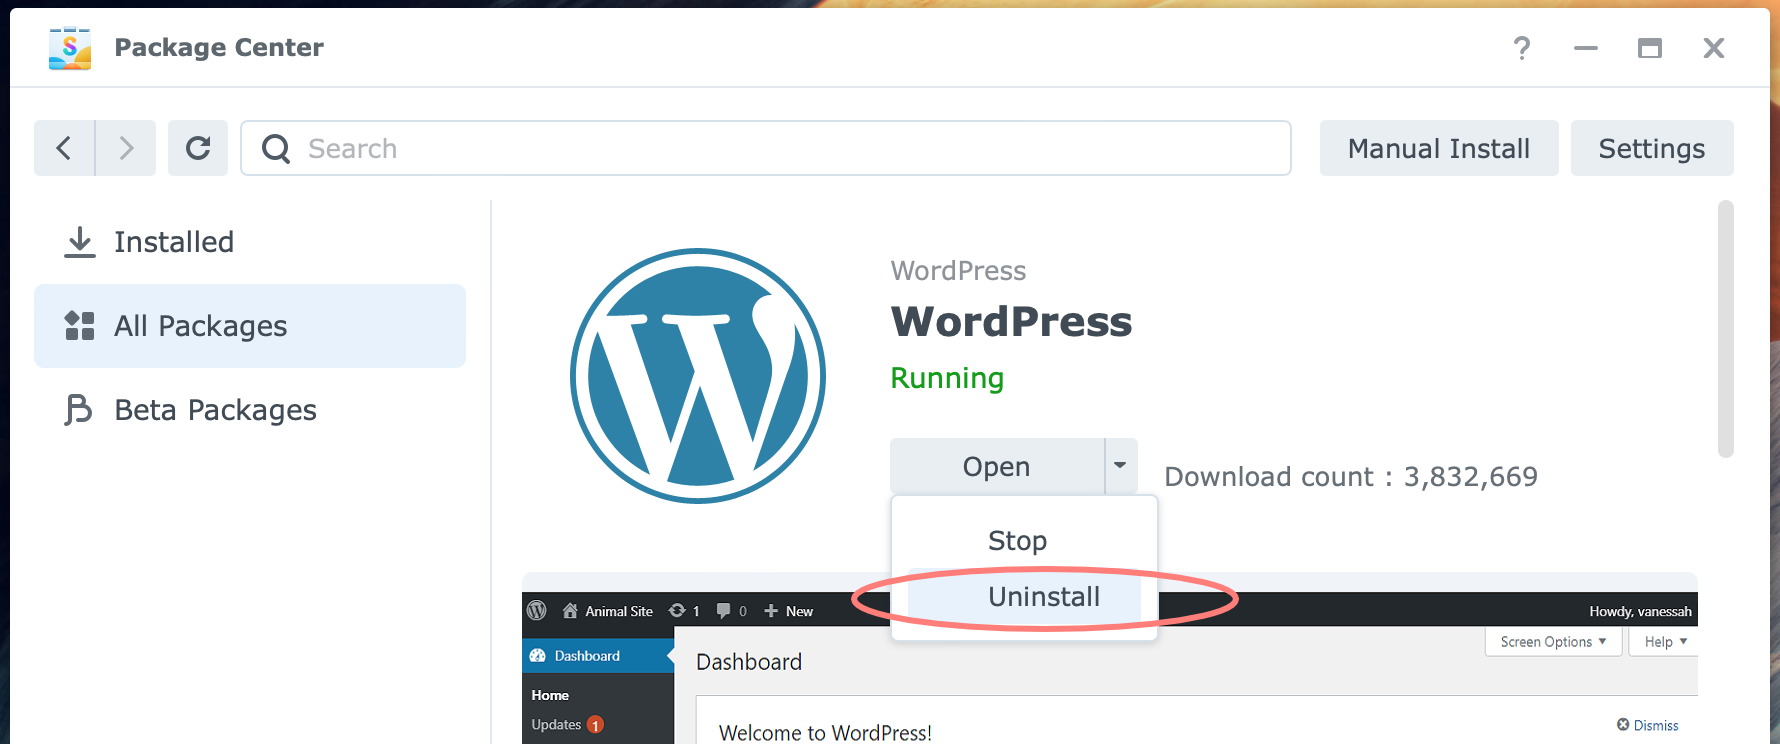
Provide the MariaDB root password when requested. This will drop the database and remove the wordpress_user.
When you remove Web Station, consider removing the /web, and /web_packages (DSM 7 only) shared folders. You can use Control Panel > Shared Folder for that task.
Hyper Backup can back up MariaDB 10 and Web Station applications and folders. Remove them from the backup task to prevent Hyper Backup from generating an error message. See the backup configuration with Hyper Backup earlier in this post.
Lastly, remove port forwarding to your NAS from your router. Change the configuration of your DNS domain to reflect the new situation.
Stop phpMyAdmin
A user pointed out that phpMyAdmin is always accessible from the internet. This is not a desirable setup from a security standpoint.
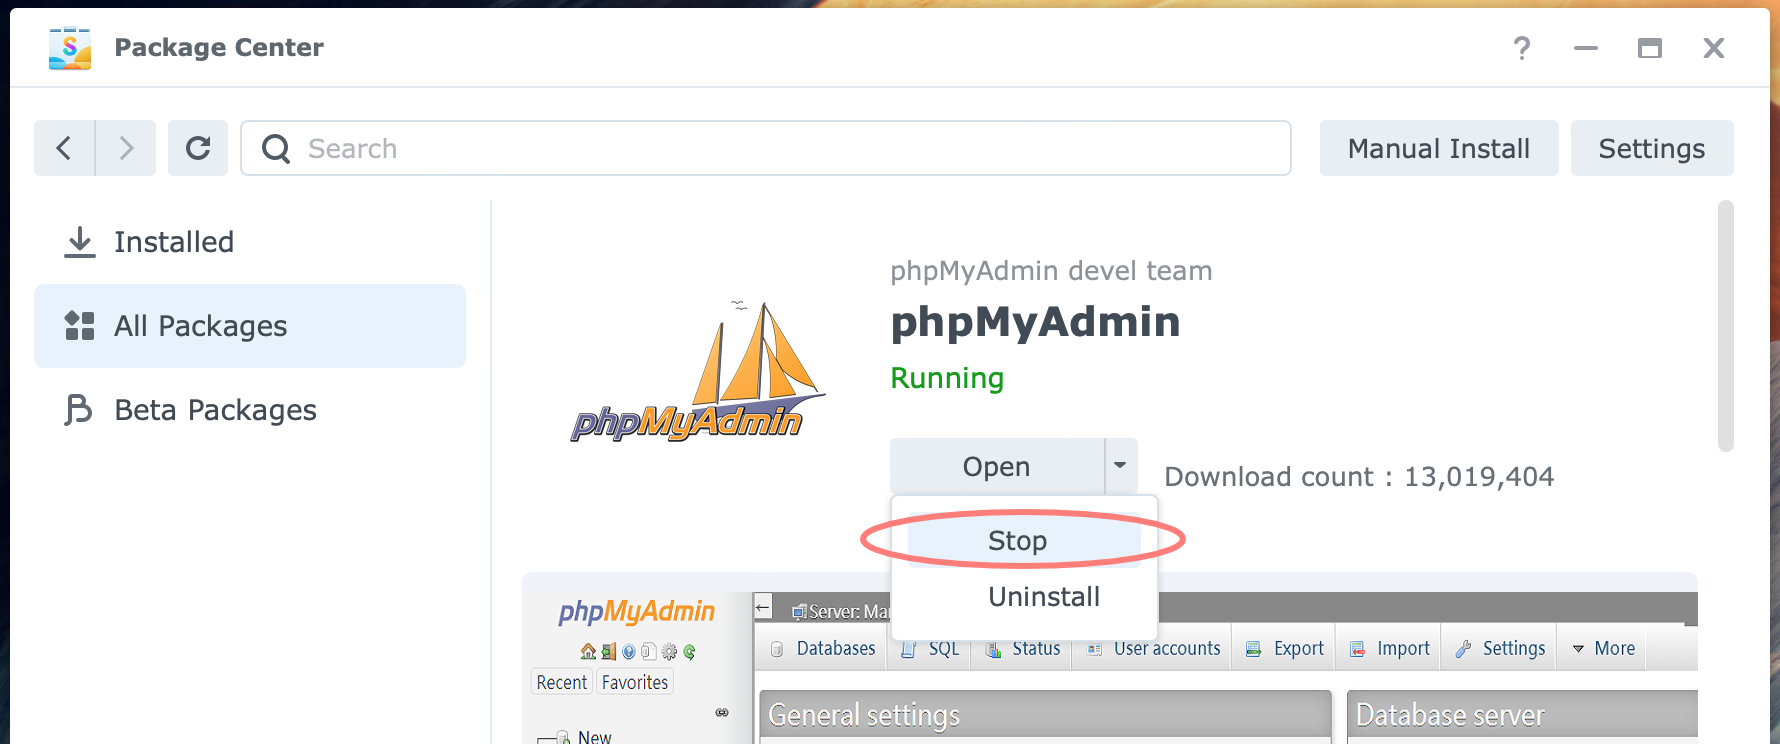
Therefore, I suggest pausing phpMyAdmin when the installation and configuration of WordPress are finished. Except for incidental maintenance, you do not need this tool.
Log in to DSM, open Package Center, and search for phpMyAdmin. Next, click on the icon of the package. The phpMyAdmin screen opens. Open the drop-down list in the button and select Stop.
DNS Server setup
If you like to access your WordPress website with a domain name, you must configure DNS. You can set up a DNS server on your NAS if you want a shortcut for connecting locally. The overall process is as follows:
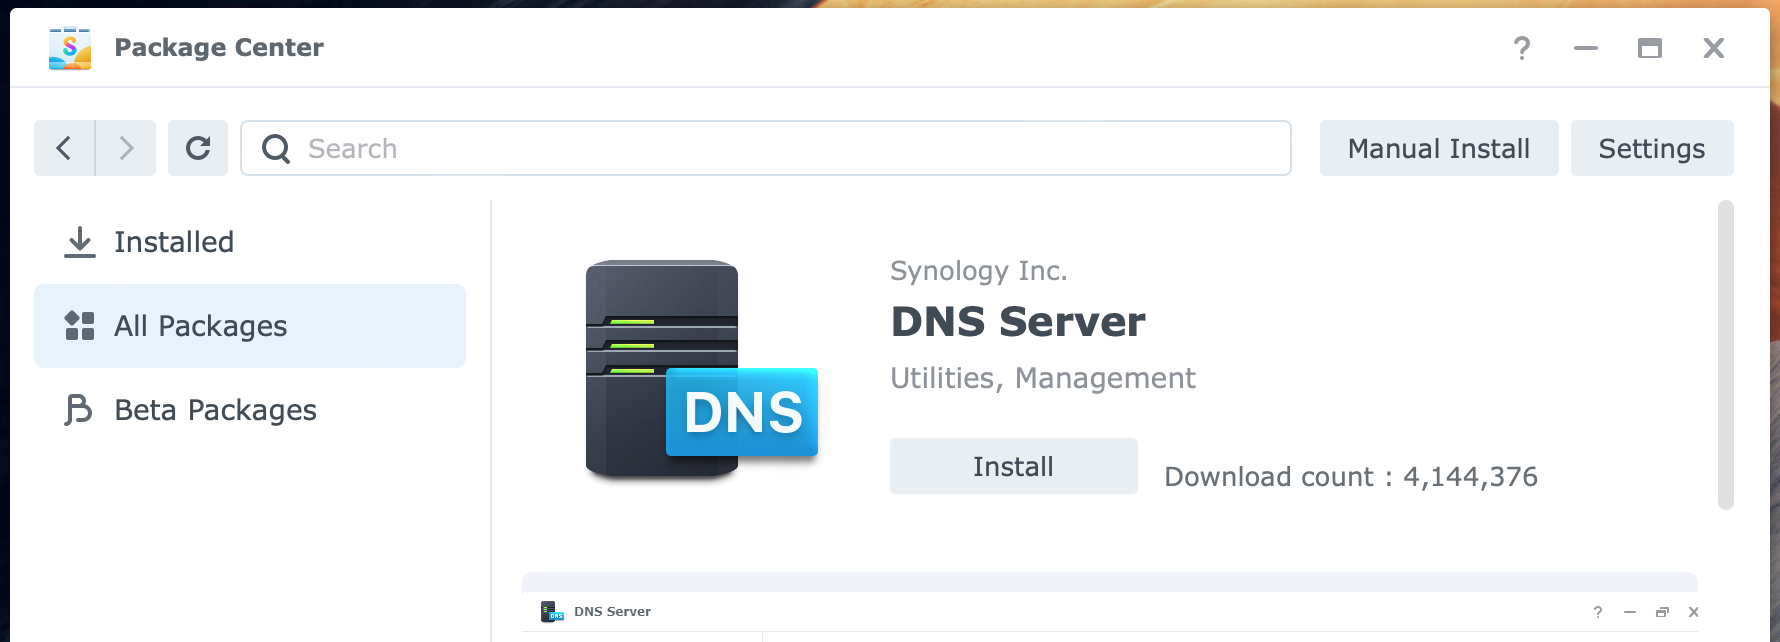
- install DNS Server from Package Center
- open the DNS Server application and enable forwarding
- in the DNS Server application, create a forward lookup zone for your website domain
- add an A record for your website using your internal IP address
Now, you have set up the DNS Server. The next task is to ensure your computer uses this DNS Server instead of your router or one on the internet. Go to the network properties of your computer and change the IP address of the DNS Server into the IP address of your NAS that runs the DNS Server. Only your computer, not other computers, tablets, or smartphones, use your DNS Server.
Alternatively, change the DNS Server configuration in the DHCP settings in your internet router, and have it point to your DNS Server.
Thanks for reading
This post is donation-ware, and I made it to help you. Please consider leaving a comment or even buying me a coffee if it did. I will be eternally grateful.
Paul Steunebrink / Storage Alchemist

Hi Paul, I buy you some cups of coffee on https://www.buymeacoffee.com/storagealch . I’m really grateful for your good explaning notes about installing WordPress on the unconventional way, for which I was looking for from beginning 2022! I never got to run, until today. Thank you.
Best Regards, Geert
SORRY Cannot run this support unfortunately. Cannot enter my email adres!? I’ll find another way.
Thank you, Geert,
Happy to hear it worked for you. If you like to support me with a donation, I have a PayPal account for my sister-site Image Alchemist on the mail address info@imagealchemist.net
Best regards, Paul Steunebrink / Storage Alchemist
Hi, you are excellent! best tutorial I ever follow online! – one question though, What if you already have port 443 and 80 on your router busy chanelling other services with a reverse proxy setup say haproxy on a pfsense box?? I’ve tried to run virtual host as a port base and link it up that way but for the life of me I cannot get it to work.. any help is appreciated
Hi Pedro,
Thank you for your comment. With regard to the question of the ports: I understand the issue, I came across this as well, but I am sorry to say that I have not found a solution yet. Have you asked around in support forums on the internet already?
Best regards, Paul Steunebrink / Storage Alchemist
So I have wordpress running at efischer.nl but now I don’t know how to set up how efischer.nl/klanten would point to synology drive and efischer.nl/photo to my photos etc.. Any suggestion?
Hi Eric,
As far as I know, this is impossible and probably not desirable concerning safety. Although I am not sure what you want to achieve, the rule of thumb is that your website and your internally accessible folder structure are separated. An FTP server would perhaps comes closer to your goal.
Best regards, Paul Steunebrink / Storage Alchemist
I have some customers, they have an account with drive with a teamfolder. We need to exchange easily files etc. when working on projects together.
they used to log in through domainname/drive and log in with a 2FA login. An FTP would not be customer friendly and even less safe maybe…
So what I would like to achieve is either klanten.efischer.nl or efischer.nl/klanten whatever is the easiest to accomplish
Maybe you could look into a reverse proxy on your NAS instead of a website. With a reverse proxy you have only one port to forward (TCP 443) and each application on your NAS is called via a subdomain name like klanten.efischer.nl.