Primary objective
You create a shared folder that users can access via File Station or over the network.
Secondary objective(s)
–
Background
A shared folder is the main entry point for users to access the data on the NAS. Each shared folder has a wide range of properties that help you to tailor it to your needs.

For an in-depth discussion of shared folders, please refer to Using Shared Folders On Synology NAS.
Actions
There are seven steps in this procedure. All steps require logging in to the DSM desktop with an administrator account.
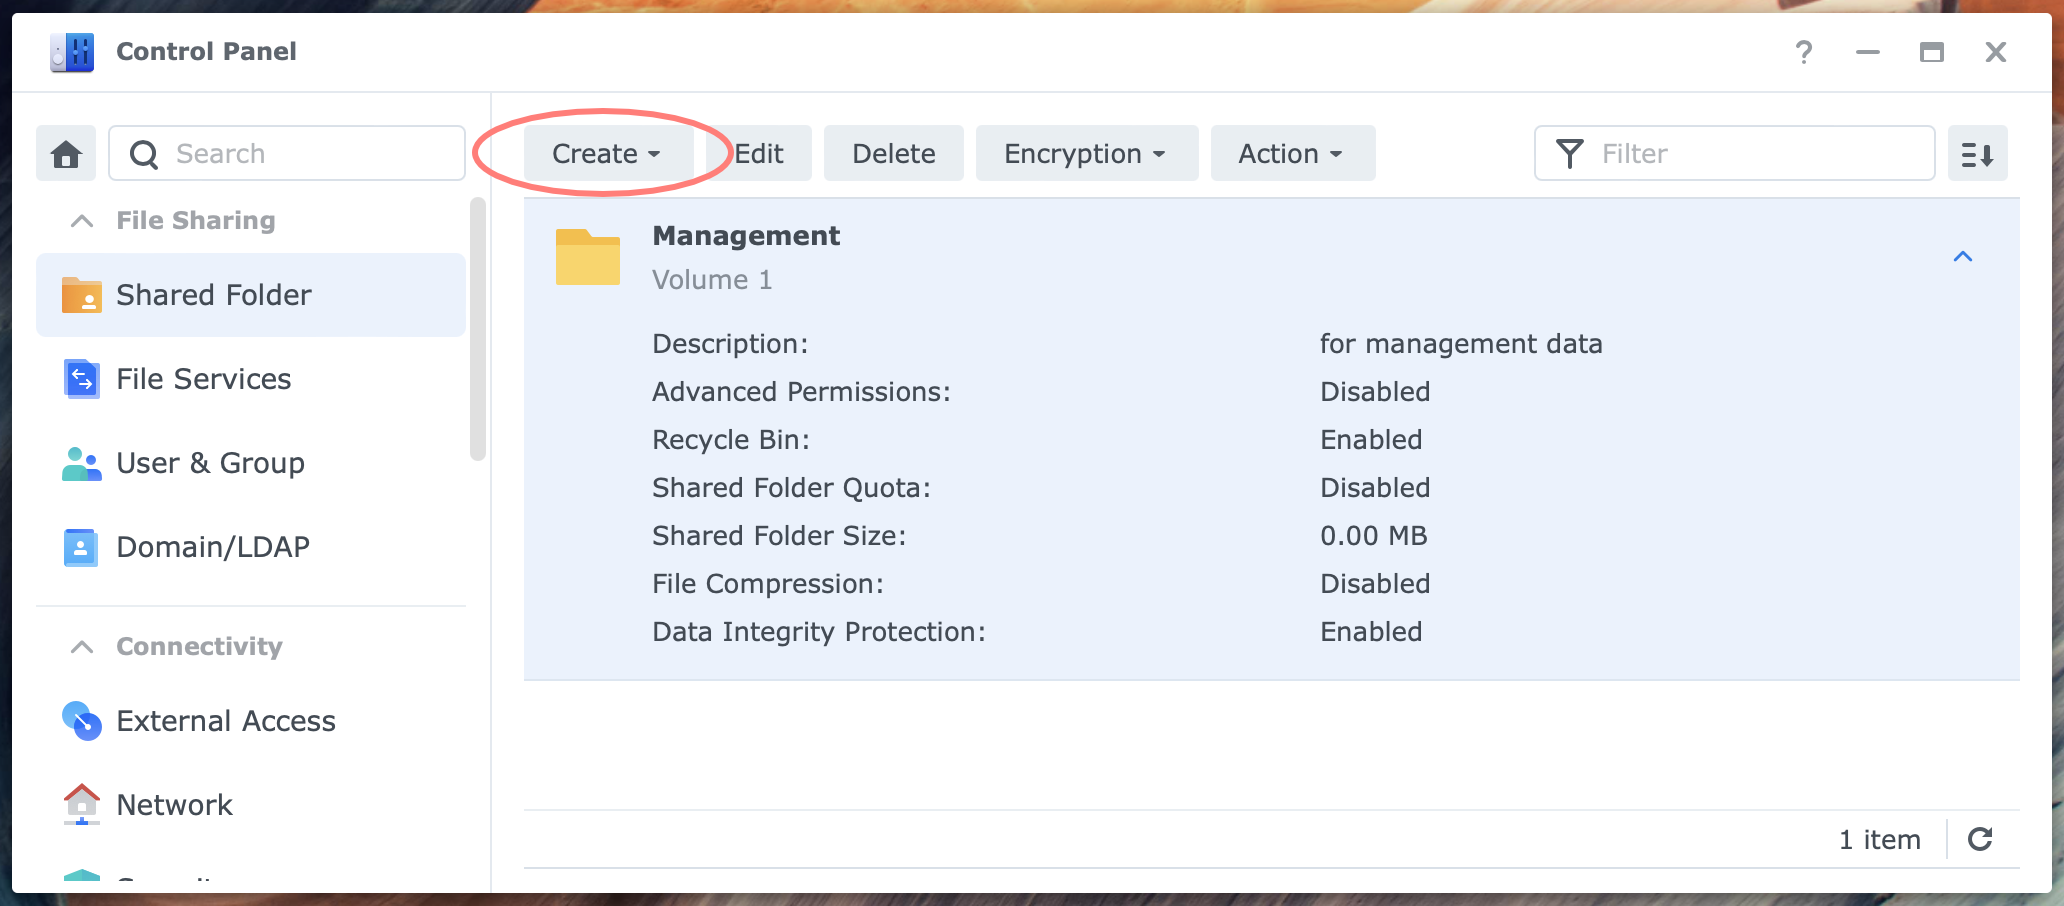
Open Control Panel > Shared Folder. Click on the Create button > Create; this starts the Shared Folder Creation Wizard
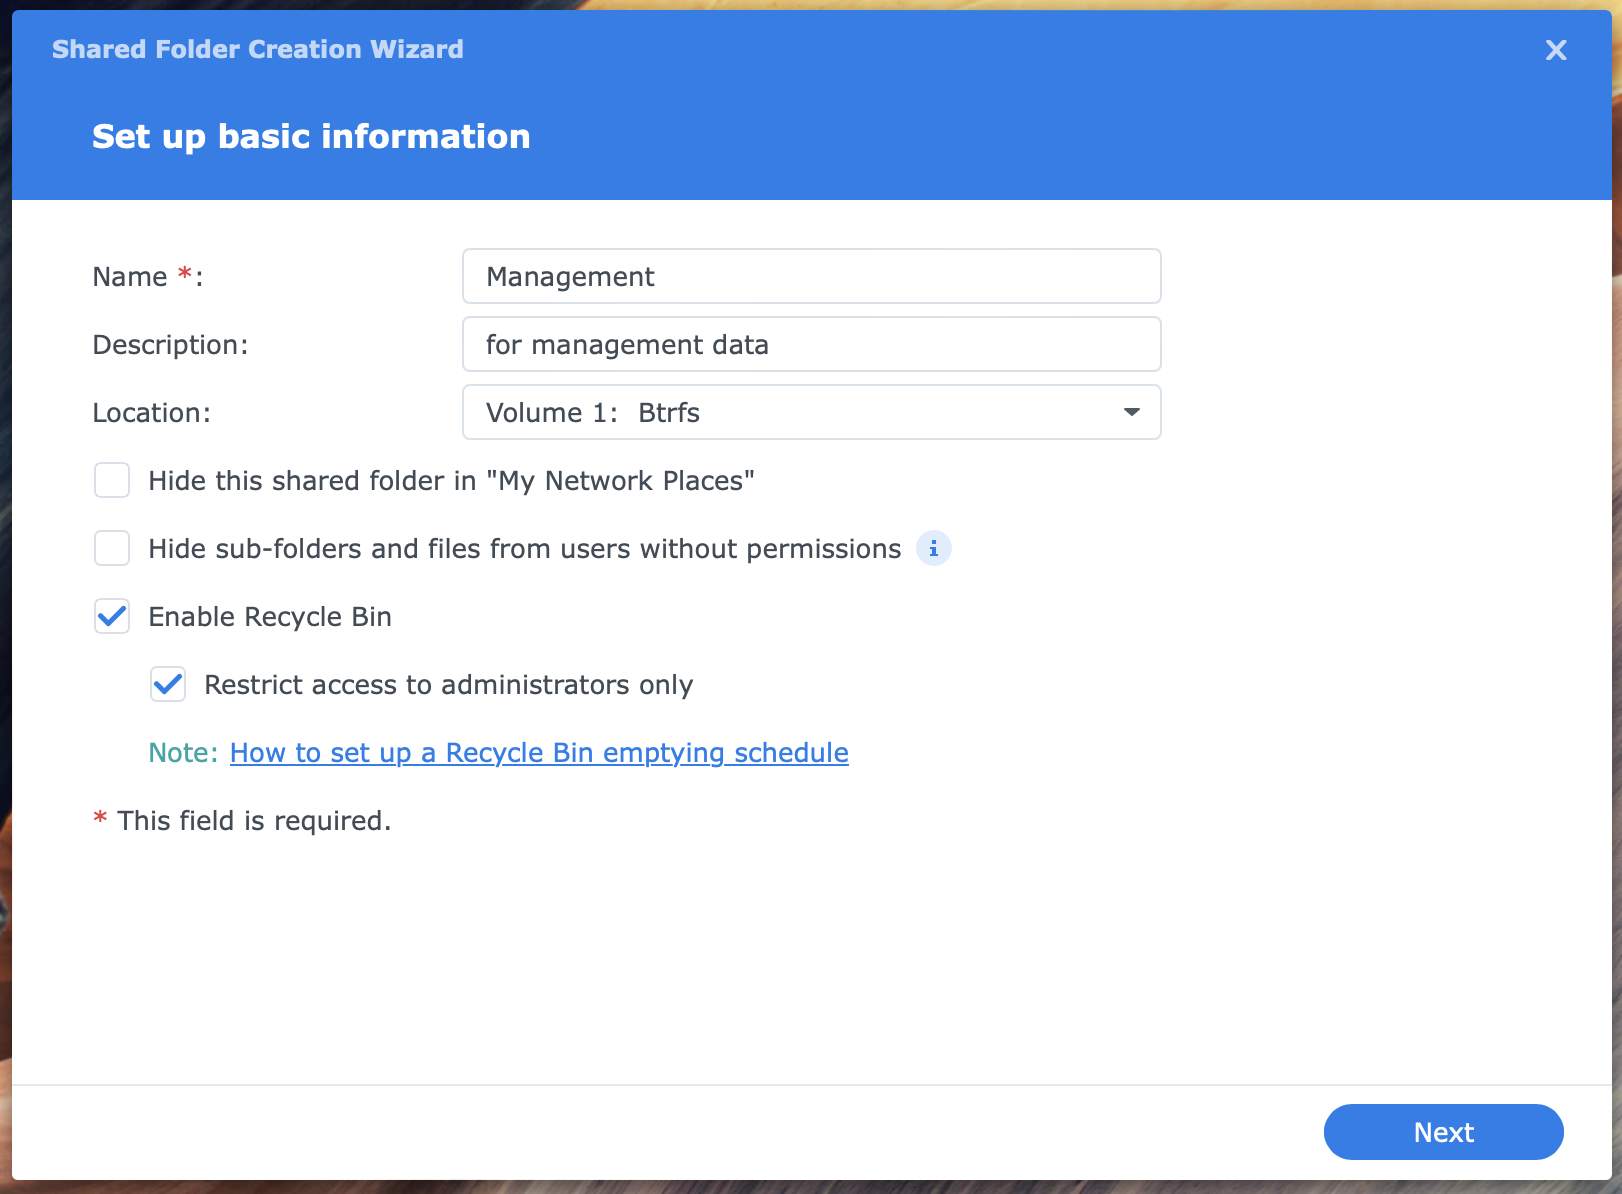
- Set up basic information
the name of the shared folder is the only required field, with other items worth noticing, in particular, the location and the recycle bin - Enable additional security measures
you can skip this screen unless you have a specific reason to encrypt the folder or make it WriteOnce - Configure advanced settings
this applies Btrfs volumes only; enable the data checksum for better data integrity; note that you can not alter this setting later; the data checksum setting allows you to compress data in the shared folder optionally; enable shared folder quota to limit the amount of data stored in that shared folder - Confirm settings
if you have second thoughts, you can go back and make changes; when you press Next, DSM creates the shared folder and continues - Configure user permissions
here, you configure permissions for users, groups, or system internal accounts
This will end the wizard, and you will return to the Control Panel > Shared Folder screen.
Congrats, you achieved the primary objective.
Thanks for reading
This post is donation-ware, and I made it to help you. Please consider leaving a comment or even buying me a coffee if it did. I will be eternally grateful.
Paul Steunebrink / Storage Alchemist
