When you use your NAS as a file server, you create shared folders as the main entry point for users to access the data on the NAS. The NAS administrator assigns permissions to each shared folder to control access. In addition, a shared folder has many properties to consider.
Using Shared Folders On Synology NAS
You store a shared folder on a volume. The shared folder is your reference point when backing up and synchronizing data and your entry point when accessing the NAS over a network.
In addition to permissions and advanced (share) permissions, shared folders can have a recycle bin, be hidden, encrypted, compressed, and read-only, and you can enable data checksum for data integrity and assign a quota to it.
Please refer to How To Create a Shared Folder for quick help creating a shared folder. This post discusses shared folders in more detail.
You create and manage shared folders with Control Panel but use them with File Station or over the network from your computer or mobile device.
This post is based on shared folders made with DSM 7.2 and on a Btrfs volume. Earlier DSM versions lack certain features, as does an Ext4 volume. I also cover these differences in the text.
Creating A Shared Folder
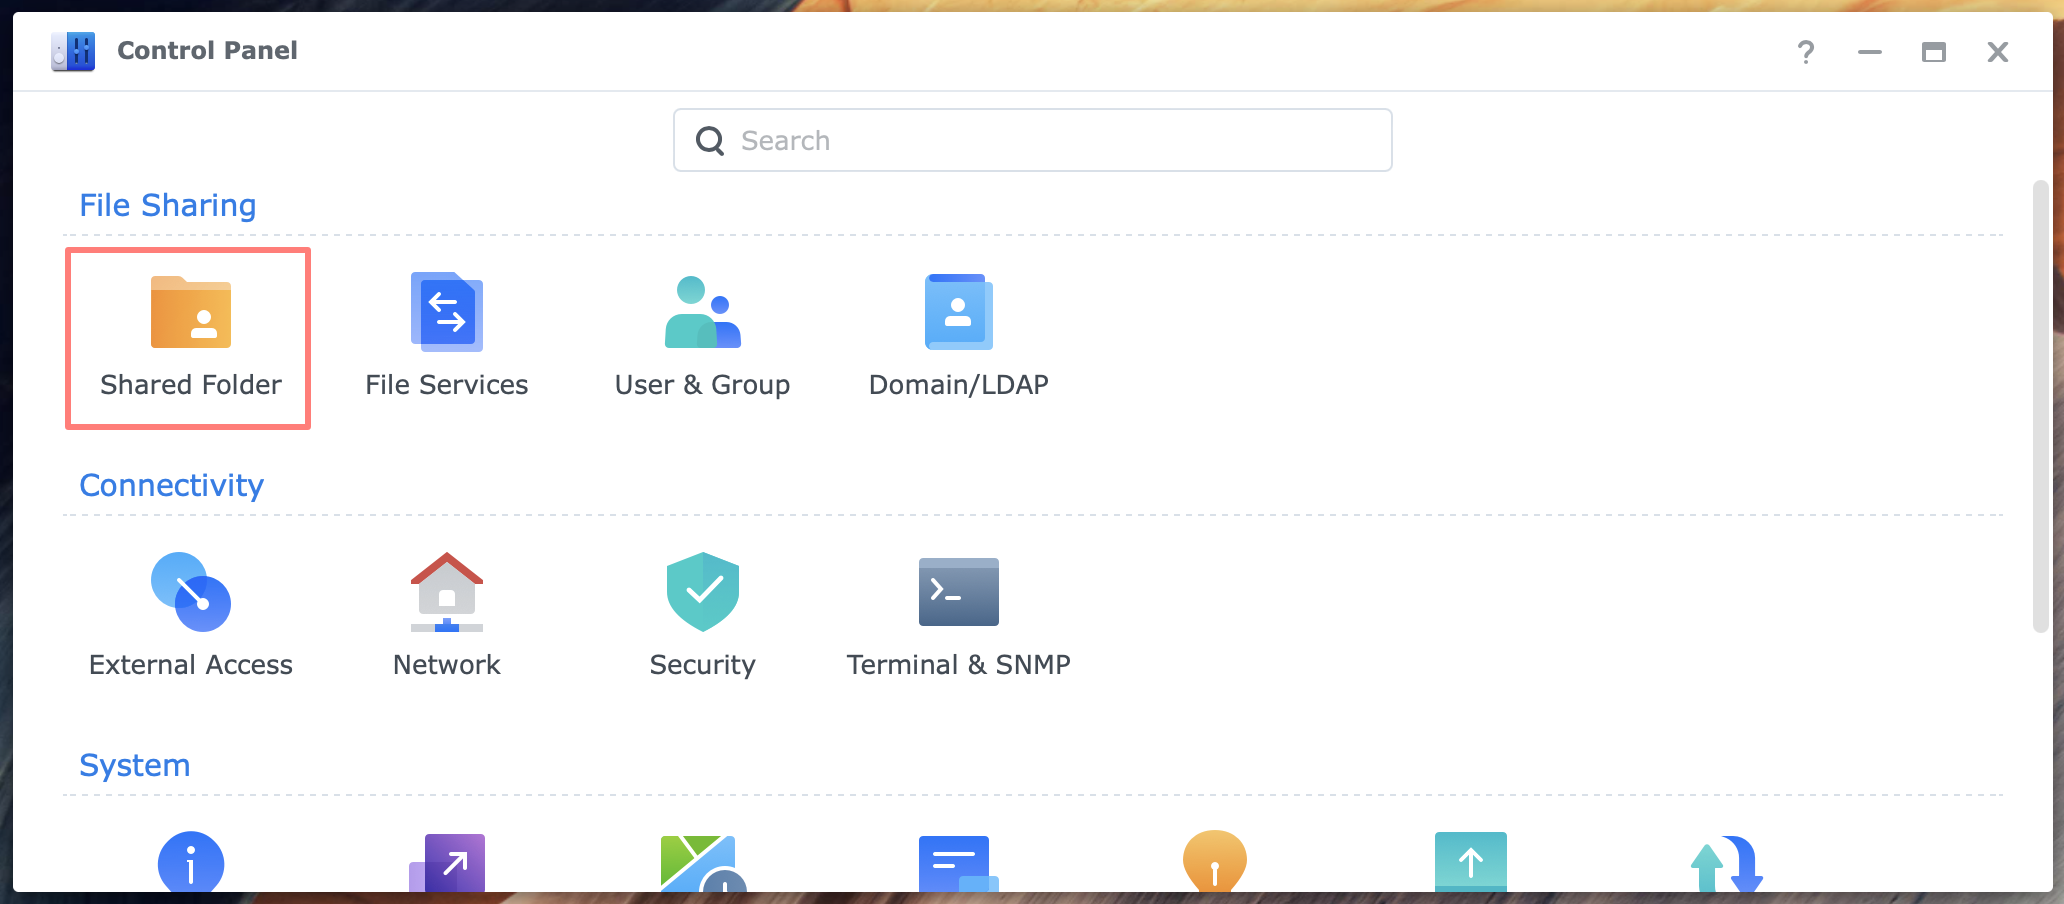
Open Control Panel > Shared Folder > Create (button) > Create Shared Folder. This starts the Shared Folder Creation Wizard. The wizard contains the following screens. An additional screen may appear when you enable one of the security measures.
- Set up basic information
the name of the shared folder is the only required field, with other items worth noticing, in particular, the location and the recycle bin - Enable additional security measures
you can skip this screen unless you have a specific reason to encrypt the folder or make it WriteOnce - Configure advanced settings
Btrfs only; enable the data checksum for better data integrity; note that you can not alter this setting later; the data checksum setting allows you to compress data in the shared folder optionally; enable shared folder quota to limit the amount of data stored in that shared folder - Confirm settings
if you have second thoughts, you can go back and make changes; when you press Next, DSM creates the shared folder and continues - Configure user permissions
here, you configure permissions for users, groups, or system internal accounts
This will end the wizard, and you will return to the Control Panel > Shared Folder screen.
Shared Folder Features
When you create a new shared folder with the Shared Folder Creation Wizard, you automatically come across most of the shared folder features.
Set up basic information
The first page of the wizard is relatively straightforward. Some notes and tips.
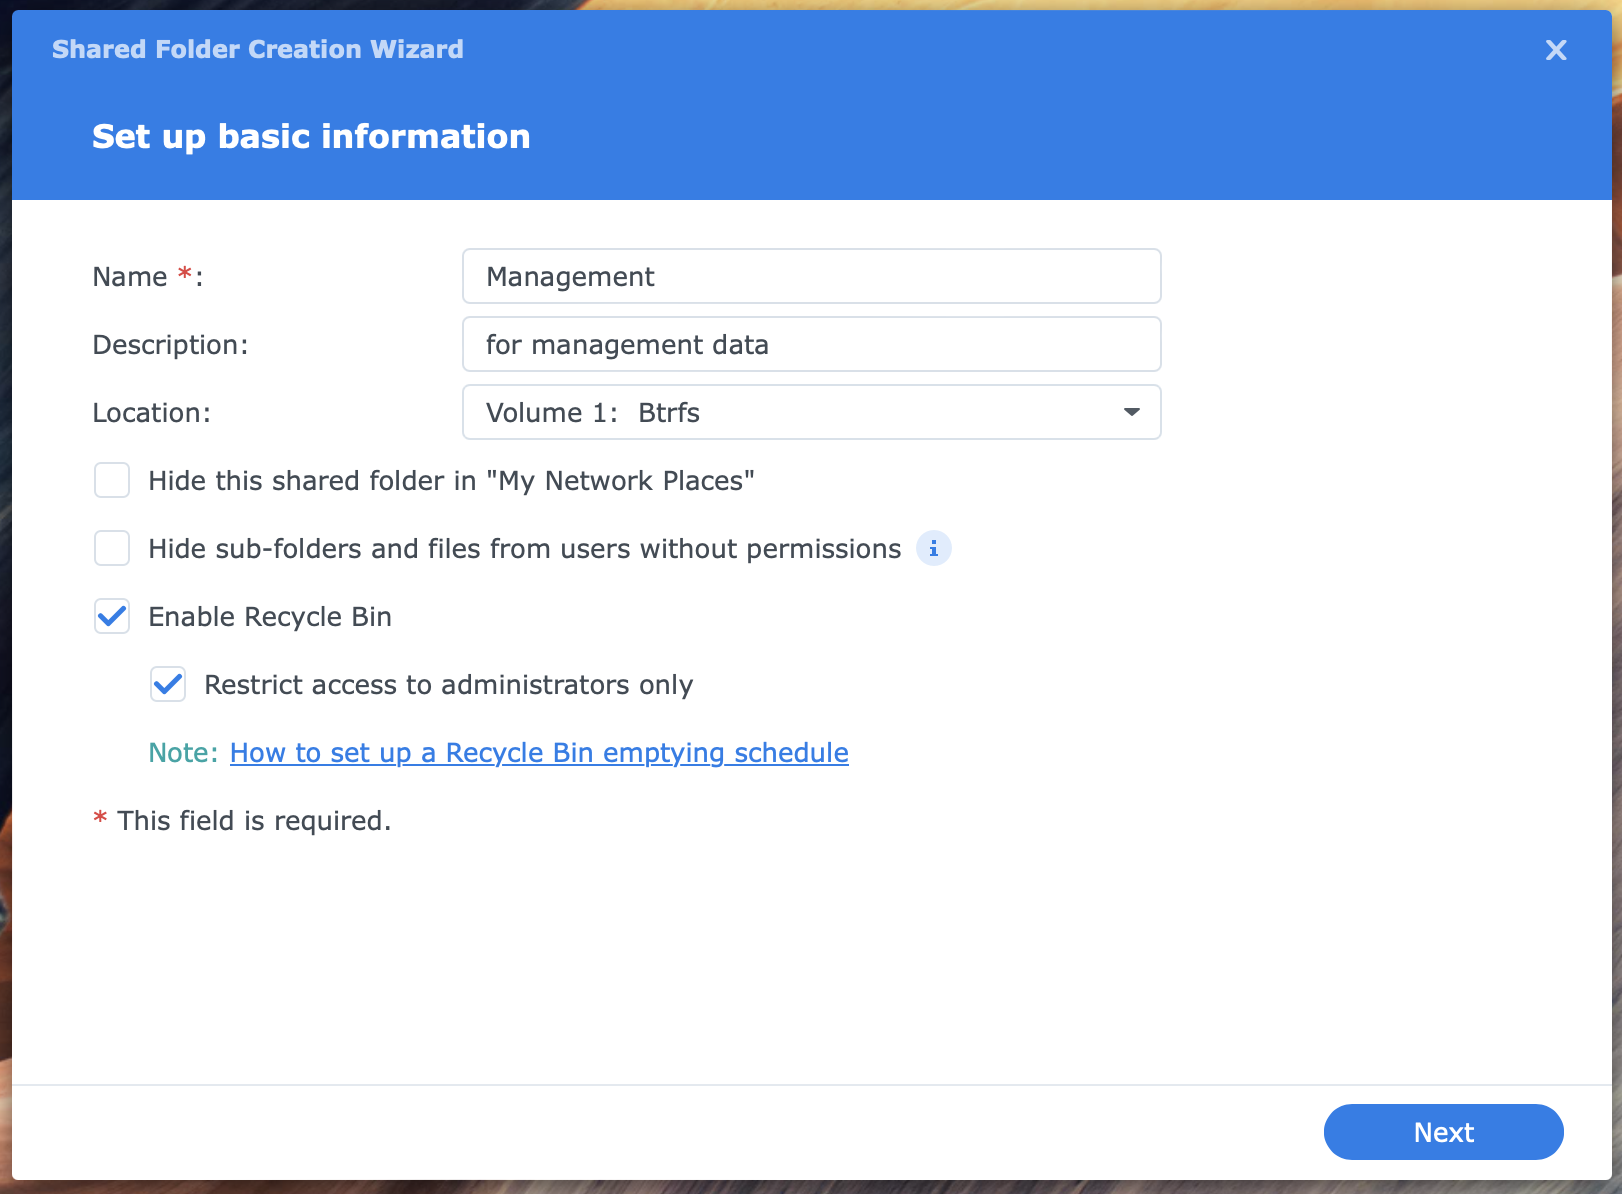
- Name
this field is mandatory; use a clear and brief descriptive name; keep it short and straightforward; this is what you see when you connect to the NAS over the network - Description
a brief description makes perfect sense, but it is optional - Location
very relevant when you have more than one volume on your NAS; note that you can move a shared folder to another volume afterward - Hide this shared folder in “My Network Places”
when enabled, the shared folder does not appear in Windows Explorer or Mac Finder when you browse the NAS; hiding does not affect connectivity. I recommend using this option for shared folders that you use for backup and maintenance - Hide sub-folders and files from users without permissions
this option is similar to the previous options but applies to folders and files in the shared folder or below - Enable Recycle Bin
a shared folder for your backups does not require a recycle bin, but for user files, it makes sense; when enabled, you can restrict access to administrators or all users that can access the shared folder
Enable additional security measures
The options you will find here depend on your model NAS. The first two options are always available, and the third requires a new model in the Plus series or higher.
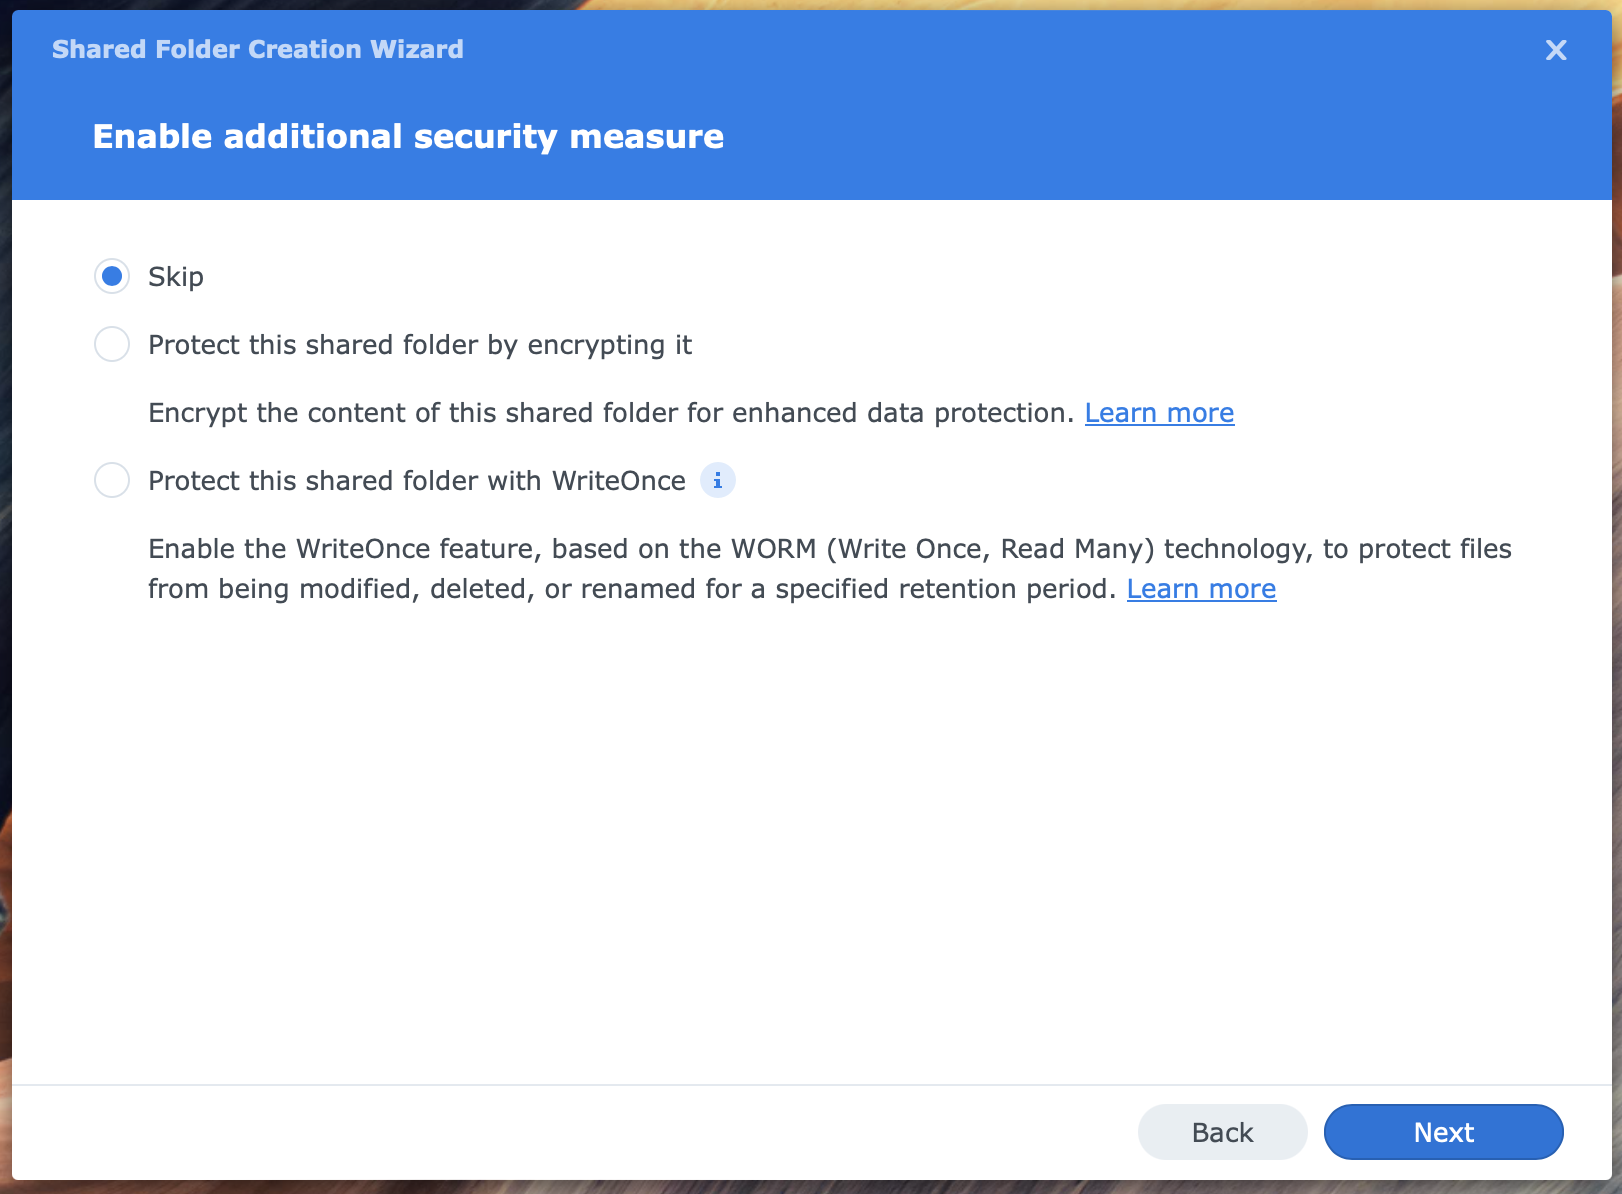
- Skip
if you do not want any additional security measure - Protect this shared folder by encrypting it
you can encrypt the new shared folder during its creation or later; when you enable it, you get the Encryption page when you click Next - Protect this shared folder with WriteOnce
when you prefer to use the WORM technology, be sure to apply this option now during creation because you can not apply it later; when you enable it, you might see a warning that the recycle bin will be disabled and get the WriteOnce page when you click Next; this is available on Btrfs, not on Ext4
Configure advanced settings
This page appears when you create a shared folder on a Btrfs volume.
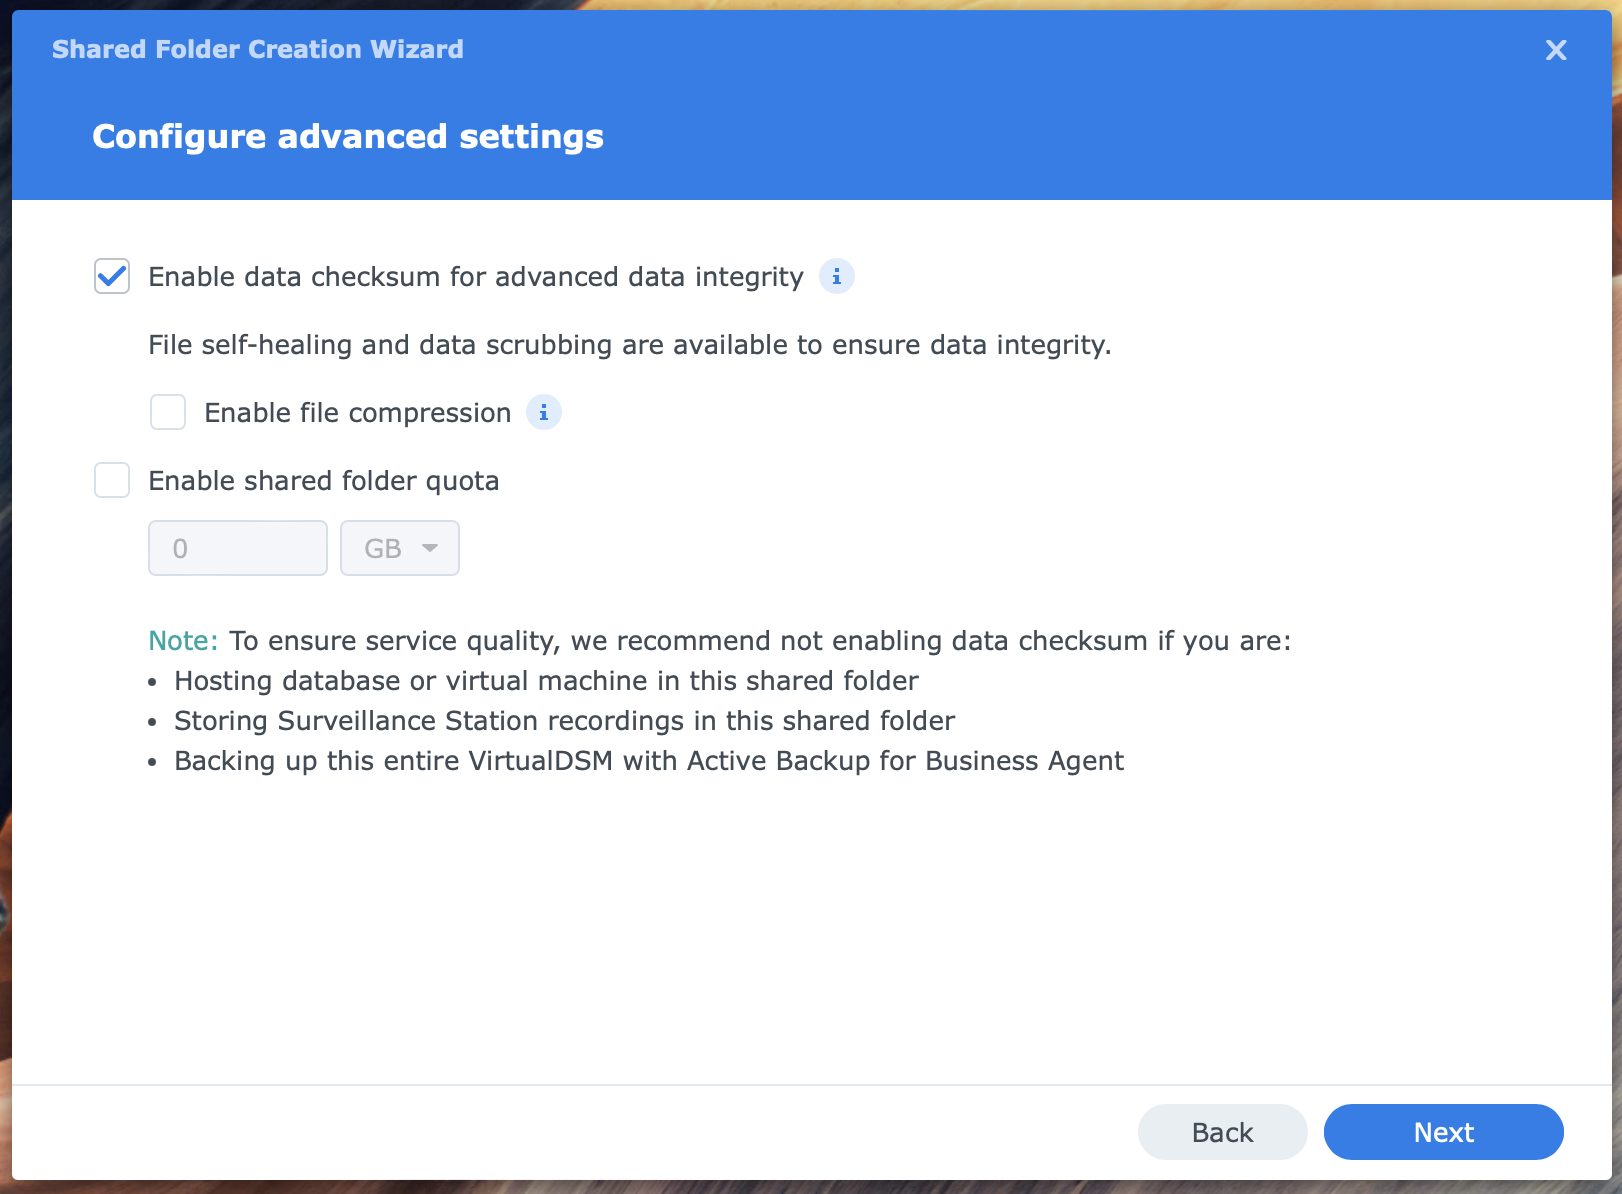
- Enable data checksum
by default, it is not enabled, but you should almost always enable it for better data integrity; enabling this option allows you to enable file compression, now or later - File compression
with file compression, you effectively save space, but it may affect performance; it works best for larger files and files that you do not access often - Enable shared folder quota
this option tells how much data, in MB, GB, or TB, all users together may store in the shared folder; this is available on Btrfs volumes, not on Ext4
Confirm settings
The NAS is ready to create a shared folder with your selected settings. Review the settings and click Next.
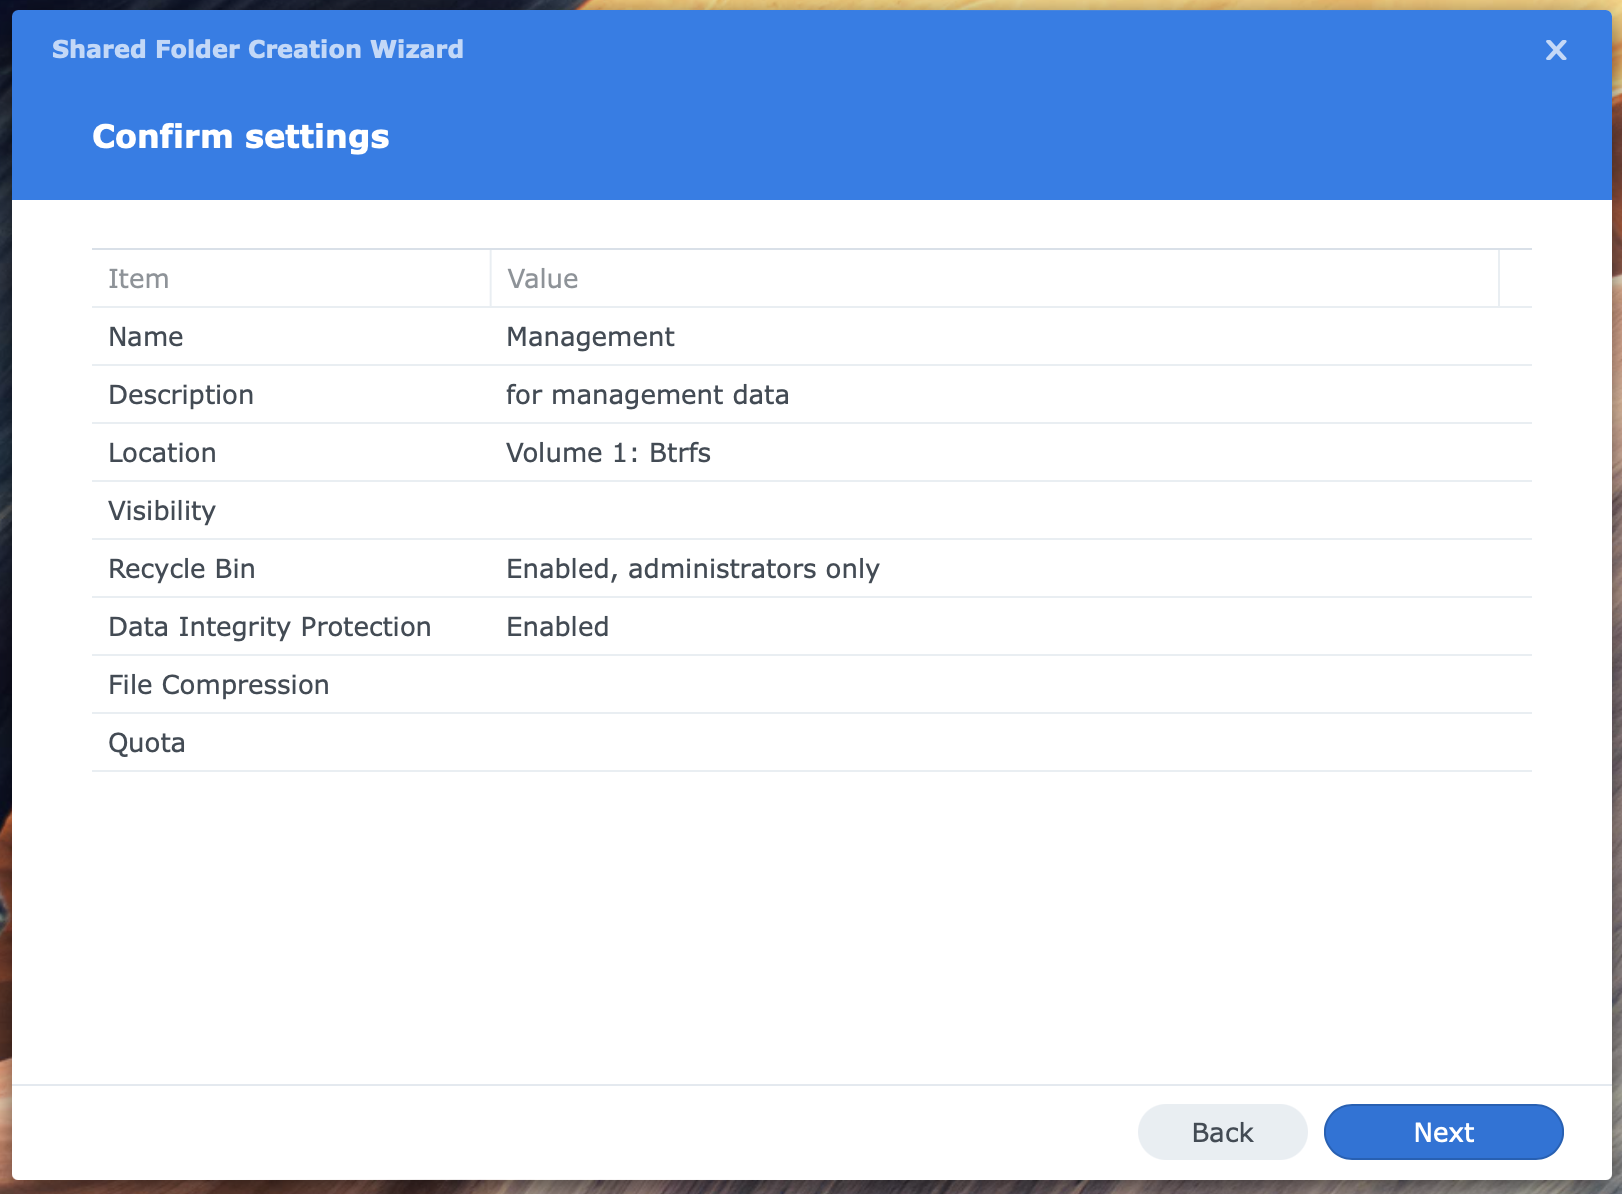
The shared folder is ready. The wizard opens the last screen about user permissions.
Configure user permissions
On this screen, you define which users or groups can do what with files and folders in the shared folder. You select the category user or group in the drop-down box at the top left corner. Next, you assign the permissions by checking a box.
Note that members of the group administrators always have full access or can assign themselves this permission.
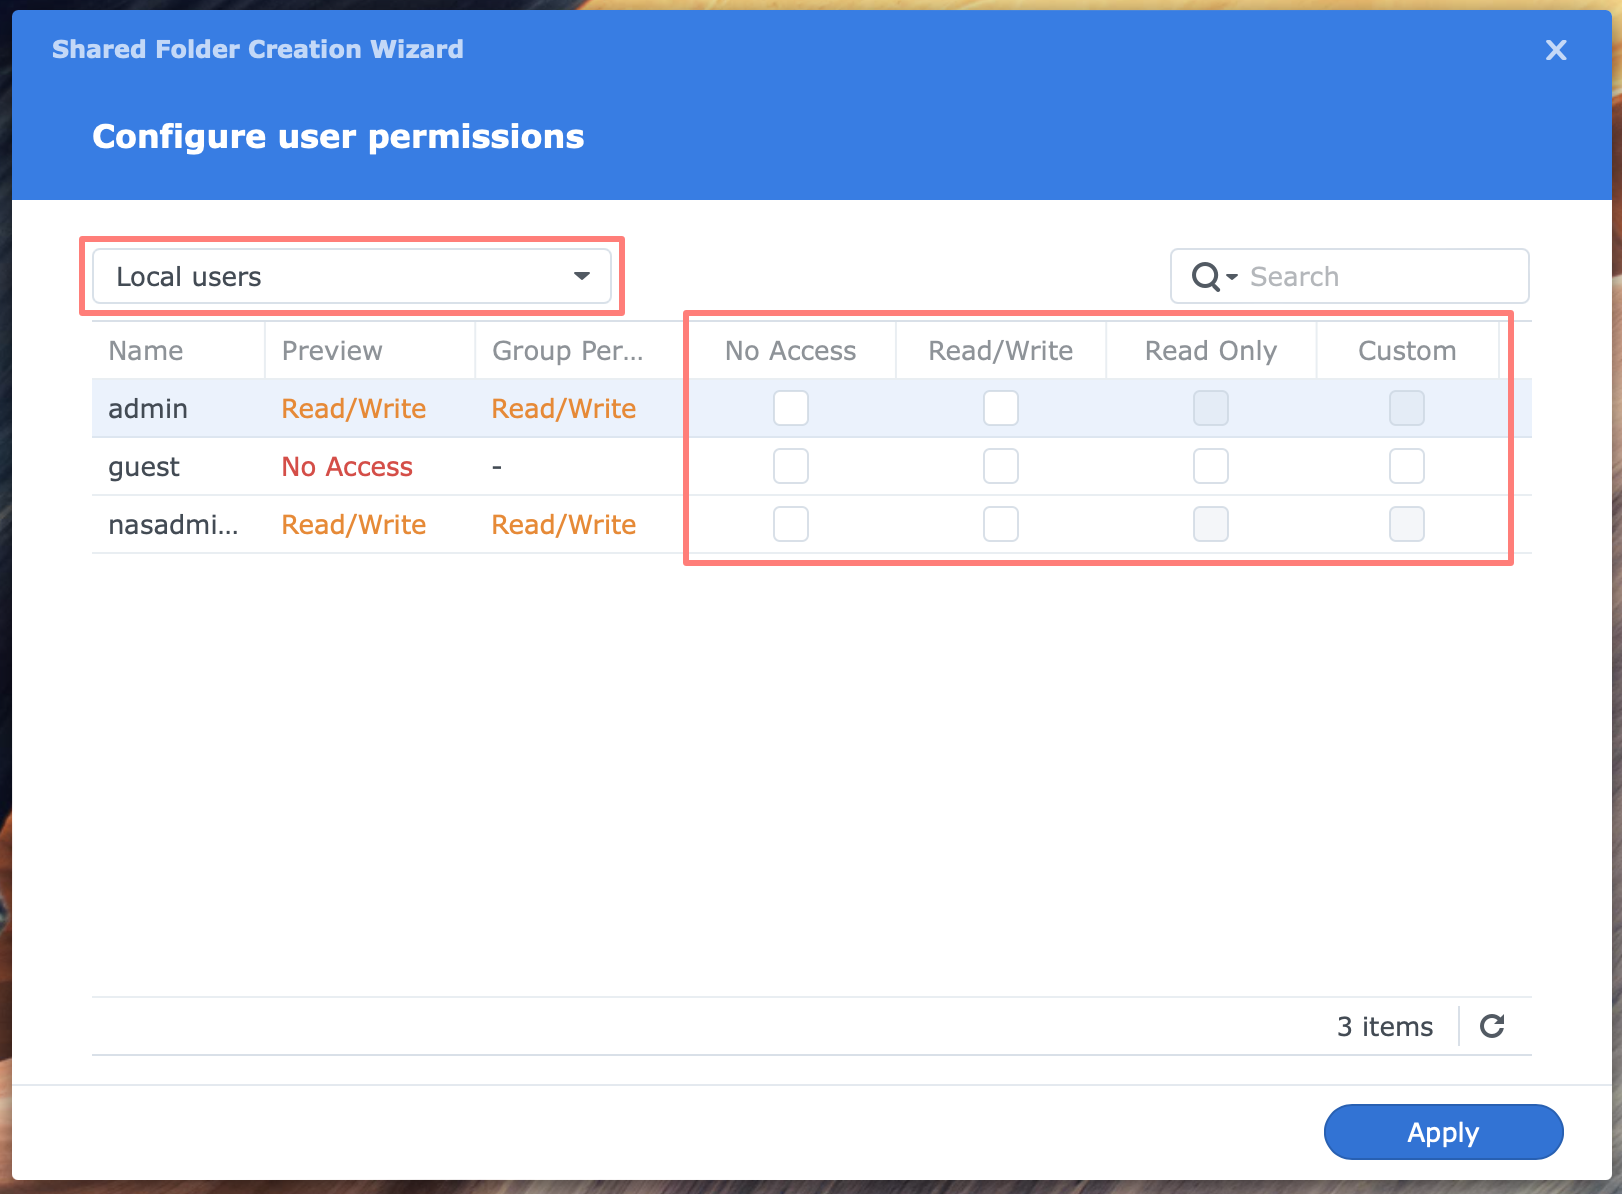
You can choose No Access, Read/Write, or Read Only when selecting permissions. For a more detailed configuration, choose Custom.
File and folder permissions are complex, and I hope to explore them further in a separate post.
Managing Shared Folders
You can change almost all properties, move the shared folder to another volume, and delete them from Control Panel.
Edit
Open Control Panel > Shared Folder, select the shared folder you like to edit, and click the Edit button.
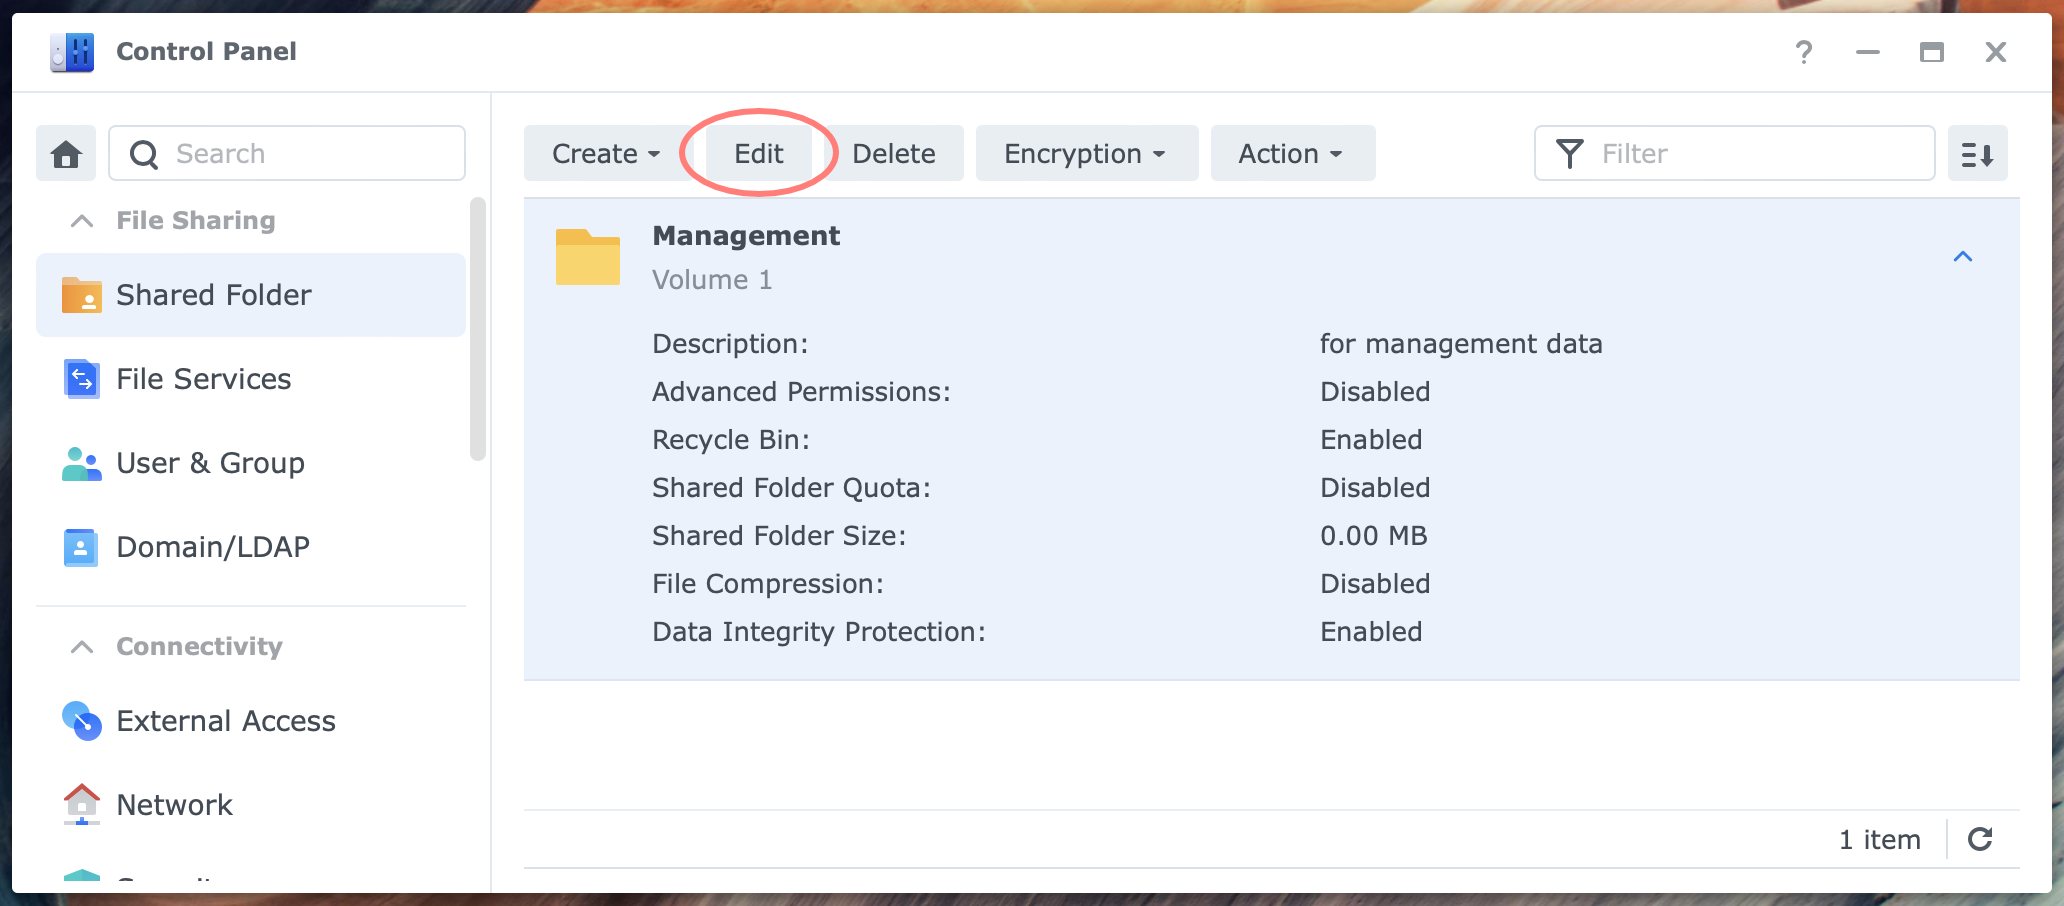
This opens the Edit Shared Folder screen, which has six tabs. The settings discussed earlier are displayed in each tab.

Two extra tabs are Advanced Permissions and NFS Permissions. I discuss both briefly below.
Move
When you edit a shared folder, you can move it with all its properties to a different volume. To do so, go to the General tab of the Edit Shared Folder screen and click on the value of the Location field.
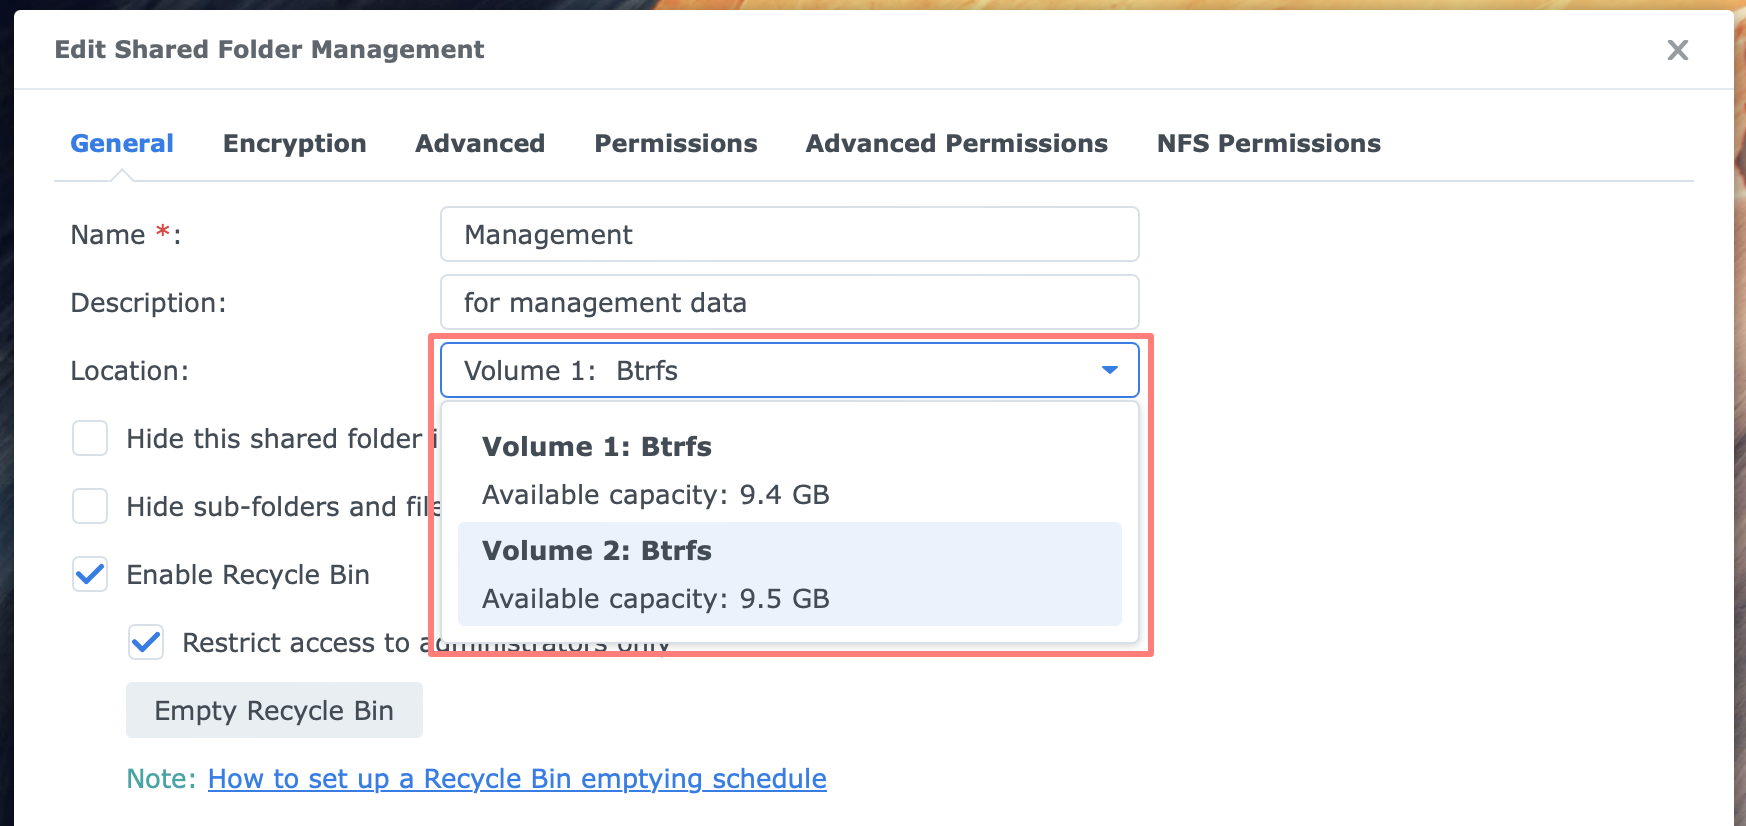
A drop-down list with all available volumes will open. Select a different volume and click the Save button. The move operation will start immediately. Before moving to another volume, any snapshot from the shared folder will be removed.
Some shared folders are created by and connected to a service or application. For example, Synology Photos (Shared Space) uses the /photo shared folder. You can move this shared folder as explained above, but it won’t break Syology Photes. The same applies to the /homes shared folder, where Synology Photos (Personal Space) saves the images.
I have not tested moving shared folders for other applications. Below is a list of reserved shared folder names and the linked service or application.
Delete
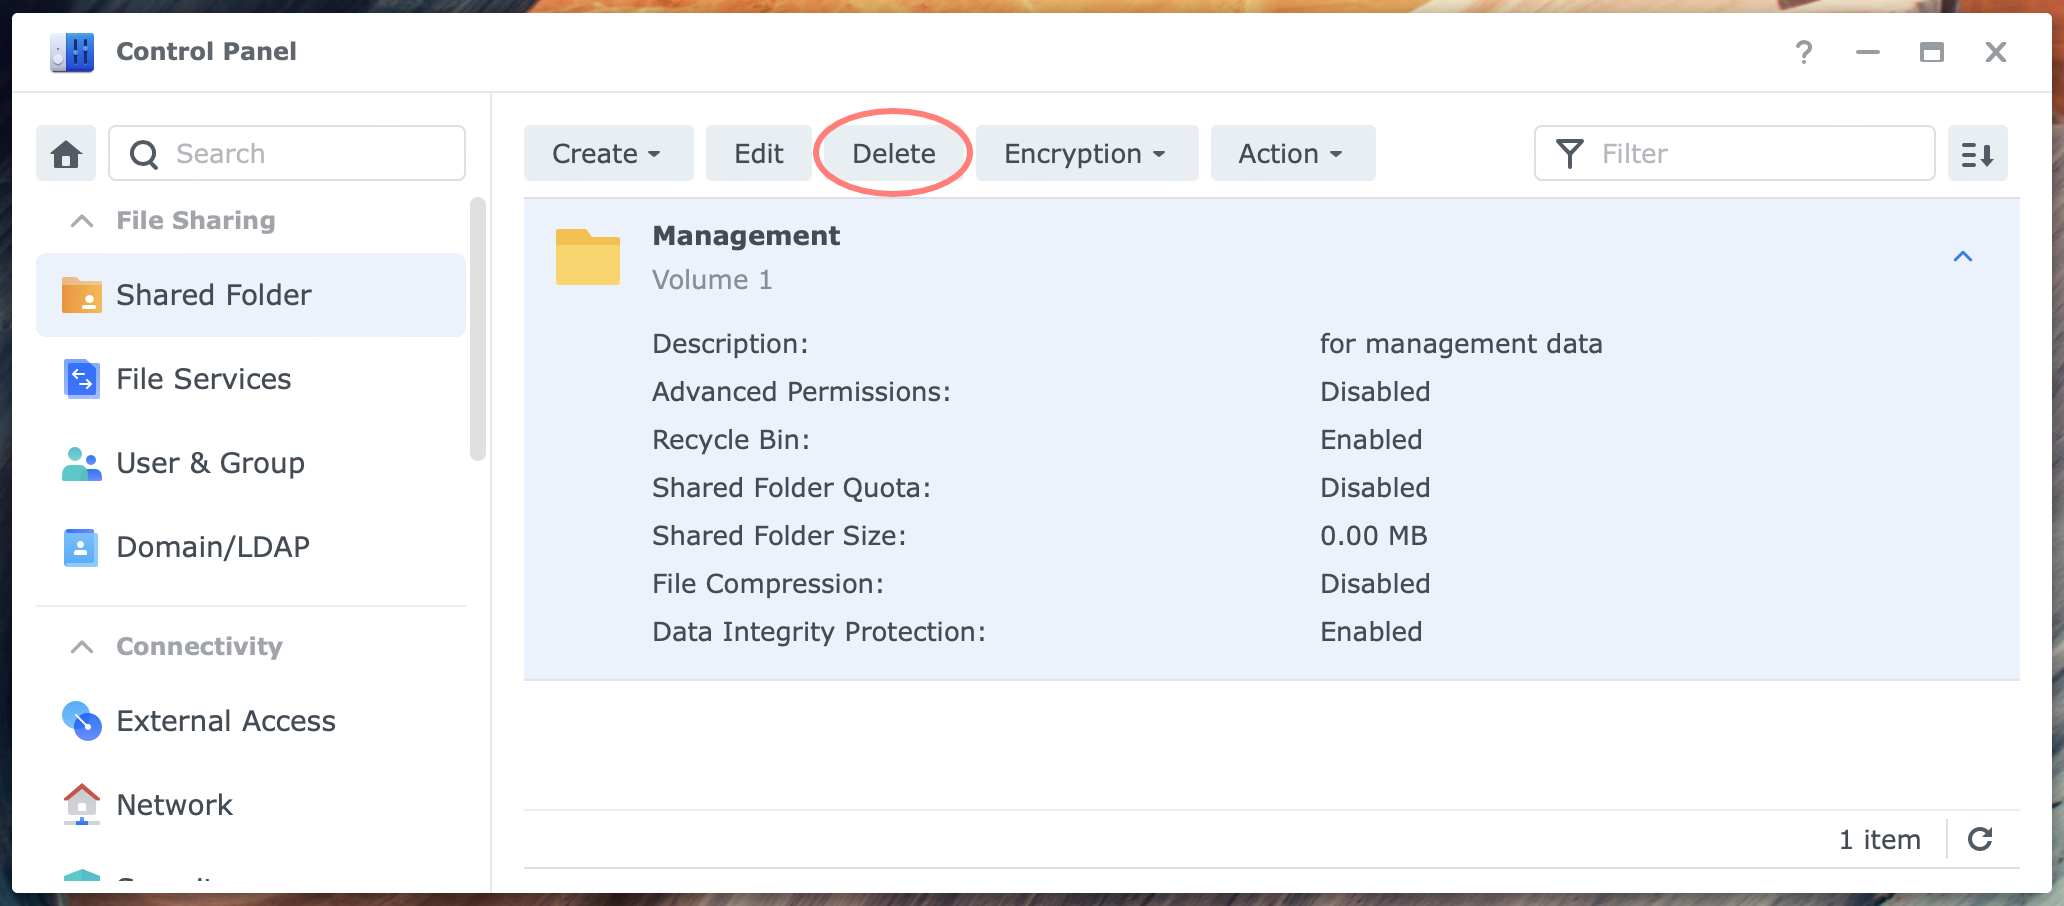
Open Control Panel > Shared Folder, select the shared folder you like to delete, and click the Delete button.
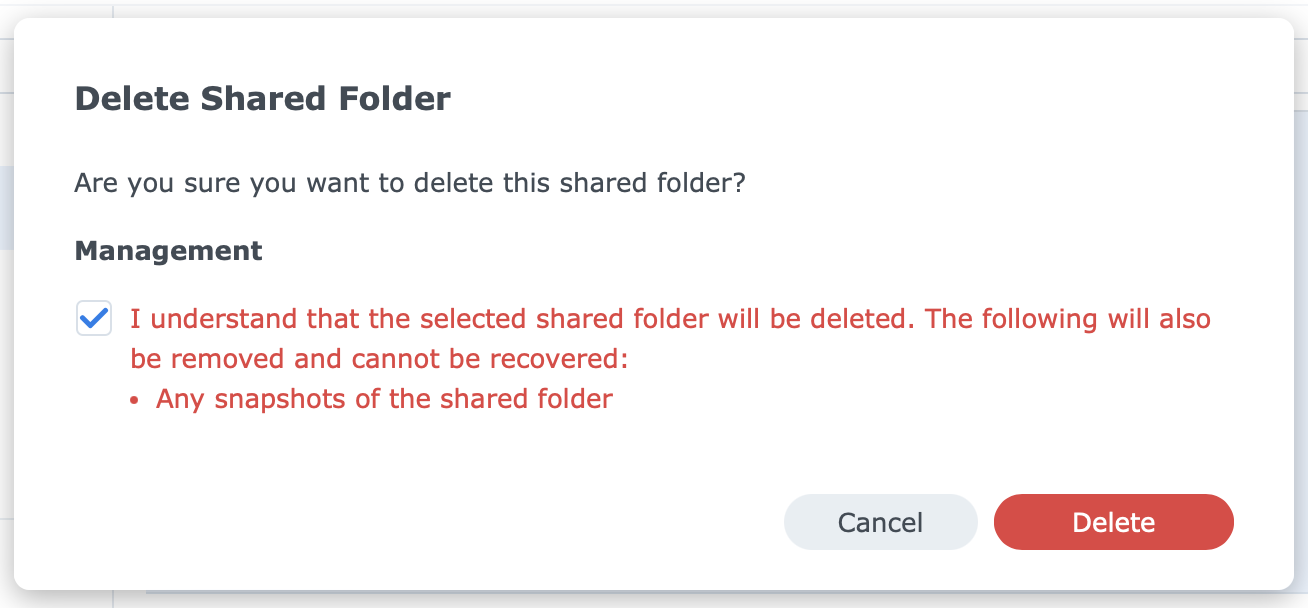
The Delete Shared Folder dialog opens, asking for confirmation. Confirm and click the Delete button.
Please enter your password and click the Submit button. The delete operation will start immediately, deleting the shared folder and all files and folders.
Permissions
As an administrator, you assign permissions to a shared folder to control which users or groups can do what with the files and folders in that shared folder. Folders and files inside the shared folder inherit permissions, but an administrator can alter these permissions in great detail.
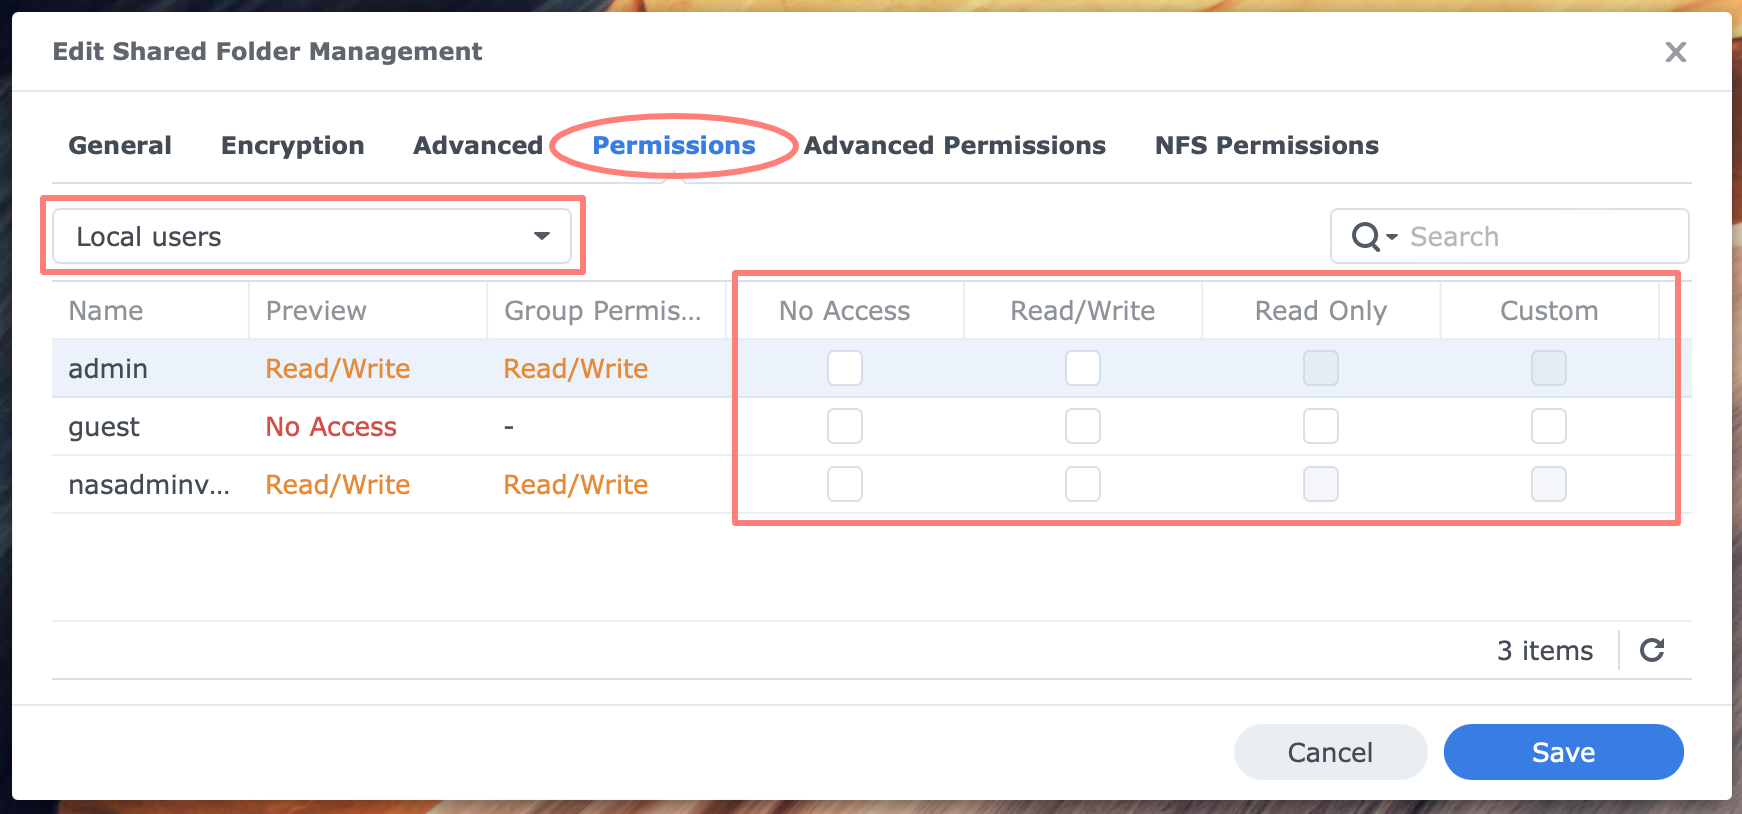
While creating the shared folder, you are presented with the permissions screen. Later, when you edit the properties of a shared folder, go to the Permissions tab.
Advanced Permissions
When editing a shared folder, you might notice the Advanced Permissions tab. You will rarely, if ever, use advanced permissions. When you open the Advanced Permissions tab, you see two sections with separate settings.
- Advanced Settings
- these settings affect users who access the shared folder via File Station, FTP, or WebDAV. You can turn off browsing, modification, or downloading for these users
- Advanced Share Permissions
- these settings affect users that access the shared folder via SMB, AFP, File Station, FTP, or WebDAV; after you enable this feature and click on the button with the same name, you see a screen similar to the regular permissions screen
Notice the remarks at the bottom of the screen. These options are not recommended, and Shared Folder Sync, discussed below, will automatically enable Advanced Share Permissions. That’s good to know.
NFS Permissions
You must enable the NFS file service on the NAS before you can create NFS permissions on this tab. NFS is still popular on Unix and Linux machines. With Windows and Mac computers, you use the SMB file service.
I have no experience with NFS and leave it out of the scope of this post.
WriteOnce
DSM 7.2 introduced shared folders with WriteOnce to prevent files from being changed, overwritten, or deleted. When you enable WriteOnce during the creation of the shared folder, you are offered the choice between two modes:
- Enterprise mode
- Compliance mode
The latter is the most stringent mode because no one, not even administrators, can remove the shared folder. The first option allows an administrator to remove it. You can not move WriteOnce folders across volumes.
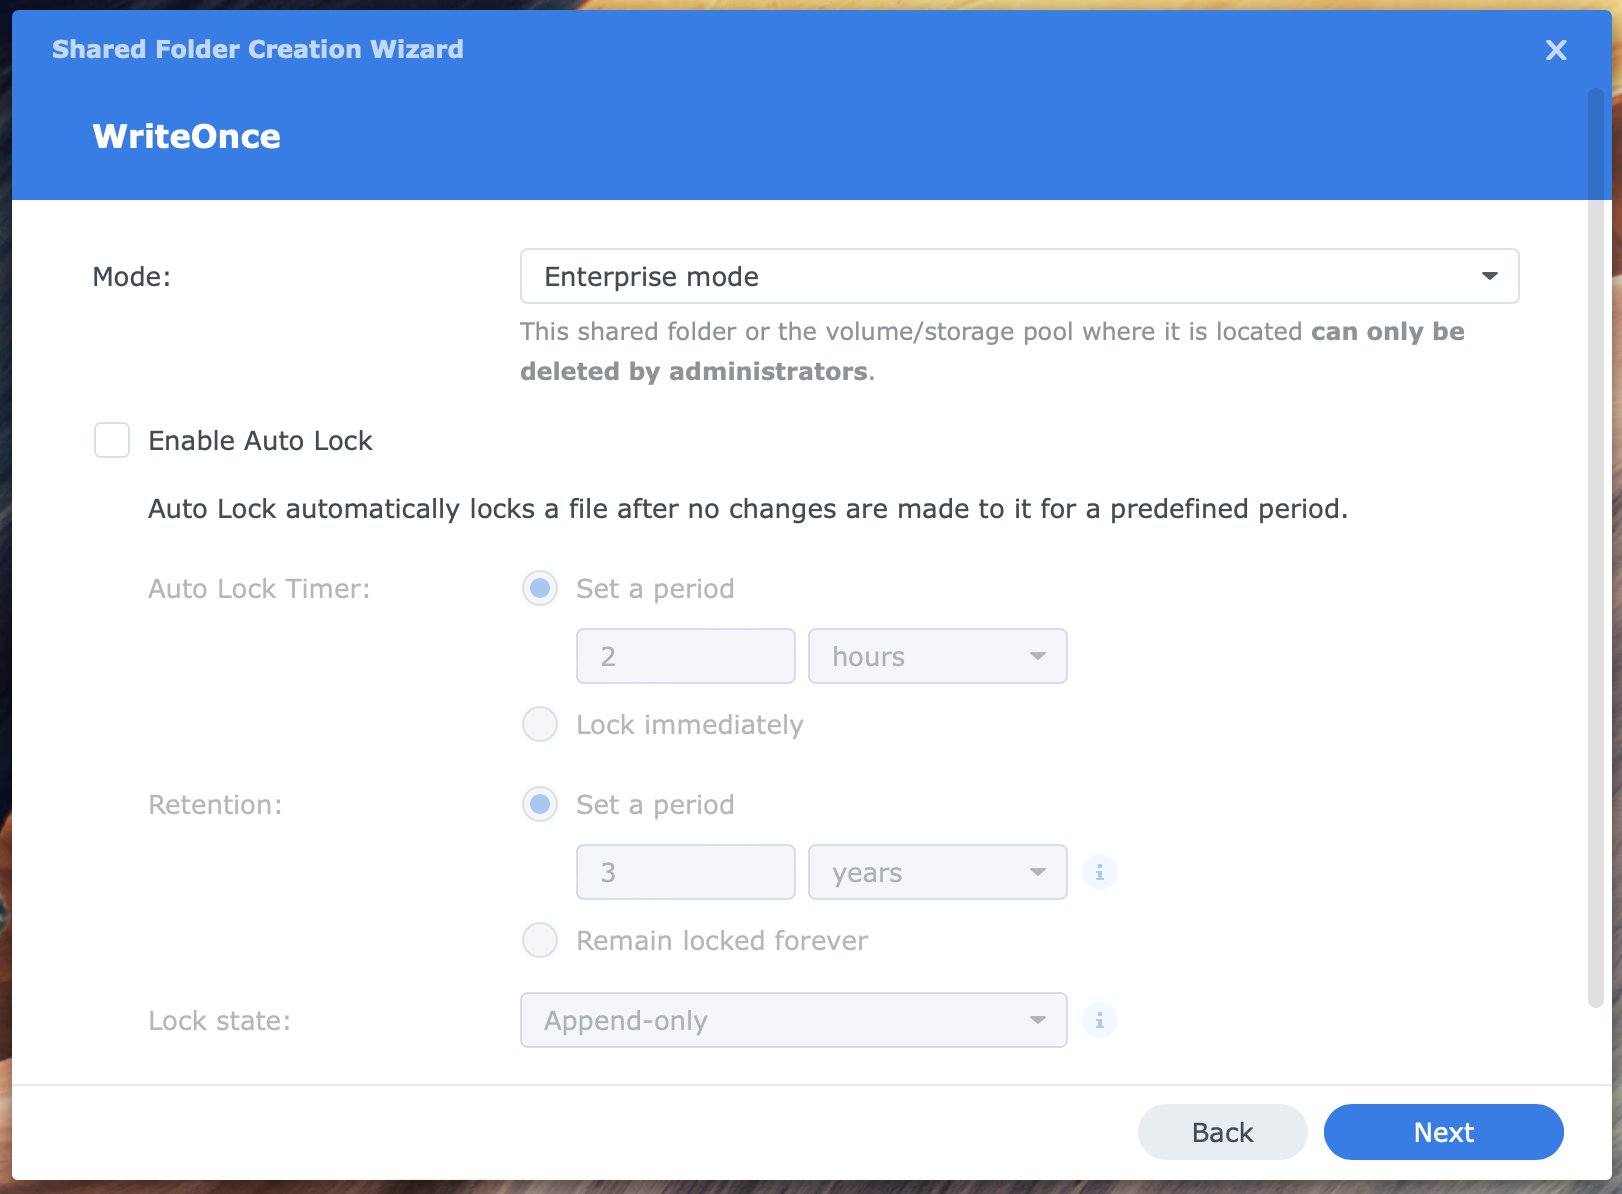
You can enable Auto Lock independent of the selected WriteOnce mode. With Auto Lock, you define the period after which a file becomes locked. You can enable Auto Lock during and after creating a shared folder with WriteOnce and disable it afterward.
A WriteOnce shared folder has some limitations. You can not rename, move, or synchronize a WriteOnce shared folder with Shared Folder Sync or Synology Drive ShareSync. To create a WriteOnce shared folder, you need a volume with Btrfs. The Ext4 file system is not supported.
Cloning A Shared Folder
Instead of creating a new shared folder from scratch, you can clone an existing shared folder. During cloning, you copy some properties while others are available to change. Cloning is only available on Btrfs, not on Ext4.

Select the existing shared folder to clone, and click the Create button > Clone. No wizard starts, but a Clone from the shared folder dialog opens with two tabs: General and Advanced.
General tab
On the General tab, you enter the name and description of the cloned shared folder. The location is fixed and identical to the original.
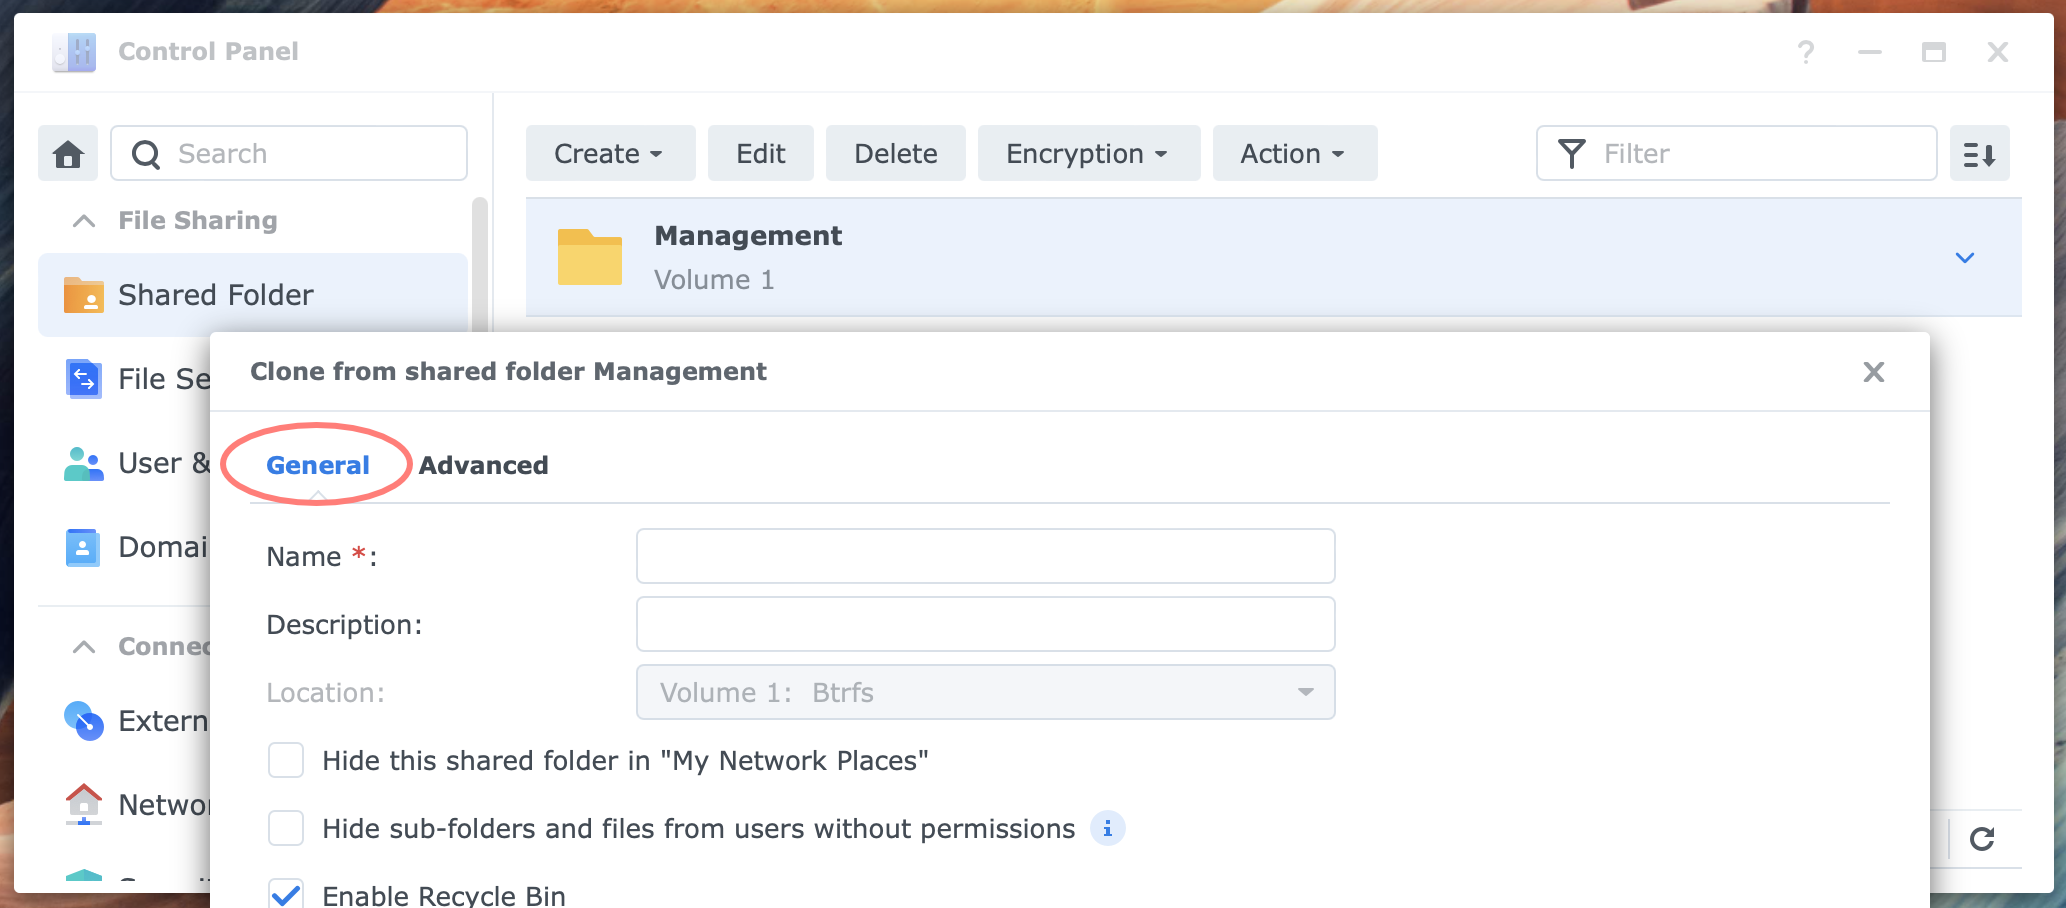
The three checkboxes are set to the default value, meaning they inherit no setting from the original.
Advanced tab
The data checksum setting is fixed and identical to the original. The file compression setting is inherited from the original but not fixed.
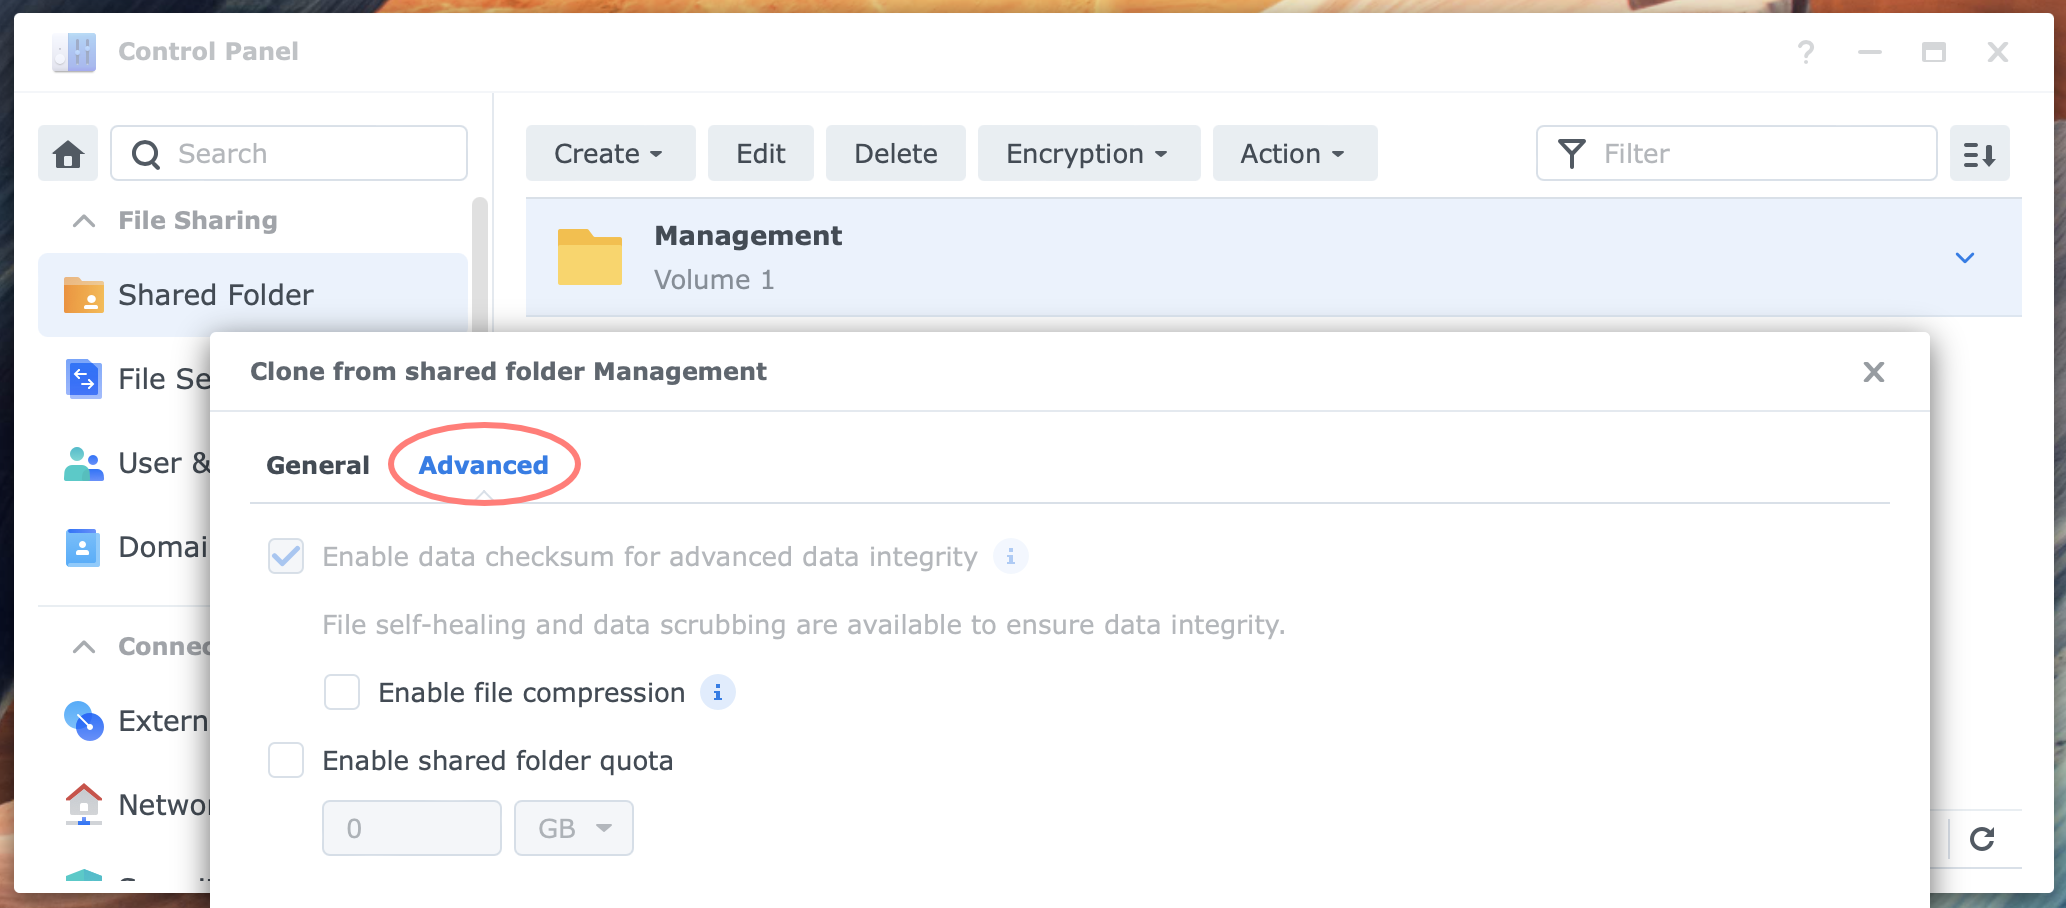
The quota setting is set to the default value.
Other settings
The cloning process does not affect Permissions and Advanced Permissions and starts with their default values. The encryption status is cloned, meaning if the original is encrypted, the clone is, too, with the same encryption key. If the original has WriteOnce enabled, this setting will not be cloned.
Summary of cloning
Cloning a shared folder means that the clone will inherit the location, data checksum, file compression, and encryption from the original.
Location, data checksum, and encryption are fixed during the clone’s creation. You can alter the file compression setting. Once the clone shared folder is ready, you can change all settings except for the data checksum.
A clone from a WriteOnce shared folder will not have WriteOnce enabled.
Synchronizing Shared Folders
You might want to synchronize shared folders between two NASs. Your Synology NAS offers three solutions.
- Rsync works with any server that supports this protocol, typically a Unix/Linux system
- Shared Folder Sync, an out-of-the-box solution for a one-way sync between two Synology NAS based on rsync, is included in DSM and ready to configure and use
- Synology Drive ShareSync, a more advanced and convoluted solution for one- and two-way sync with versioning between two Synology NAS
For a detailed discussion of Shared Folder Sync, please refer to Using Shared Folder Sync On Synology NAS. A post on Synology Drive ShareSync is planned.
Moving a synced shared folder
While synchronizing a shared folder between NASs, you might need to move a shared folder across volumes, either at the source or the destination NAS.
With Shared Folder Sync, you can move the source and destination shared folders to another volume without adversely affecting the synchronization process.
With Synology Drive ShareSync, you can move a shared folder while it is synced. From the source side, where you manage connections with the Synology Drive ShareSync app, you must enable the connection again. The connection with the Team Folder is automatically updated at the destination side, where you manage the Team folders with the Synology Drive Admin Console. No actions are required at that end.
Shared Folder Maintenance
Periodic data scrubbing ensures data consistency and lowers the risk of data loss in the event of drive failure. When you select the storage pool in the column at the left, you see an information screen with the data scrubbing status. In other words, data scrubbing is a storage pool-related feature.
You can review the state of data scrubbing from Storage Manager. Select the storage pool in the left column. The information page at the right displays the status and the date when it was last completed. You can manually initiate data scrubbing with the Run Now button.
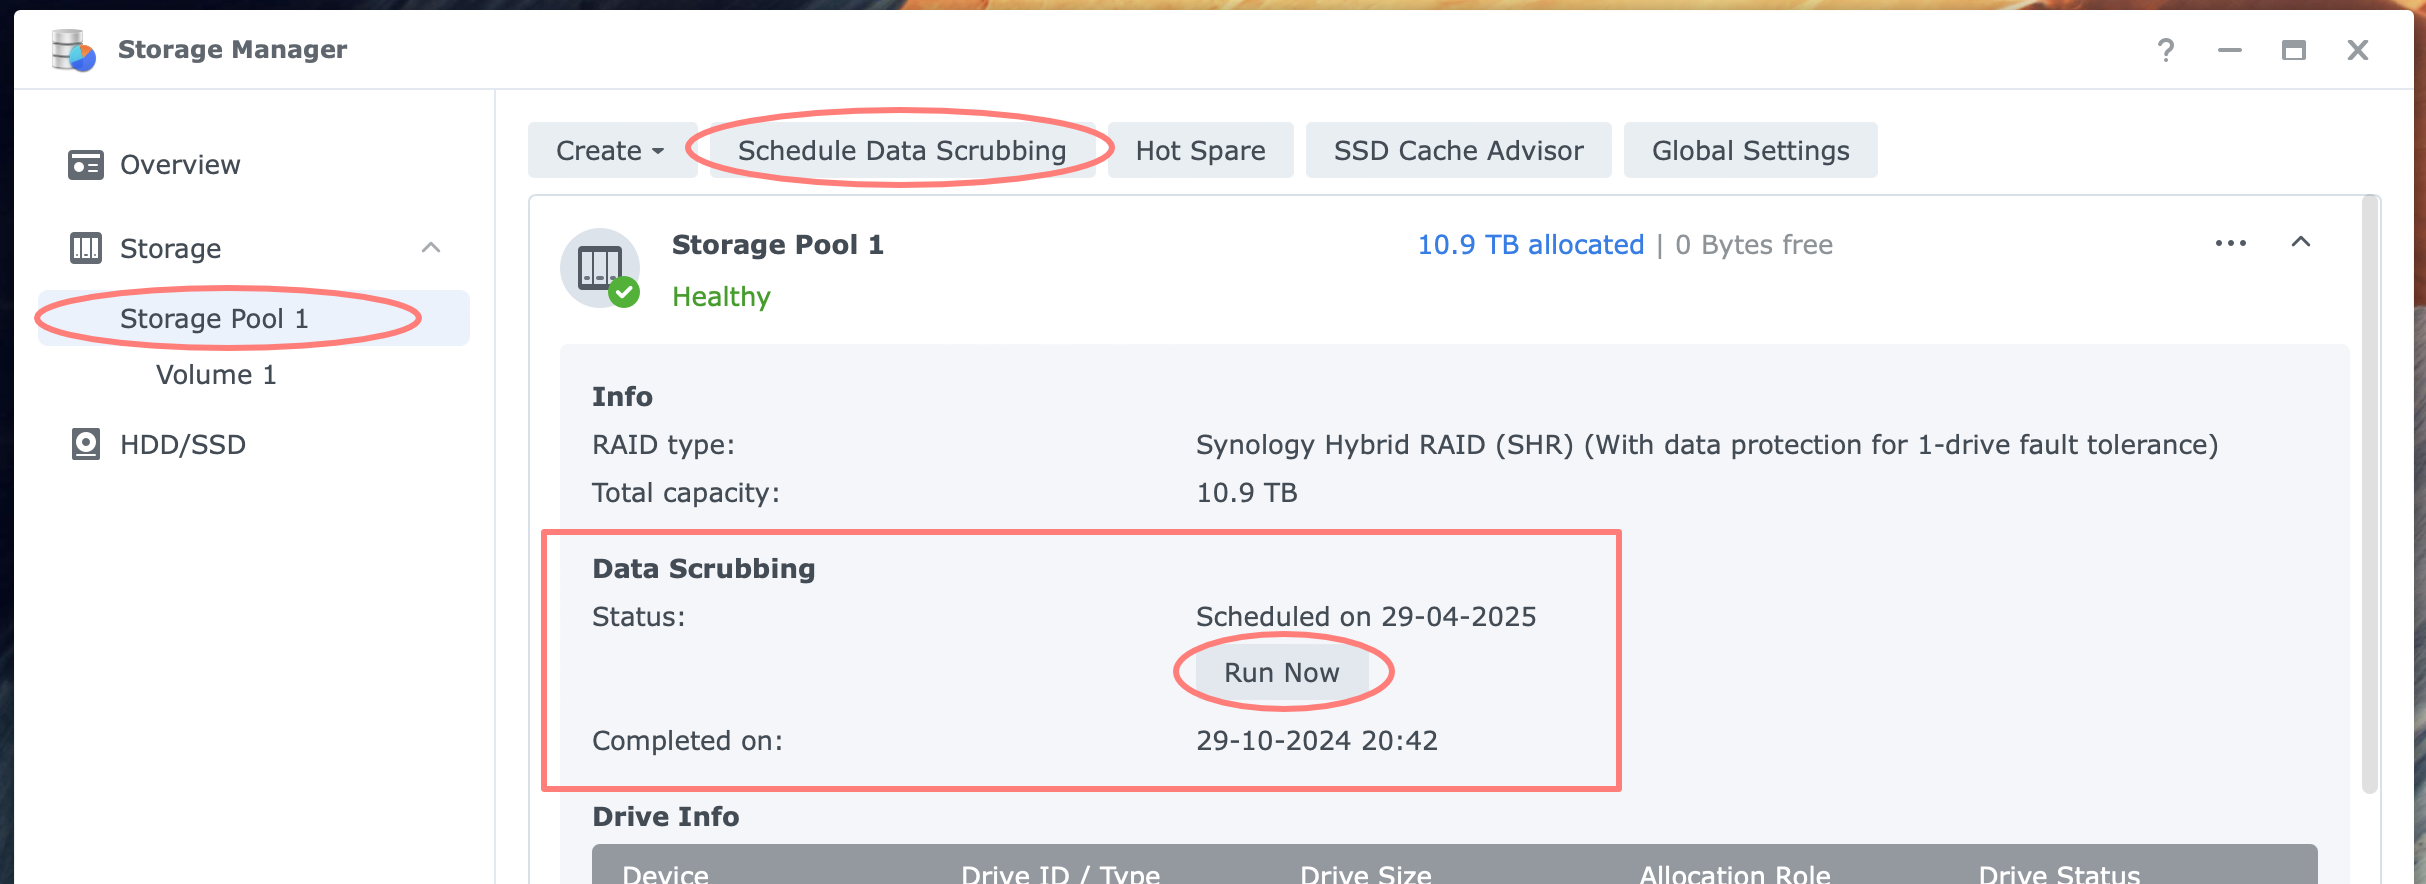
From the information screen, you see the status, like Ready, Manual, or Running, a Run Now or Pause data scrubbing button to start or pause the process manually, and the date the data scrubbing was last completed.
You can manually start data scrubbing with the Run Now button or schedule the process using the button at the top of the screen. Note that when you schedule scrubbing, the process starts immediately.
Scrubbing is most effective if shared folders have the data checksum feature enabled. However, data scrubbing is still recommended even if no shared folder has a data checksum.
Reserved Shared Folder Names
Several applications and services create a shared folder with a predefined name. To avoid potential conflicts, avoid using these shared folder names.
| application/service | shared folder |
| rsync | /NetBackup |
| User Home service | /homes |
| Active Backup for Business | /ActiveBackupforBusiness |
| Active Backup for Business Agent | /ActiveBackupforBusiness |
| Audio Station | /music; /home/music (optional) |
| Media Server | /music; /photo; /video |
| Surveillance Station | /surveillance |
| Synology Drive Server | /home/Drive |
| Synology Photos | /photo (Shared Space); /home/Photos (Personal Space) |
| Video Station | /video |
| Web Station | /web; /web_packages; /home/www (optional) |
| Container Manager | /docker |
The applications and their shared folders are listed above. Do not delete the shared folder before removing the service from your NAS.
Creating Snapshots
With the Snapshot Replication application installed from Package Center, you instantly create a recoverable copy of your data. Snapshot replication is a recommended addition to your backup strategy. You configure this per shared folder. These snapshots are stored inside the shared folder in a subfolder #snapshots. Snapshots are taken manually or scheduled, and apply a retention policy.
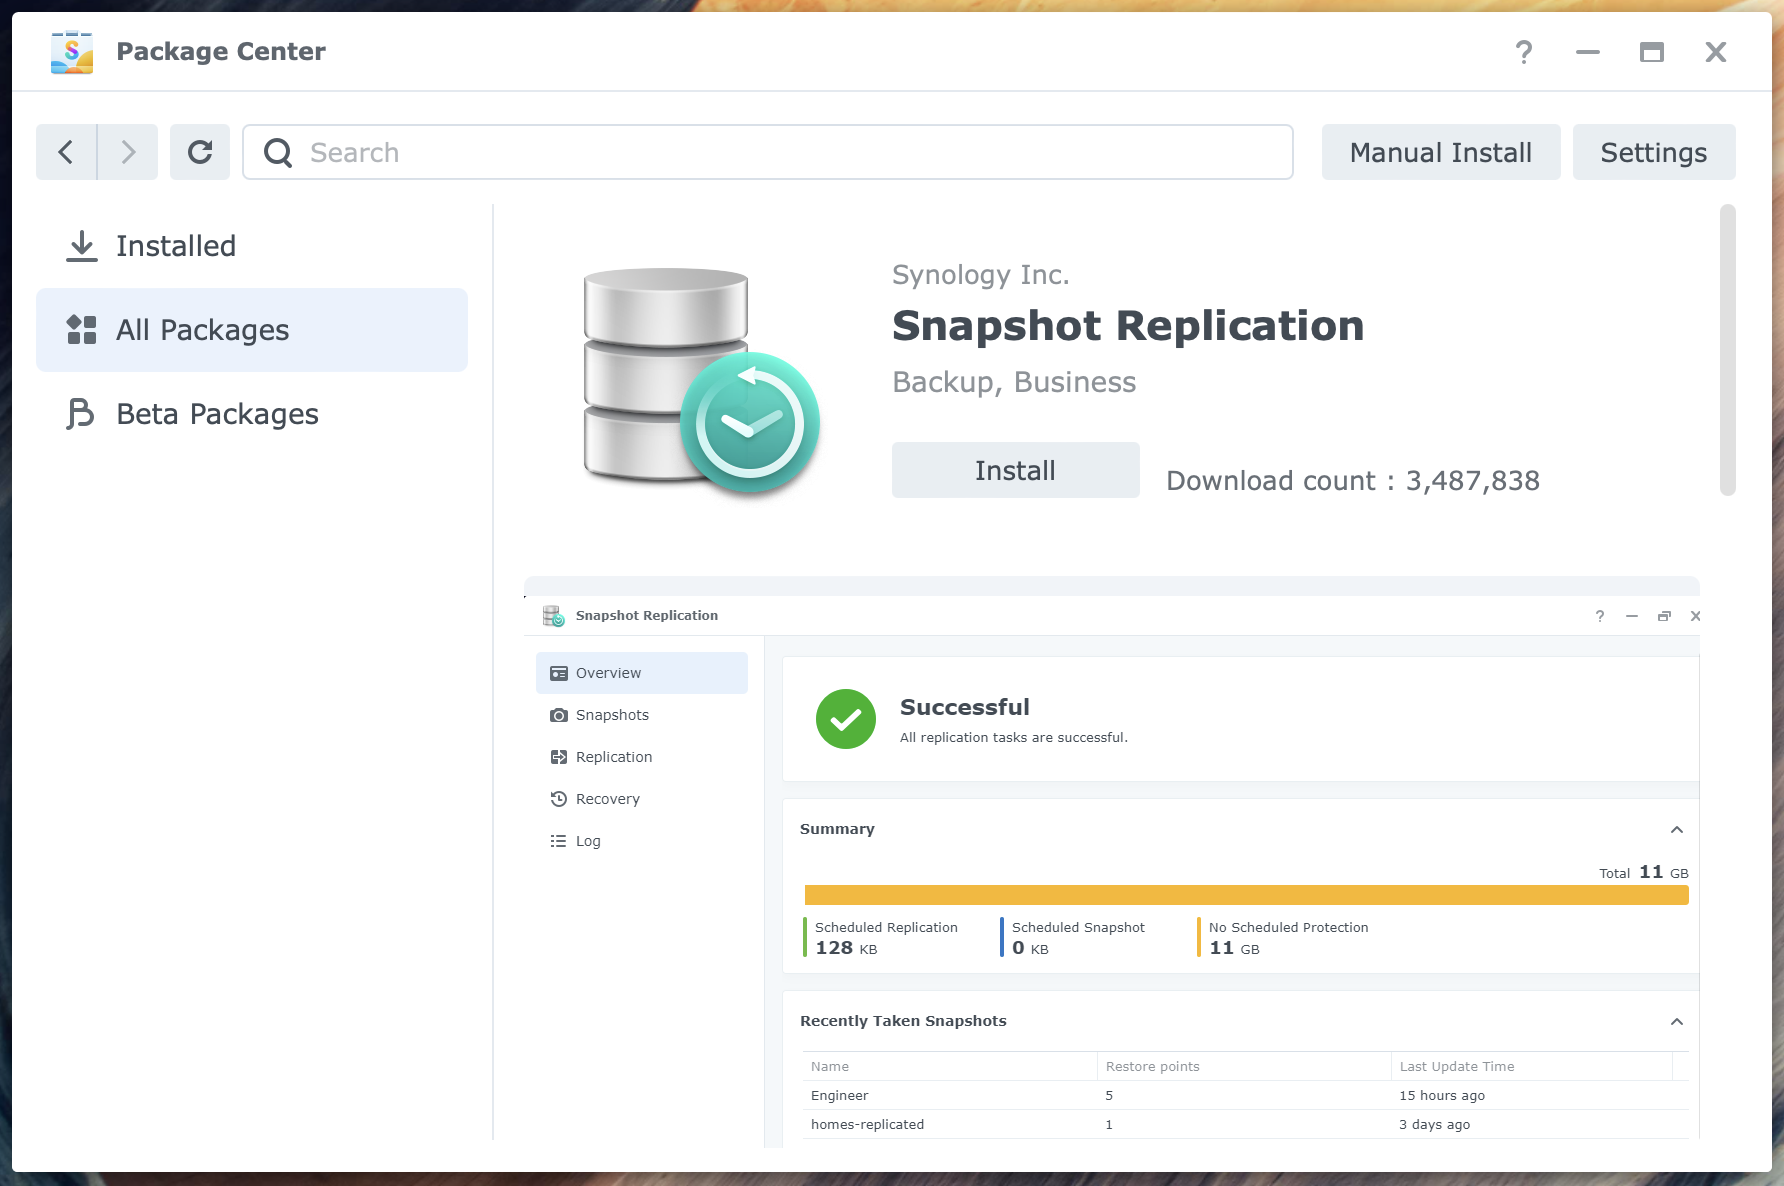
Next, in addition to the snapshots taken and stored in the #snapshots subfolder of the shared folder, you can replicate snapshots for better data security. Replicate to either a local or remote destination.
A local replica is a shared folder named after the original shared folder plus a suffix like -1. A remote replica has the same name as the originating shared folder. A replica is always a read-only shared folder.
Thanks for reading
This post is donation-ware, and I made it to help you. Please consider leaving a comment or even buying me a coffee if it did. I will be eternally grateful.
Paul Steunebrink / Storage Alchemist
