Using Auto Block is an essential cornerstone of hardening your Synology NAS. Auto Block is an easy and effective way to protect your NAS against brute-force login attacks. Auto Block monitors logins and lets you define a threshold for blocking the originating host to prevent further login attempts.
Using Auto Block On Synology NAS
In DSM, in Control Panel, you find a feature called Auto Block. What does Auto Block do, and how does it relate to the firewall and other security features?
Purpose
Auto Block prevents so-called brute force attacks of repetitive automated login attempts within a short timeframe. It is relatively easy to set up, and its use is highly recommended.
How it works
With Auto Block, you can set a threshold for the number of failed login attempts within a specific timeframe. Auto Block counts successive failed login attempts and measures the period these events occur.
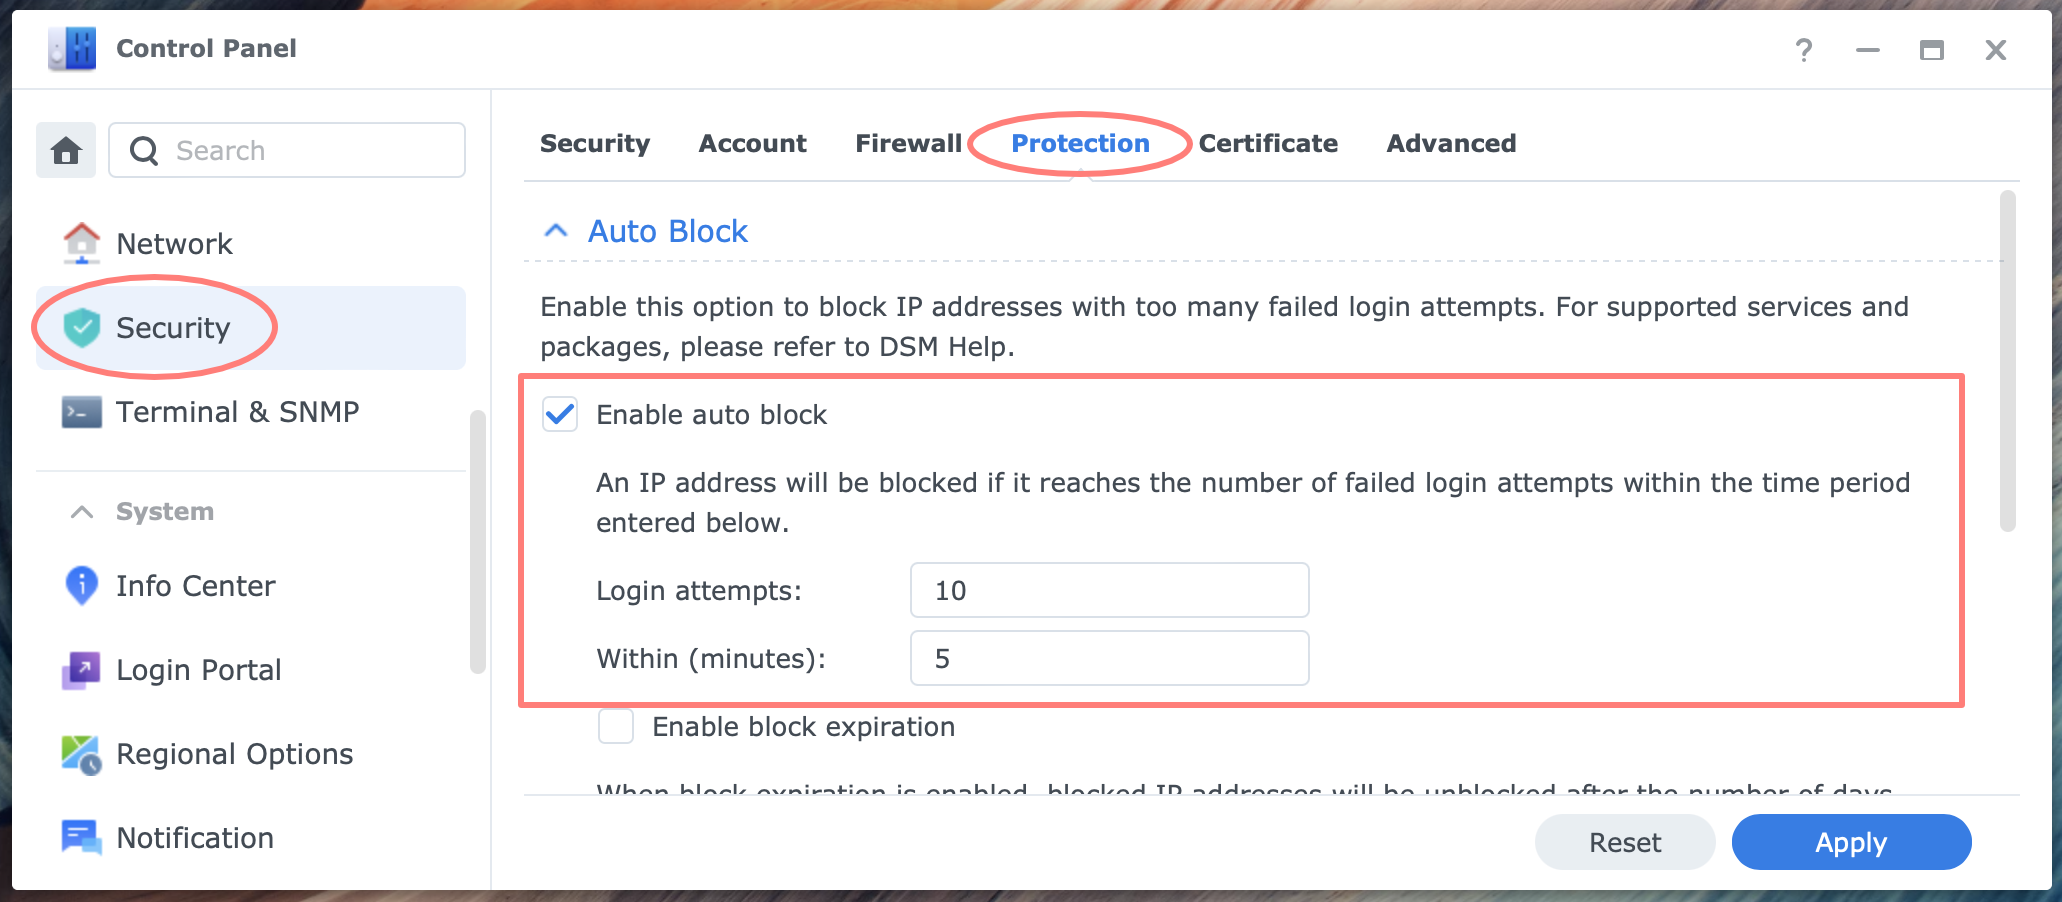
When the predefined threshold is met, the host’s IP address that initiated these attempts is blocked. The blockade can be temporary or permanent.
Allow And Block Lists
Besides enforcing a login threshold, Auto Block works with two lists of IP addresses, the Allow and the Block Lists. You can use either one or both. Note that there is an import and export feature for both lists. This helps during the deployment of a new NAS.
Allow List
Any IP address on the Allow List will never be blocked. Including an IP address in this list effectively disables Auto Block for that IP address. You typically allow local IP addresses as these are considered safe. You can enable individual addresses, a subnet, or a range of addresses.
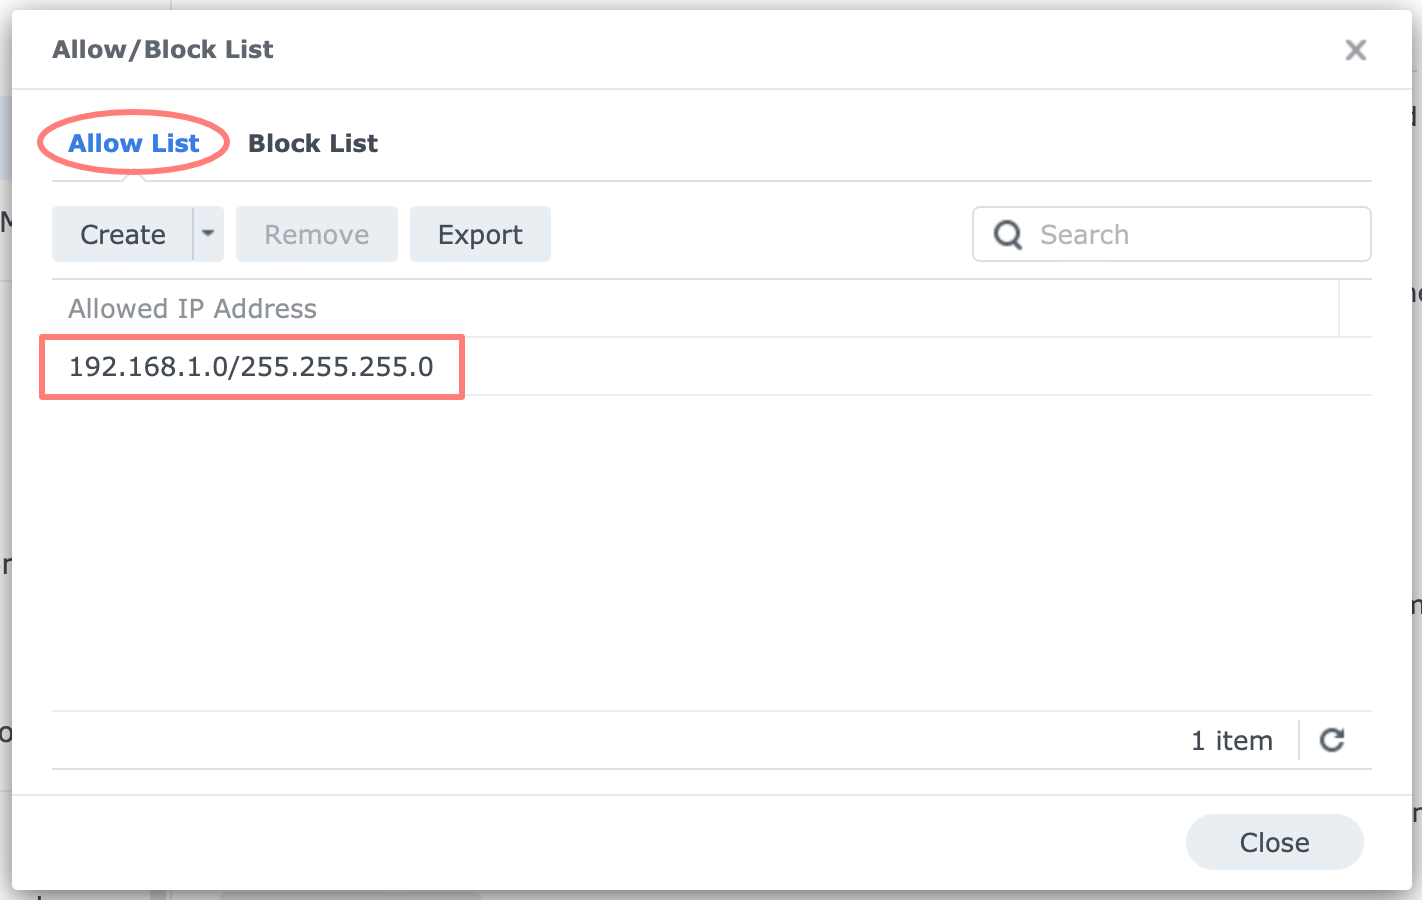
Note that if you log in via external access, the source IP address may be local or not, depending on the type of external access. This is important to consider for two reasons.
Assume you log in to your NAS via a DDNS with port forwarding. The IP address the NAS sees is typically the external IP address of the router that you use at your end. In other words, if you log in via DDNS to the office NAS from home, your home router IP address is the address you log in from. By adding your home router’s address to the Allow List, you prevent being blocked when you log in from home.
When you log in via a VPN server in your local network, your NAS might see a local IP address as the location from which you log in. By including your local IP address range in the Allow List, you effectively disabled Auto Block for VPN connections.
On other occasions, the NAS might see the VPN server’s internal address range, for example, 10.8.0.x/24, as the originating address. If that is the case, consider adding that range to the Allow List in Auto Block.
Block List
When the Auto Block threshold is met after successive failed login attempts, the IP address is blocked and put on the Block List. Hosts on the Block List cannot log in.
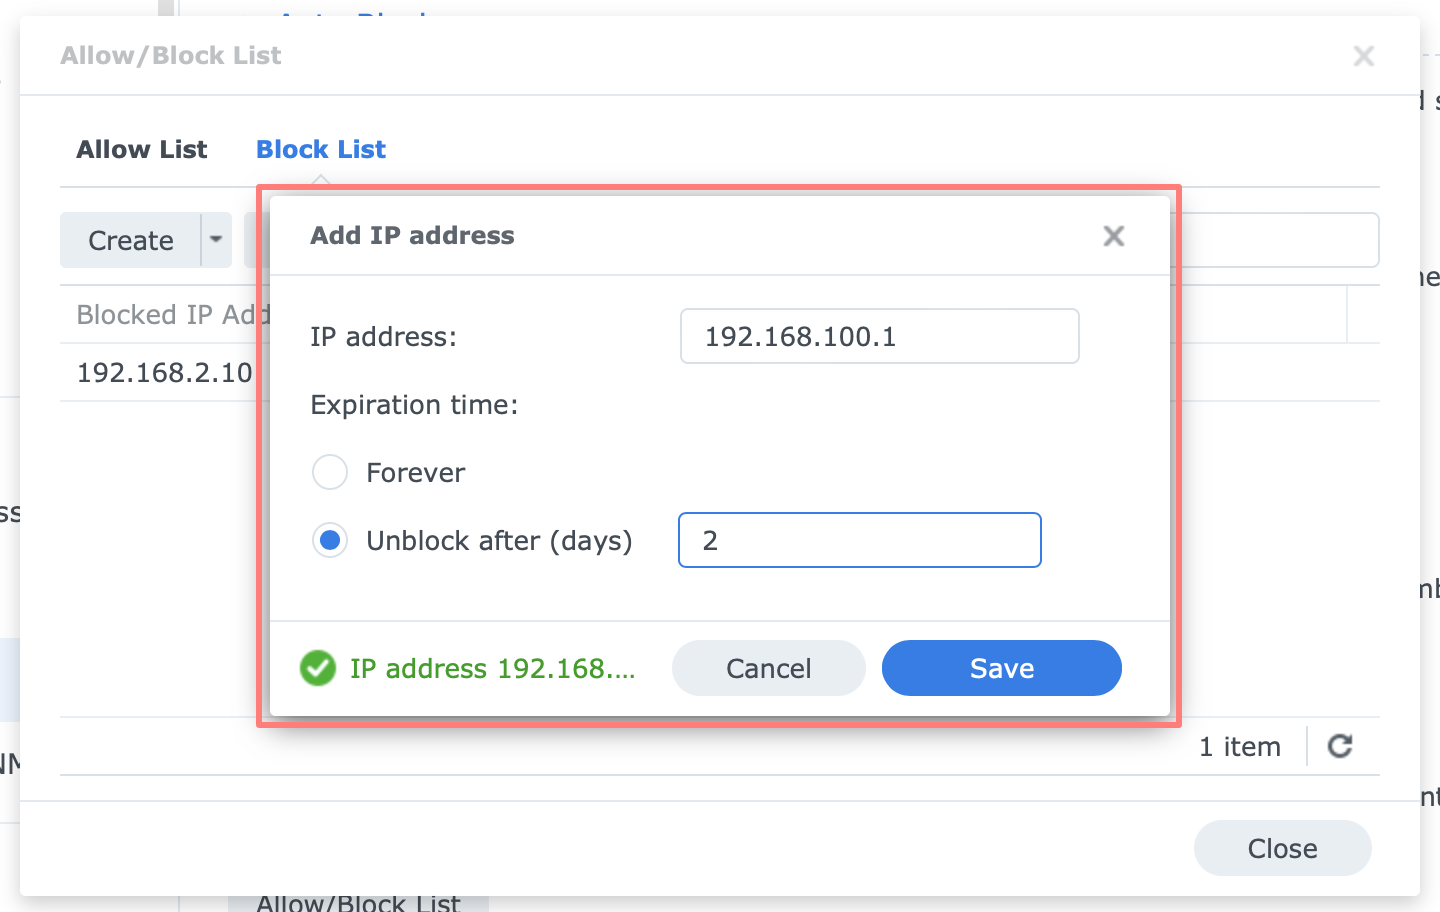
You can manually populate the Block List with known hosts that previously showed malicious login behavior. There is a maximum of about 80,000 hosts on the list. You can set an expiration time per IP address or block it forever.
Locking Yourself Out
Auto Block as a preventive security measure has one potential disadvantage: you lock yourself out. After a few failed login attempts, you get the infamous message that you can no longer log in.
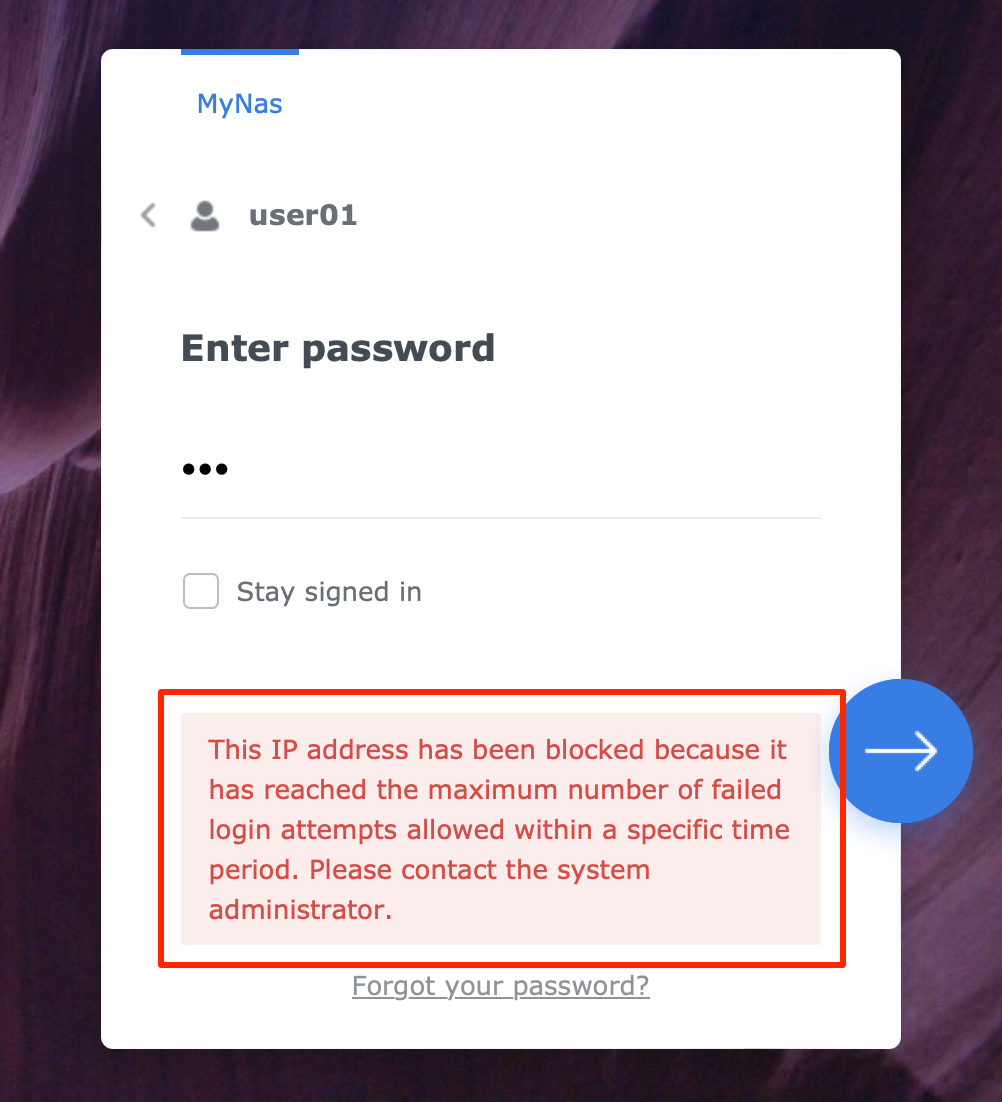
There are several ways to prevent this and overcome the issue.
Preventing lockout
Using a password manager can minimize the chance of a failed login attempt. I strongly advocate this tool since it allows you to create strong and unique passwords for every other login.
If you are unfamiliar with a password manager, it saves the name and password combination with the URL it is used for. This way, failed logins are a thing of the past.
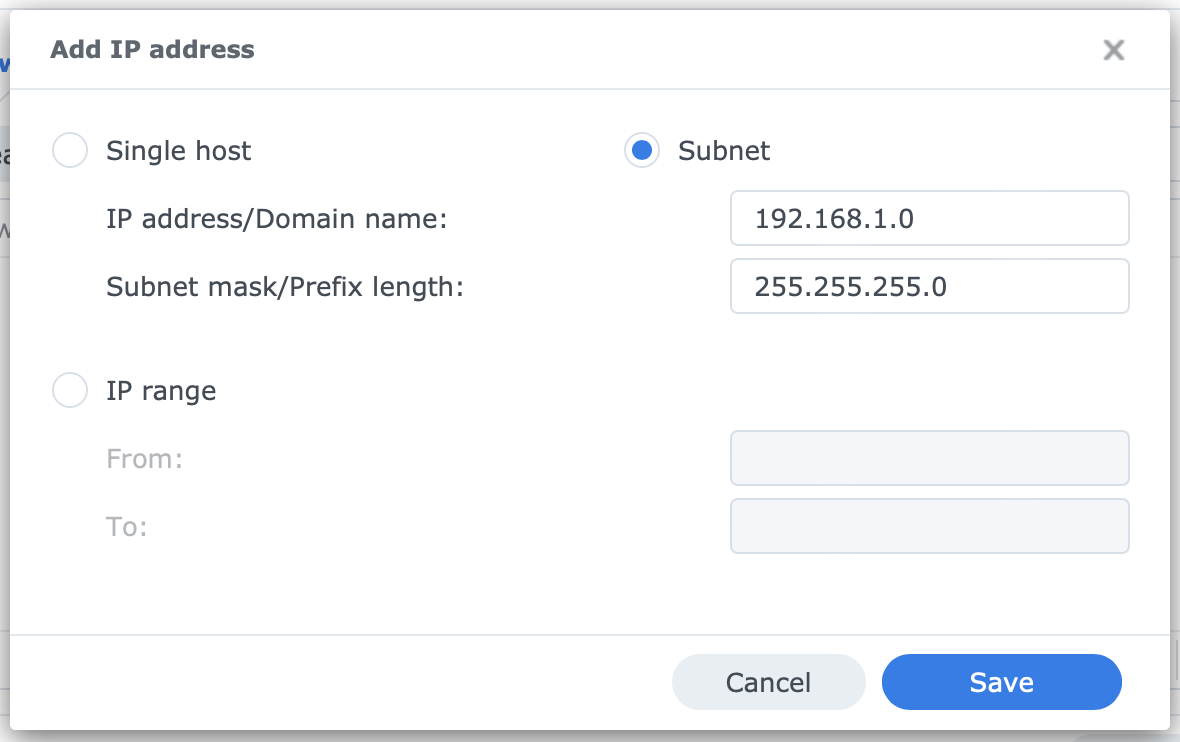
A second step is to configure the Allow List of Auto Block. A best practice is to allow the local subnet. This may not work if you log in via external access. See my remarks below.
Overcoming lockout
When blocked, connect from a different device if logged in locally. The other device has a different IP address and is not blocked. You can also use the same computer but switch from Ethernet to WiFi or vice versa. A different network interface has another IP address that is not (yet) blocked.
This might not work if you log in remotely from a certain location because all devices at that location might have the same NAS originating address. Change the way you connect to the internet and try again.
For example, instead of using a broadband internet connection, use your smartphone as a hot spot and connect your computer to the smartphone. The NAS will notice a different originating IP address than the one blocked.
If someone with an administrator account can log in, he can remove the blocked address from the Block List. If that fails, you can wait until the block expires. This amount of patience won’t help if you are in a hurry or the block does not expire.
Last, you can do a mode-one reset on the NAS. This will disable Auto Block. However, you need (someone with) physical access to the NAS to press the reset button.
Fix the Block List
Except when the block expires, you should probably remove it when you can log in alternatively, as mentioned above.
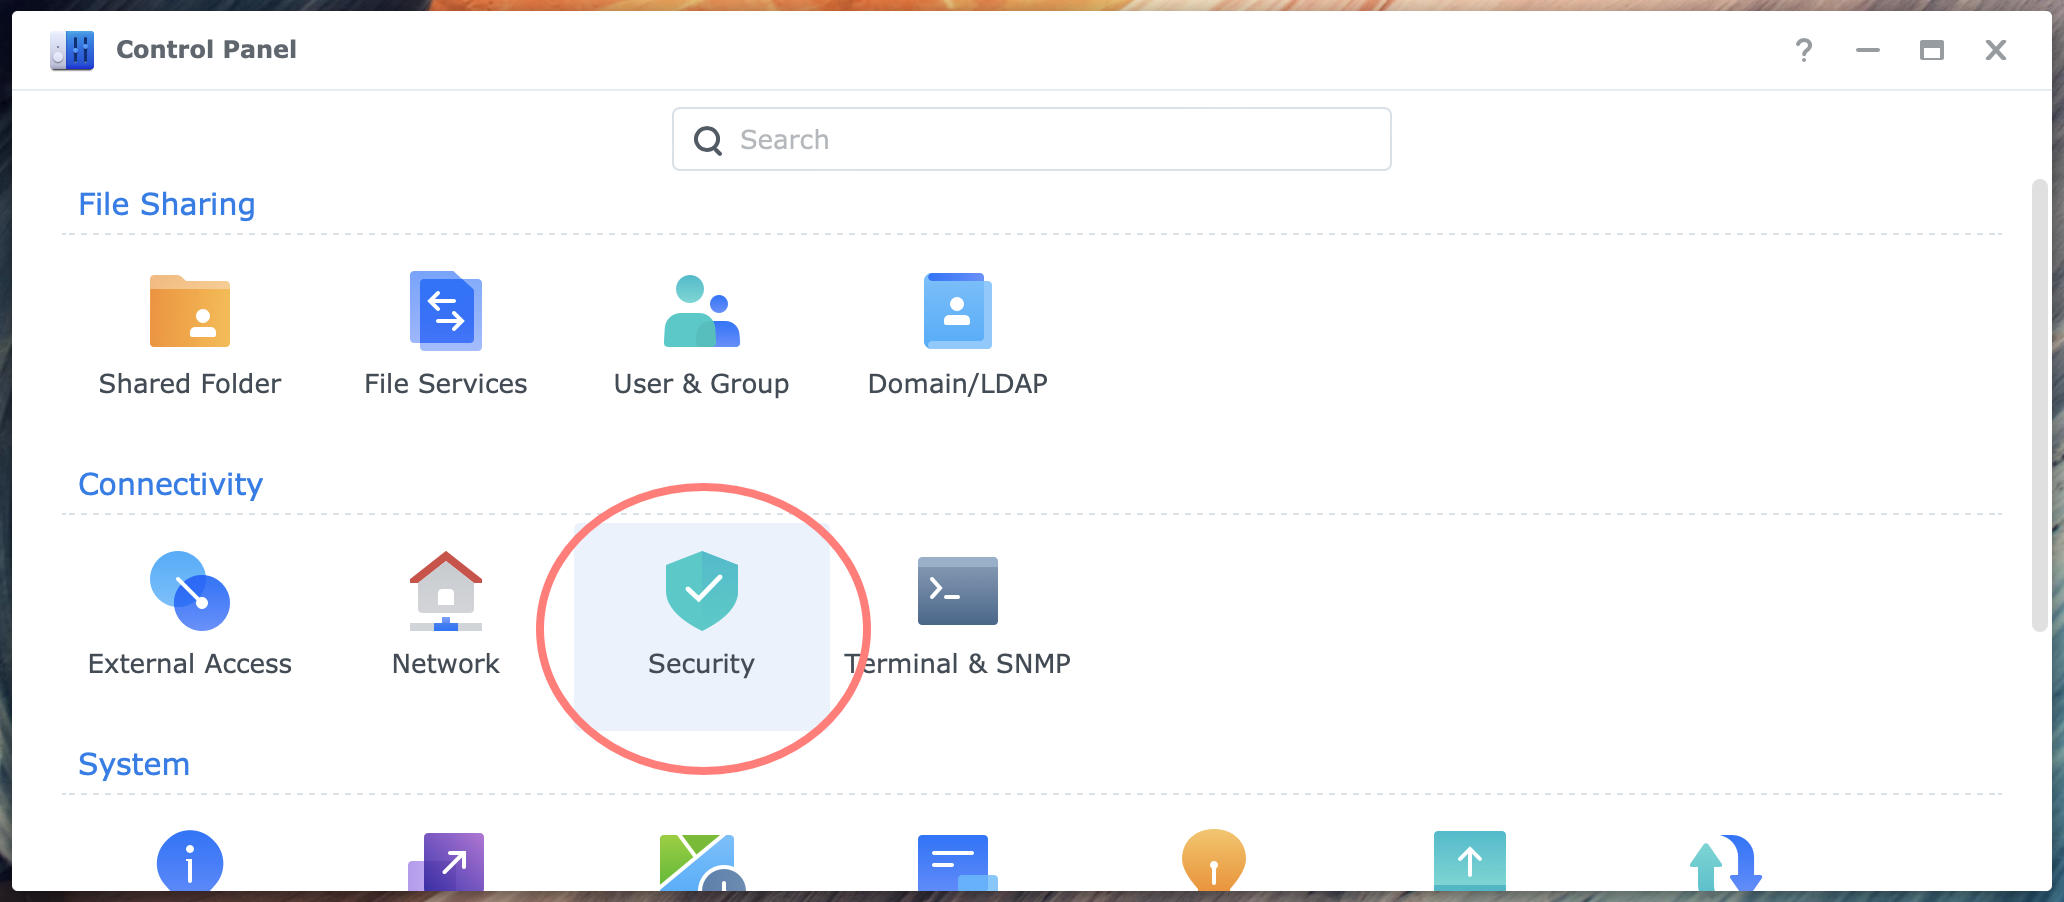
In the Control Panel > Security > Protection tab, look in the Auto Block section for the Allow/Block List button. In the dialog that opens, select the second tab, Block List. If you know the blocked IP address, use the search feature.
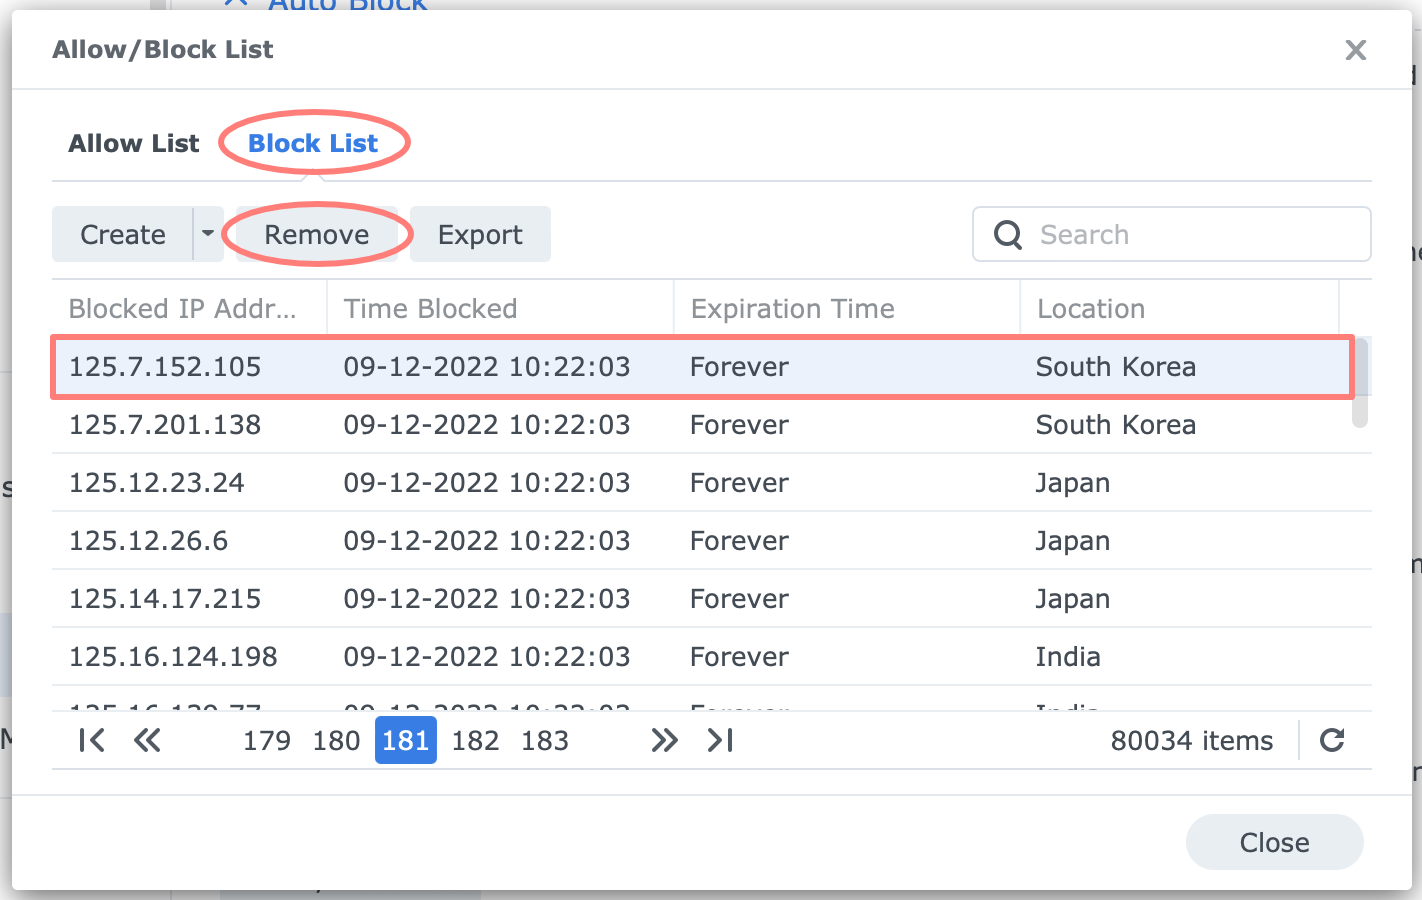
You can find the IP address in the network settings of the device you made failed login attempts with or in the notification you received after the address was blocked. If you do not know the IP address but were blocked recently, you will find the blocked address at the end of the Block List.
Select the IP address to unlock and click on the Remove button.
Notifications
DSM can send you a notification when an IP address is blocked. You can set up notifications from Control Panel > Notifications. To set up notifications, please refer to How To Configure Email Notifications.
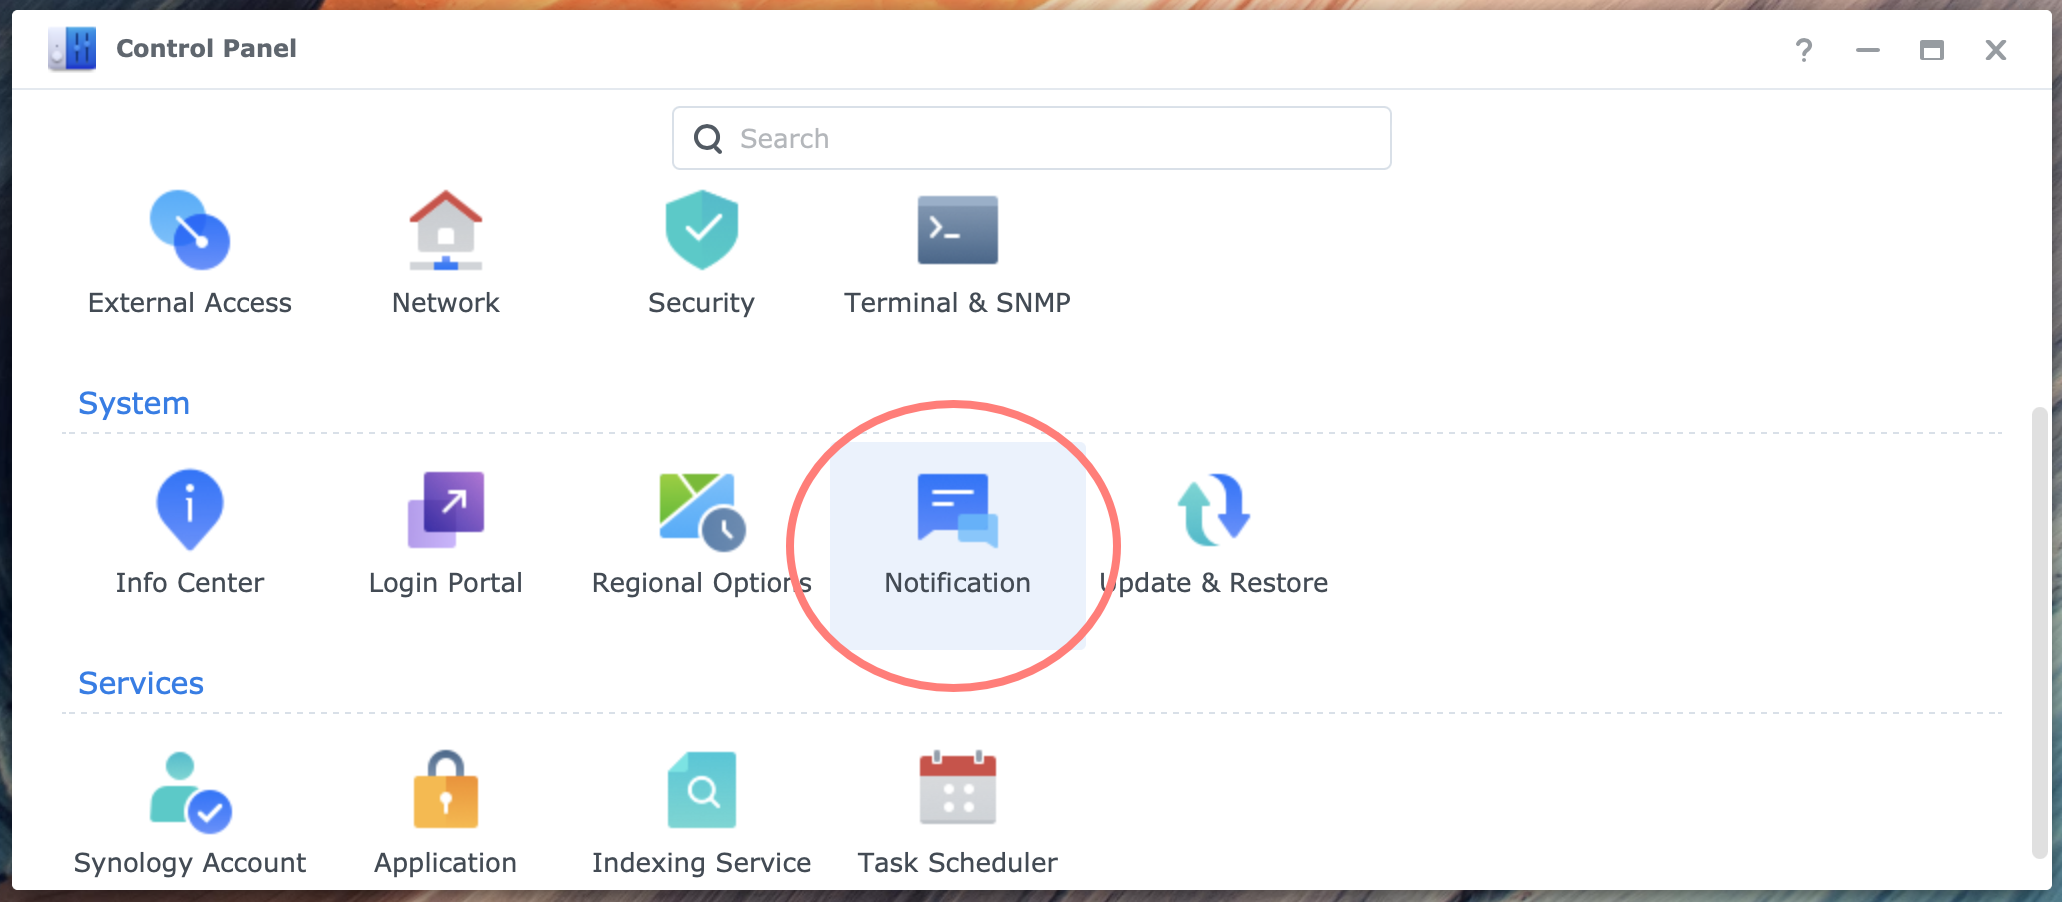
When an IP address is blocked, you get a mail with the message:
"The IP address [IP_address] experienced 1 failed attempts when attempting to log in to DSM running on MyNas within 1 minutes, and was blocked at 26-03-2024 20:13"
At the login screen, it says:
"This IP address has been blocked because it has reached the maximum number of failed login attempts..."
In Log Center > Logs > General log you find an event with status Warning that says:
"Host [IP_address] was blocked via [DSM]."
Configuring Auto Block
In DSM 7, you can find Auto Block in Control Panel > Security > Protection tab. The threshold is defaulted to 10 login attempts in 5 minutes without expiration.
Overview of settings
The settings are:
- Enable auto block [enabled/disabled; default: enabled]
- Login attempts [range 1-9999; default: 10; whole numbers]
- Within (minutes)
- range 1-9999999
- default: 5
- whole numbers
- Enable block expiration [enabled/disabled; default: disabled]
- Unblock after (days)
- range 1-999
- default: 0
- whole numbers]
- Allow/Block List [button]
- Allow List
- Create > Add/Import List
- Block List
- Create > Add/Import List
- Allow List
My preferred settings
Because I use a password manager and never have to deal with failed login attempts, I have a low threshold for blocking an IP address without expiration.
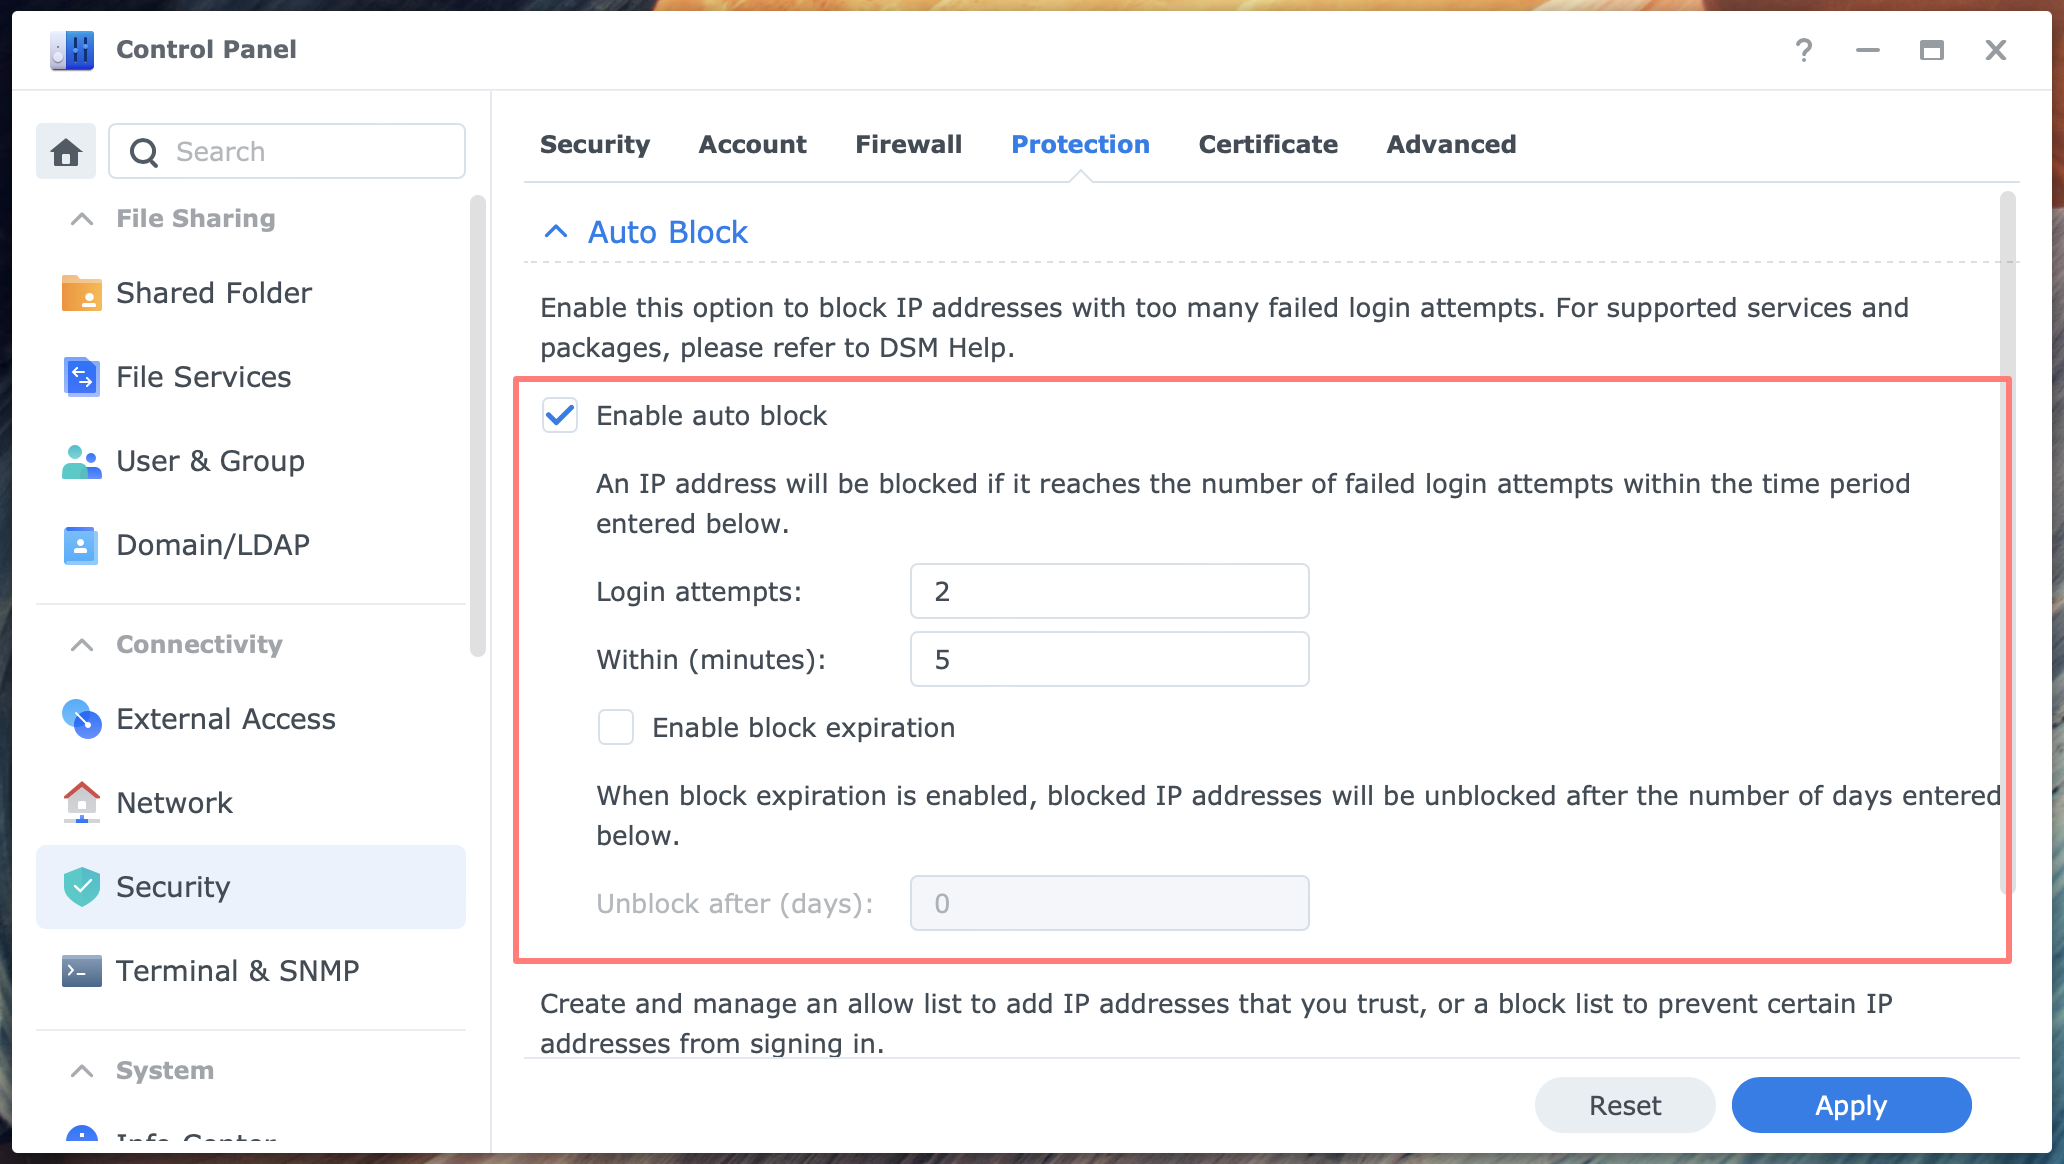
Although I do not suffer regular failed login attempts, due to changing the default DSM ports, I automatically build my personal Block List.
In the Allow List, I enter the local IP address range called the local subnet.
Other Security Measures
Several other security measures can be used in conjunction with Auto Block. Consider each measure as a piece of the puzzle. Combined, they provide the best possible protection for your data on your NAS.
Security Advisor
Run the Security Advisor tool to analyze and fix potential issues quickly. Please reference Using Security Advisor On Synology NAS for details.
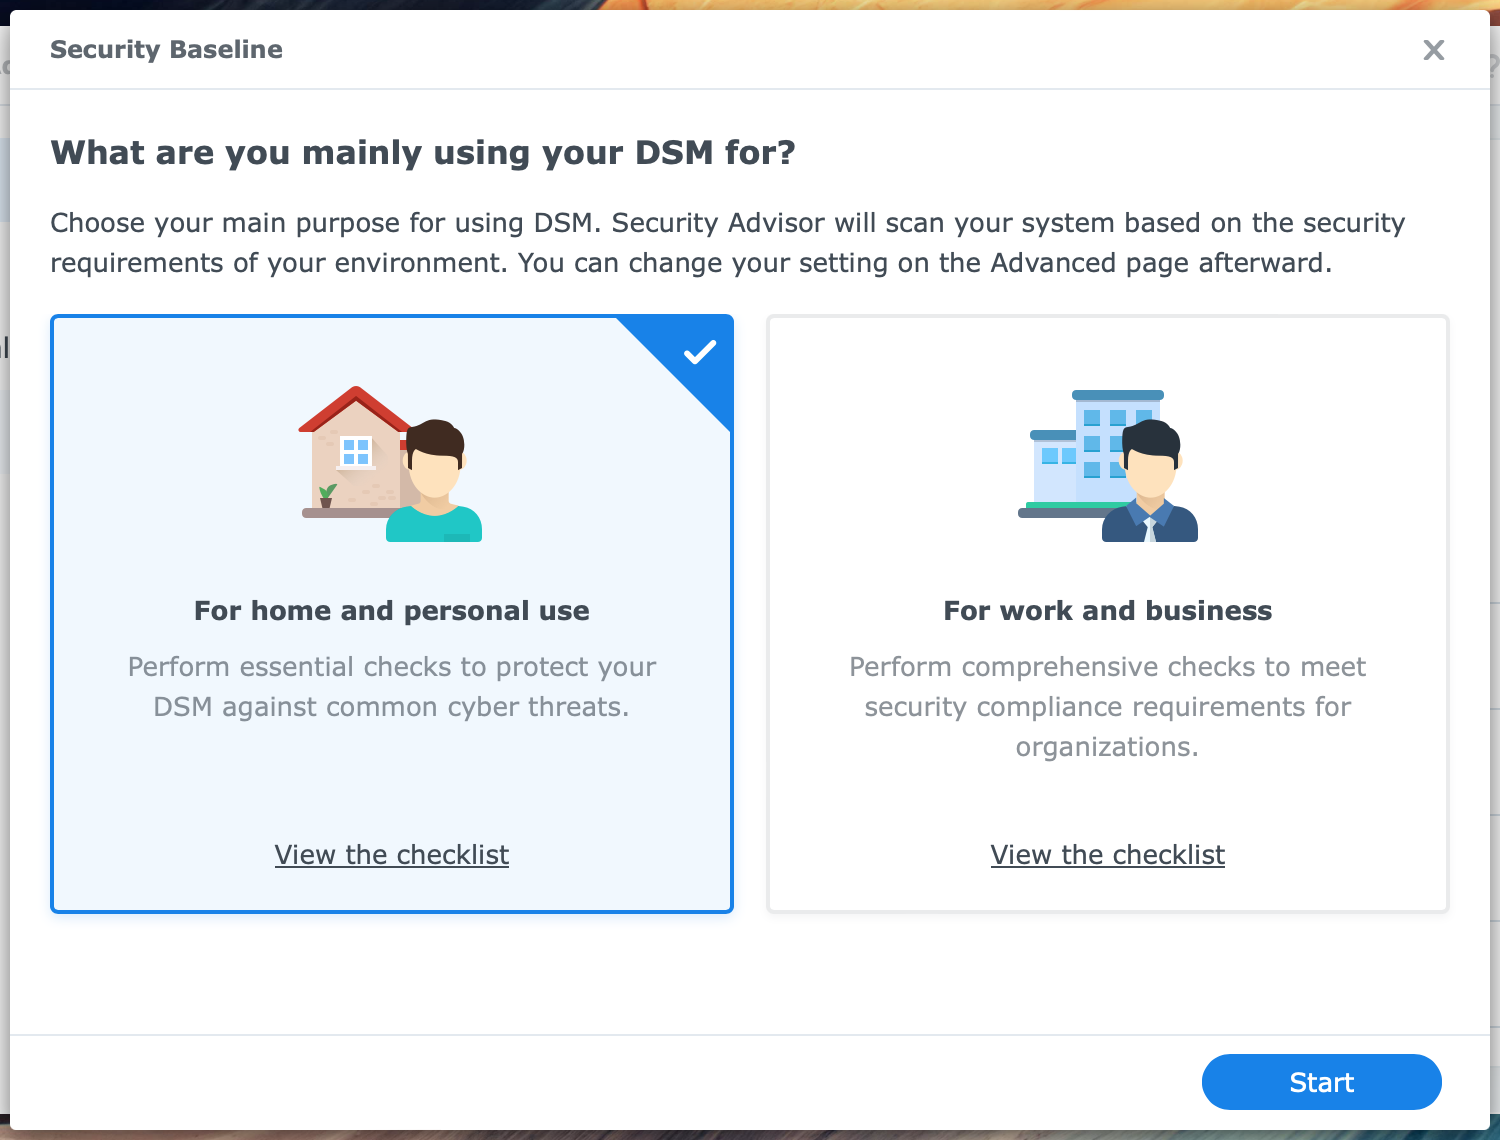
This will cover deactivating the default admin account and changing default DSM ports.
Firewall
Where Auto Block monitors login attempts, the firewall does a different job. It determines whether someone or a computer with a specific IP address can access a service in the NAS in the first place. In other words, the firewall is your first line of defense, and Auto Block comes next.
If you experience repeated login attempts from certain countries, you can add a deny rule for them and place it at the top of your firewall rules.
Strong authentication
All users should use strong passwords, and administrators should use two-factor authentication.
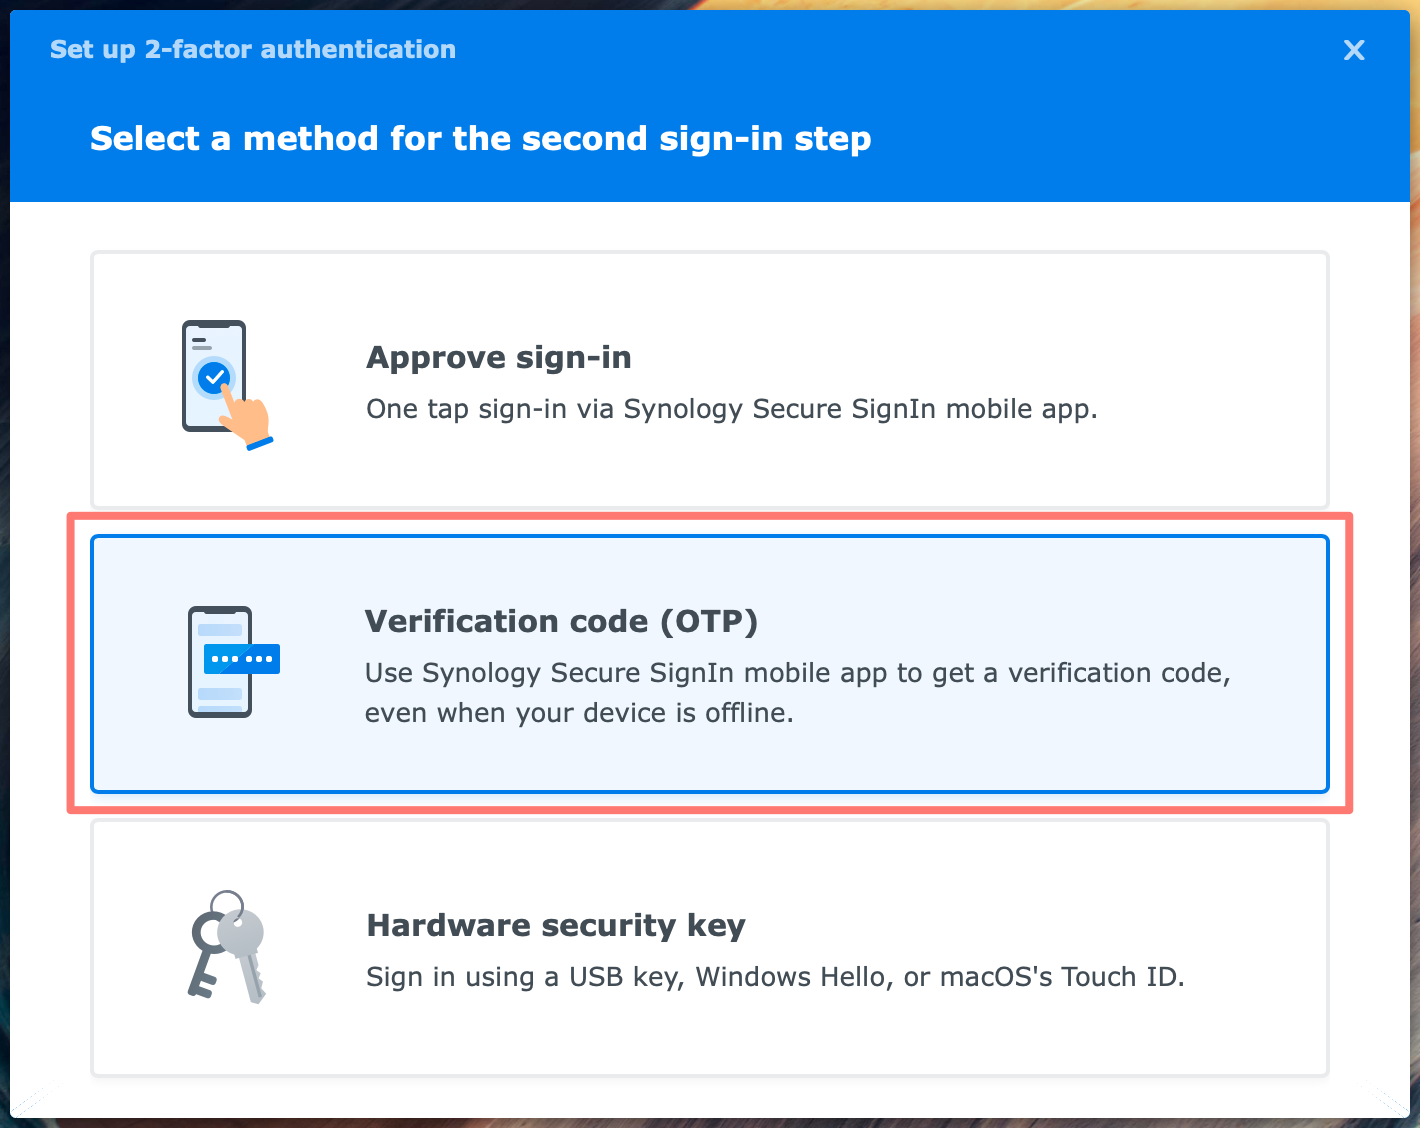
For more details, please refer to How To Enable 2-Factor Authentication.
Backup
It may not surprise you, but having a good backup that you can rely on should be number one on your data security measures.
Thanks for reading
This post is donation-ware, and I made it to help you. Please consider leaving a comment or even buying me a coffee if it did. I will be eternally grateful.
Paul Steunebrink / Storage Alchemist
