The NAS configuration is invisible but contains invaluable data for your system-level configuration. For the continuity of the NAS service, it is vital that you periodically create a backup after configuration changes: the configuration backup
Using Configuration Backup With Synology NAS
The fact that you can back up the NAS configuration assumes there is one, and it might be sensible to save it to restore it when necessary.
So what is this configuration backup about, why should you make that backup, and how do you make such a backup? And while we are on it, how and when do you restore such a backup?
Background
On a NAS, there are three types of data.
- data in shared folders
- application data
- configuration data
With a configuration backup, you can safeguard the configuration data about the NAS. Configuration data is stored in the NAS’s firmware and not on the disks in any partition. Removing the disk and deleting all storage pools does not wipe the configuration data. That is great but makes users less aware of its existence.
When do you use it?
For example, when you replace a NAS and plan to rebuild it according to the previous model, start with the configuration backup for users, groups, shared folders, and permissions. Next, restore the data in the shared folders and the applications along with application data.
In another scenario, where you had to reset your Synology NAS and build it up from scratch, a configuration backup will save you much time.
Creating A Configuration Backup
In DSM 6, there were two ways of making a configuration backup, and DSM 7 added a third and fully automated option.
- upload to Synology account
- export to computer
- backup with Hyper Backup
Let’s look at each option in more detail.
Upload to Synology account
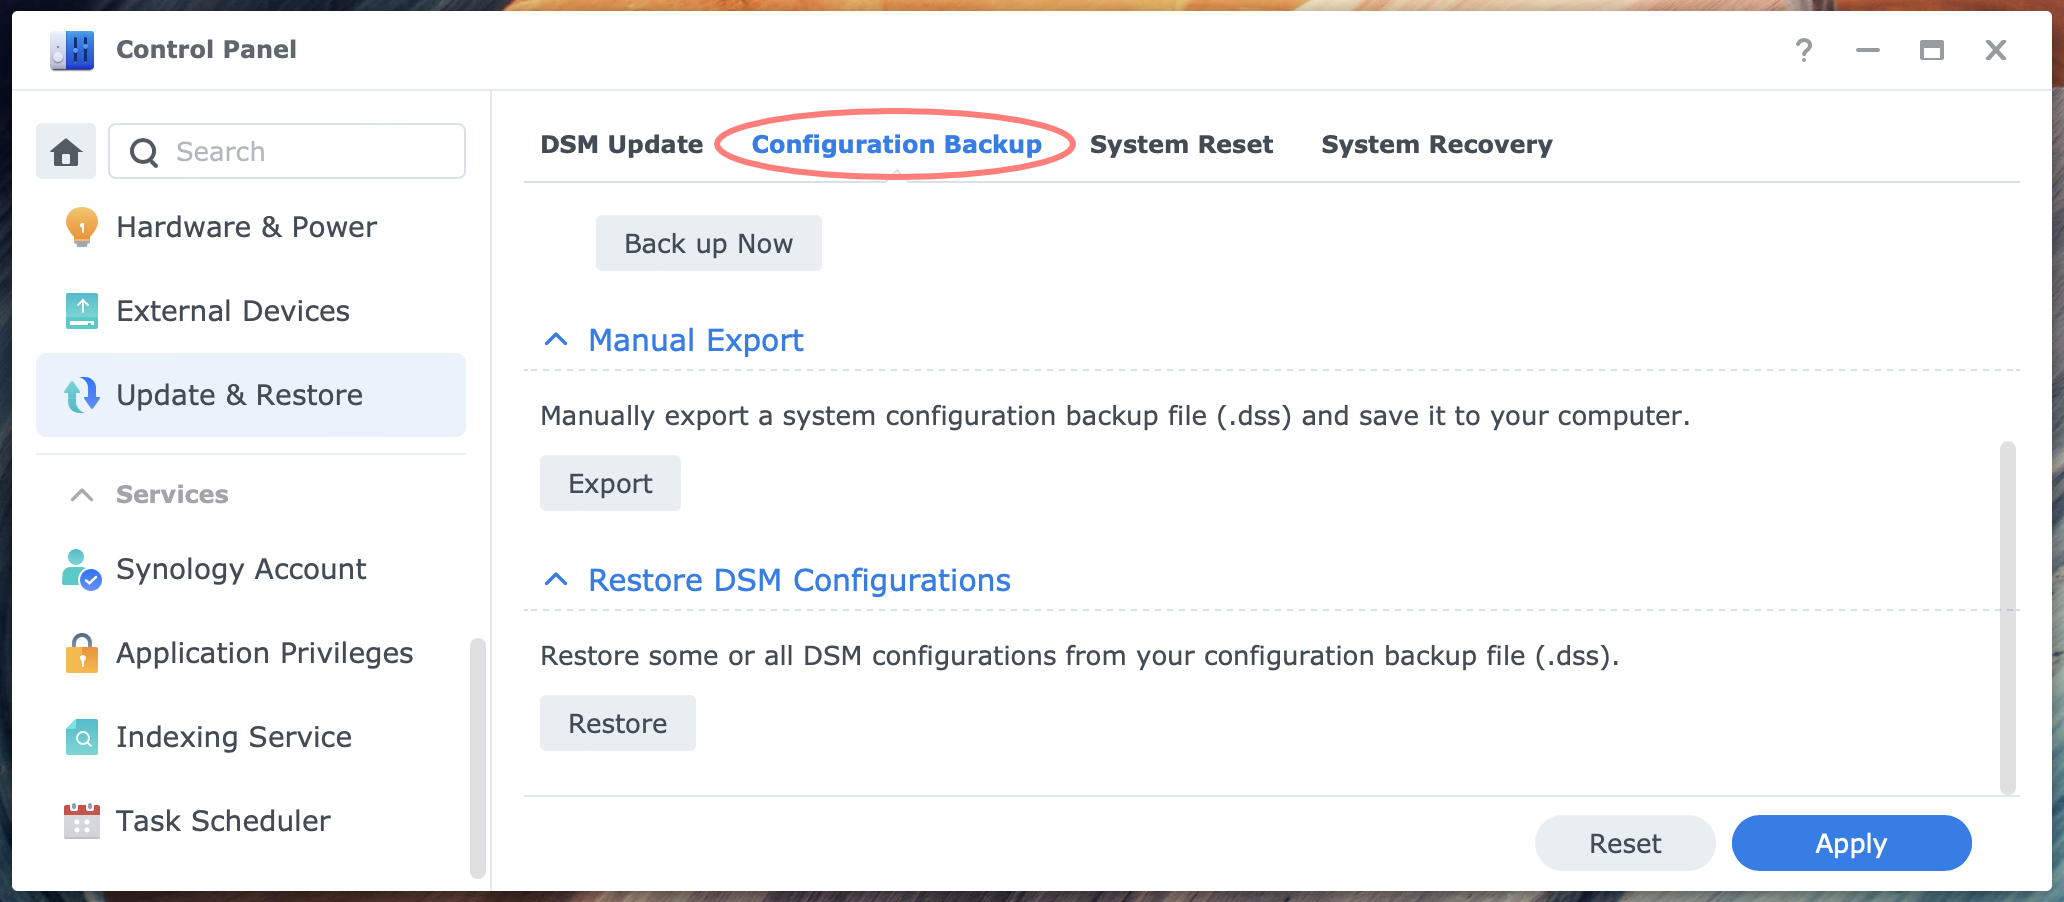
This is new in DSM 7. Log in to the DSM desktop and go to Control Panel > Update & Restore > Configuration Backup tab. Go to the Automatic Backup section. Mark the checkbox to Enable automatic DSM configuration backup. If your NAS has not yet been signed in with your Synology account, you are requested to do so.
Notice the Backup status of the last backup and whether it was successful. Synology saves multiple versions of your configuration backup in your account online.

The online backup is encrypted. You can choose between Auto encryption and Self-defined encryption. If you select the latter, enter a password for the encryption twice.
Confirm your selections with the Apply button below. You can make a backup with the Back up Now button or wait until the DSM initiates a backup. Note that changes in the DSM configuration trigger a backup.
Export to computer
Log in to the DSM desktop and go to Control Panel > Update & Restore > Configuration Backup tab. Go to the Manual Export section.
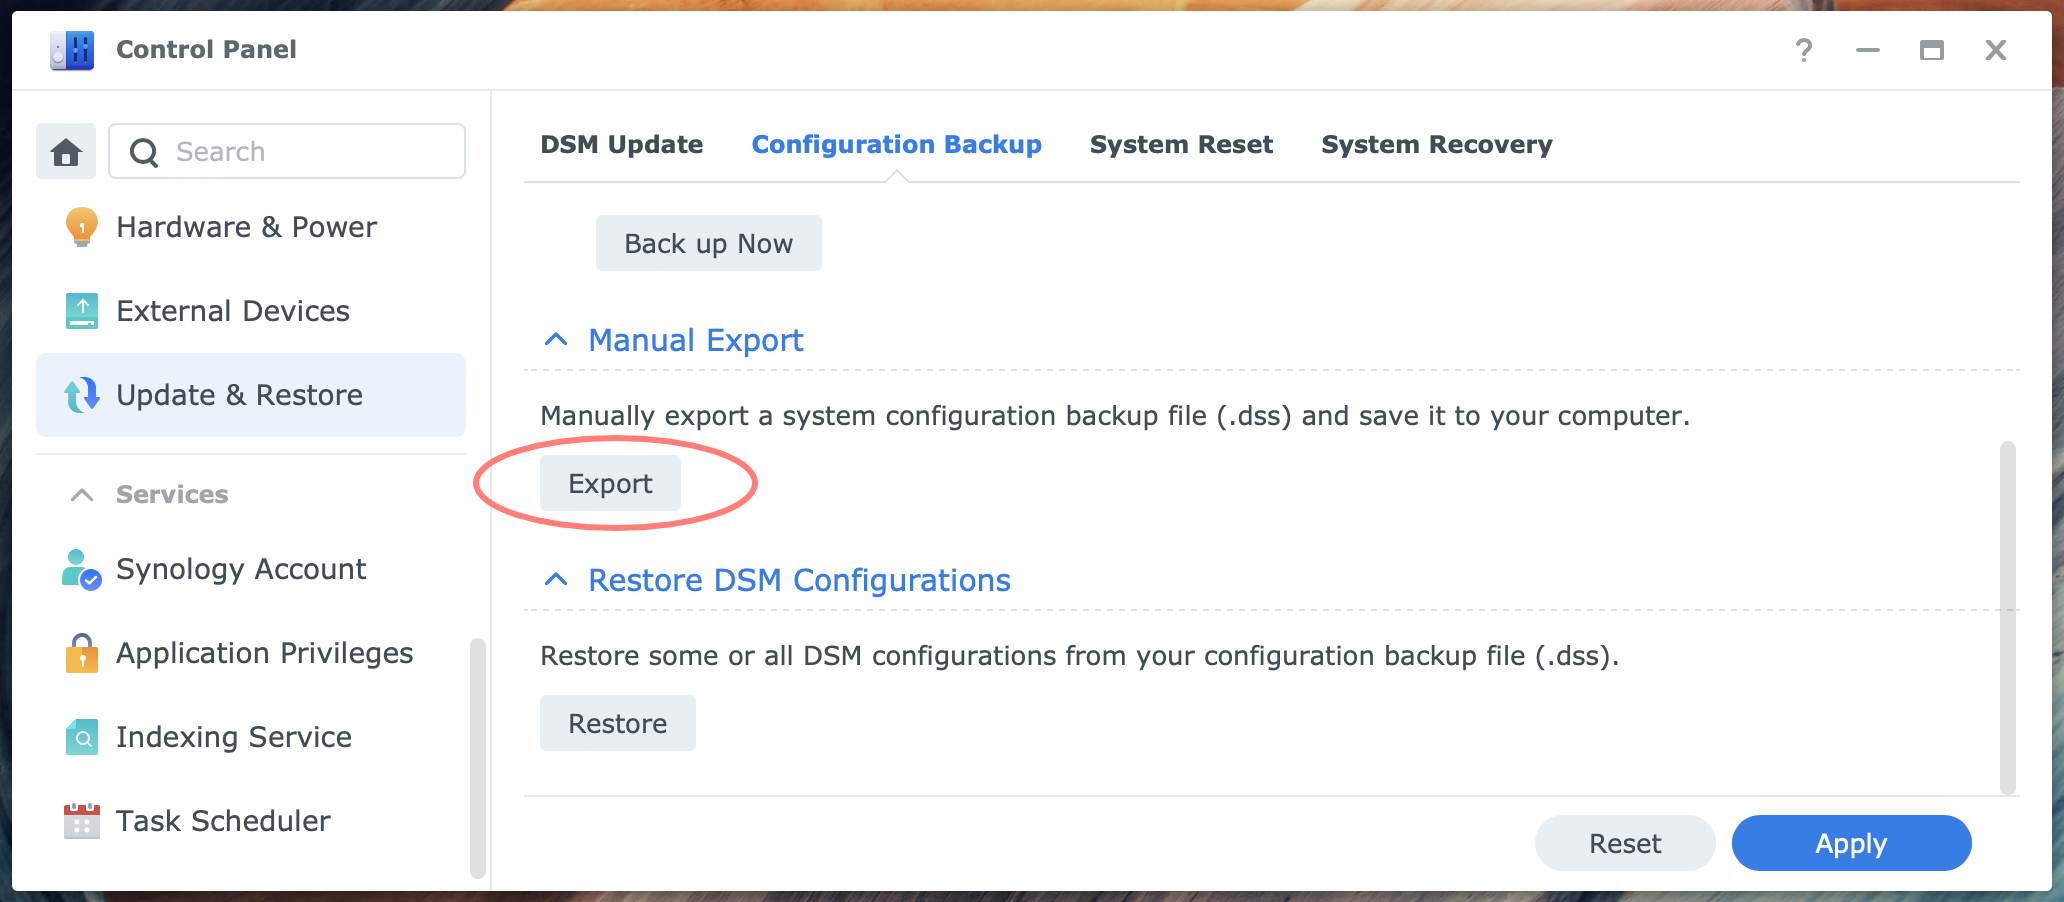
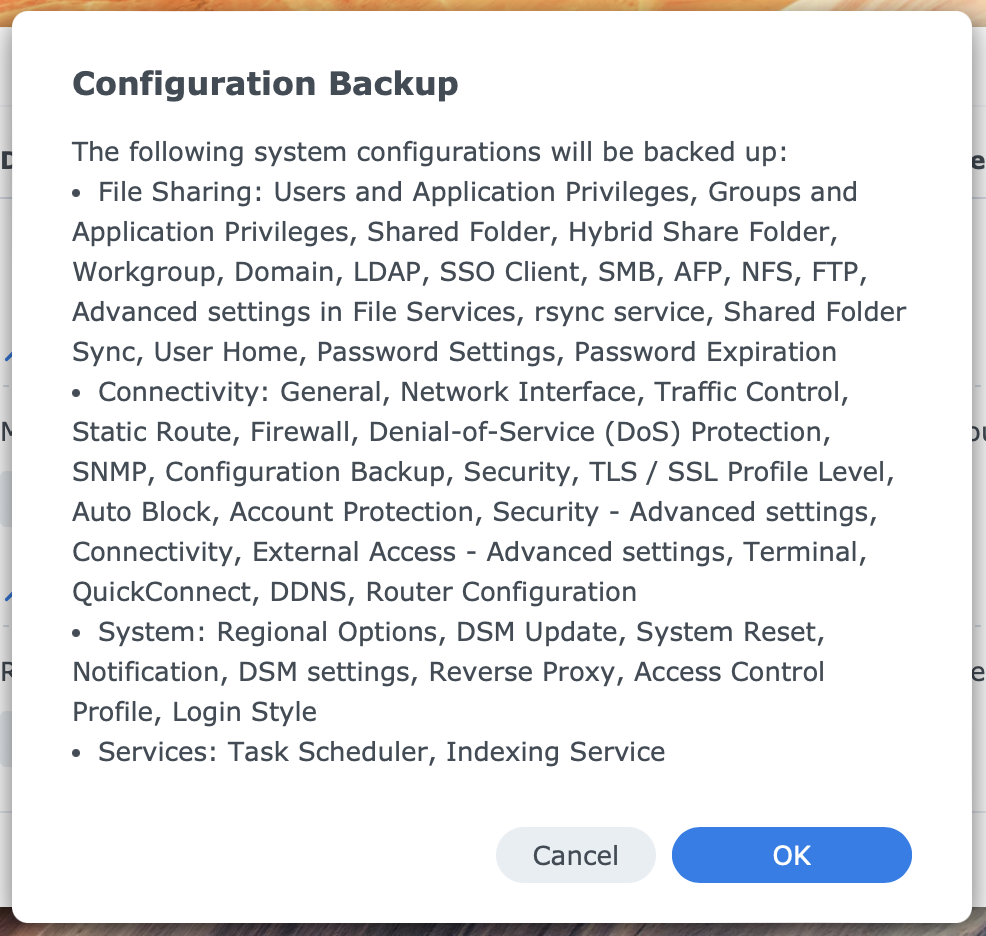
Click on the Export button. A message appears with all items that the configuration backup contains.
You will find a file with the .dss extension in your computer’s download folder. The file name format is server-name_date.dss.
Backup with Hyper Backup
With each data task, Hyper Backup automatically backs up the NAS configuration. Only when you start a restore from a backup will you notice a configuration backup, which you can enable or skip. See below for details on restoring a configuration backup via Hyper Backup.
Contents Of A Configuration Backup
The table below lists all items in a DSM 7.2 configuration backup. I noticed that the list can vary slightly depending on the version of DSM.
- Users, Groups, Shared Folders, Application Privileges
- Users and Application Privileges
- Groups and Application Privileges
- Shared Folder
- Hybrid Share Folder
- Workgroup, Domain, LDAP, SSO Client
- Workgroup, Domain, LDAP
- SSO Client
- File Sharing and Backup Services
- SMB
- AFP
- NFS
- FTP
- Advanced settings in File Services
- rsync service
- Shared Folder Sync
- Network-Related Settings (all sub settings are greyed out)
- General
- Network Interface
- Traffic Control
- Static Route
- Firewall
- Denial-of-Service (DoS) Protection
- Other Services
- User Home
- Password Settings
- Password Expiration
- SNMP
- Task Scheduler
- Regional Options
- DSM Update
- Configuration Backup
- System Reset
- Notification
- Security
- TLS / SSL Profile Level
- Auto Block
- Account Protection
- DSM settings
- Security – Advanced settings
- Connectivity
- External Access – Advanced settings
- Reverse Proxy
- Access Control Profile
- Login Style
- Terminal
- QuickConnect
- DDNS
- Router Configuration
- Indexing Service
Restore A Configuration
You restore the backup with the same application you made it with: Control Panel or Hyper Backup.
Restore from Control Panel
Log in to the DSM desktop and open Control Panel > Update & Restore > Configuration Backup tab > Restore DSM Configuration section.
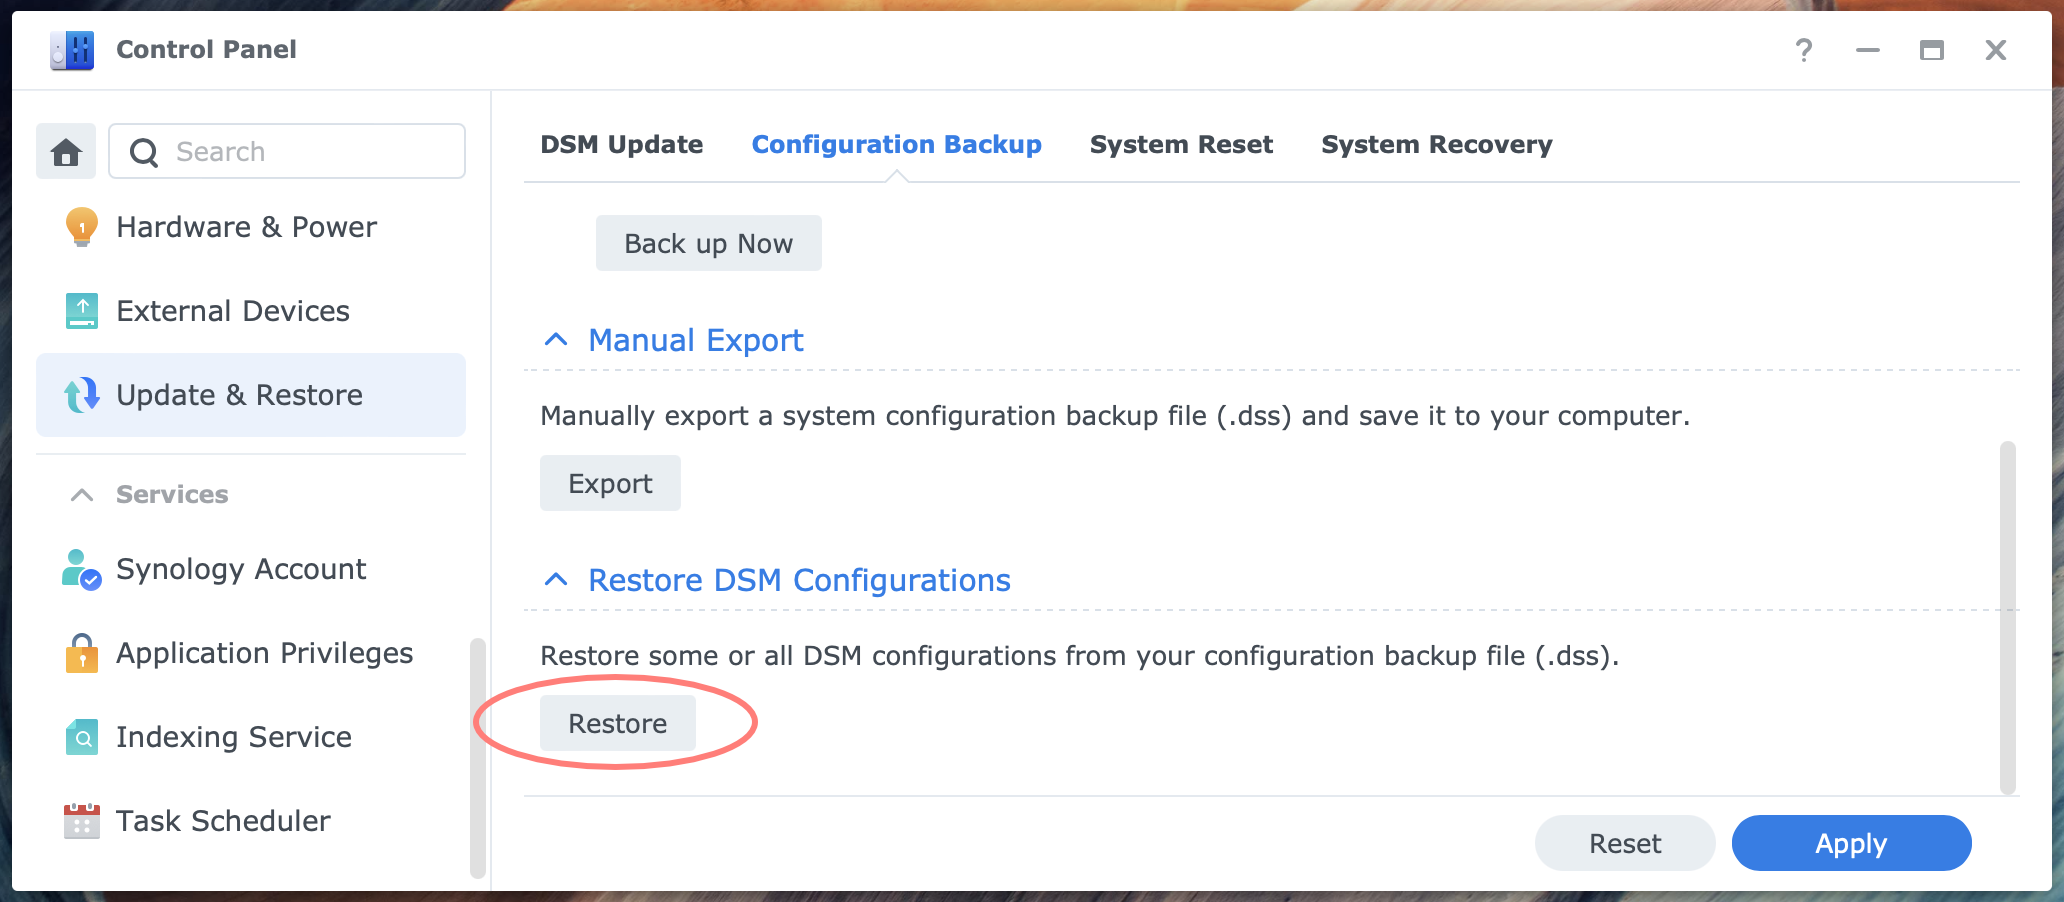
Click on the Restore button. Select a source:
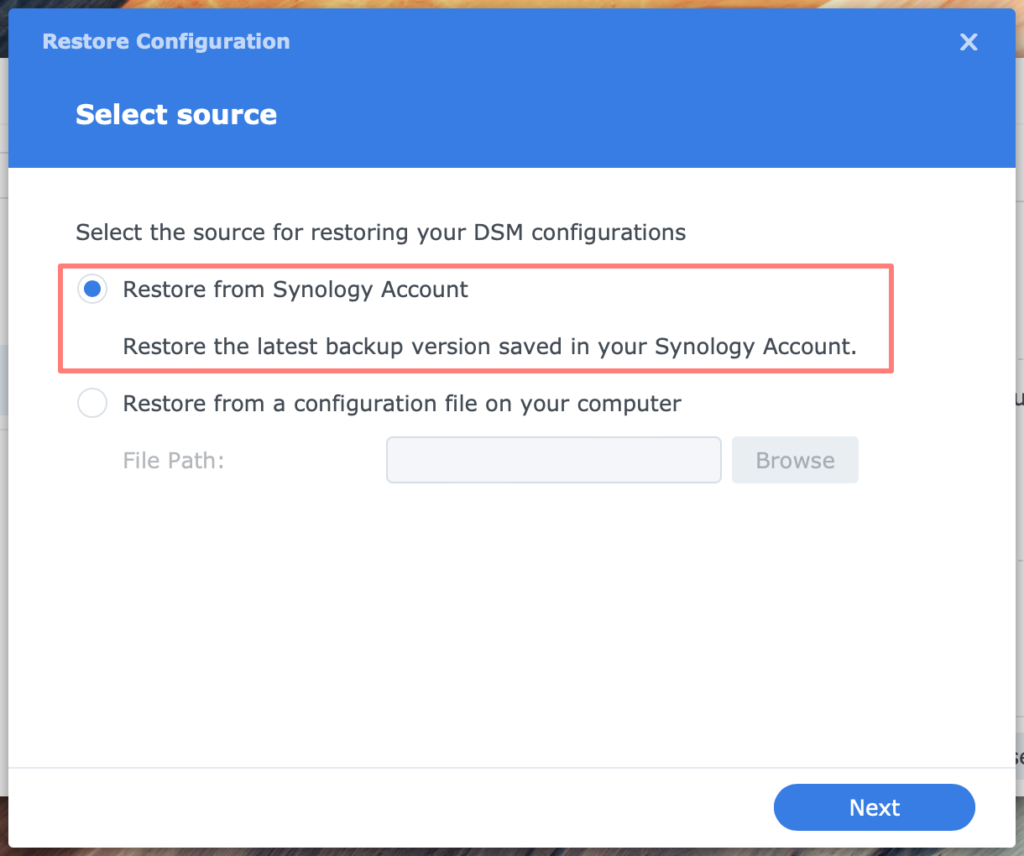
- Restore from Synology account
- select from a list of backups the version you would like to restore
- Restore from a configuration file on your computer
- enter a file path
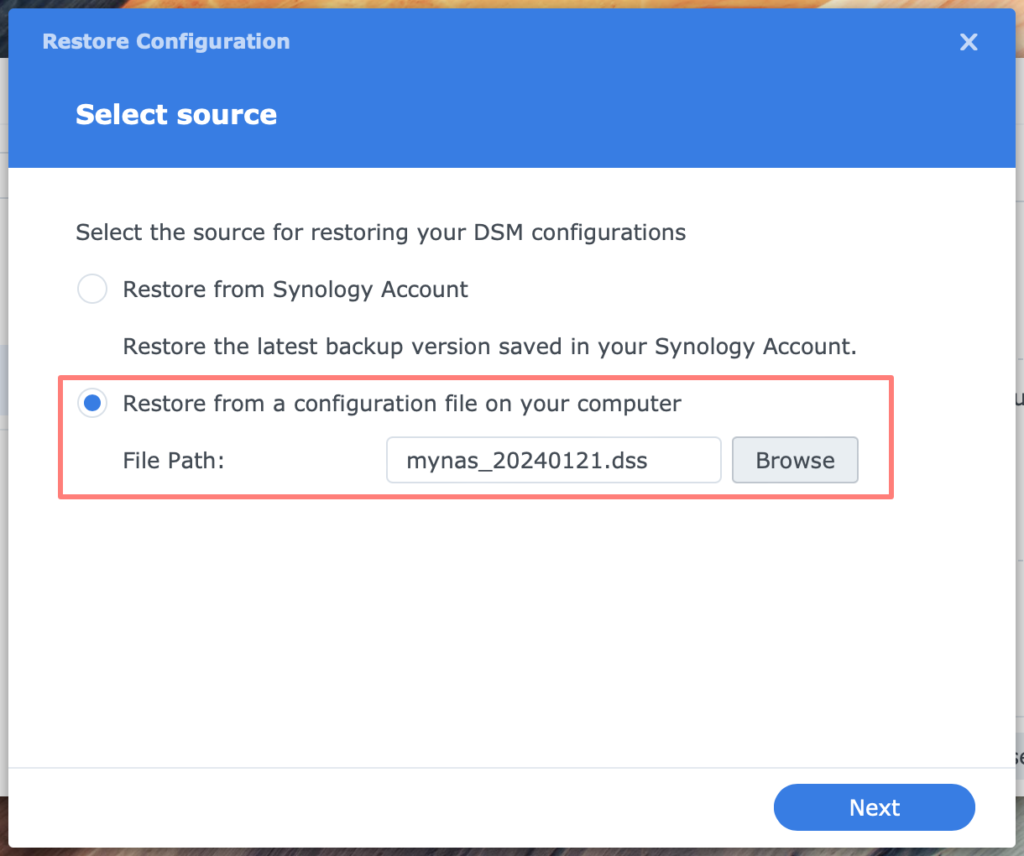
Click Next to continue. You see a list of all items in the configuration backup. Enable the items you like to restore.
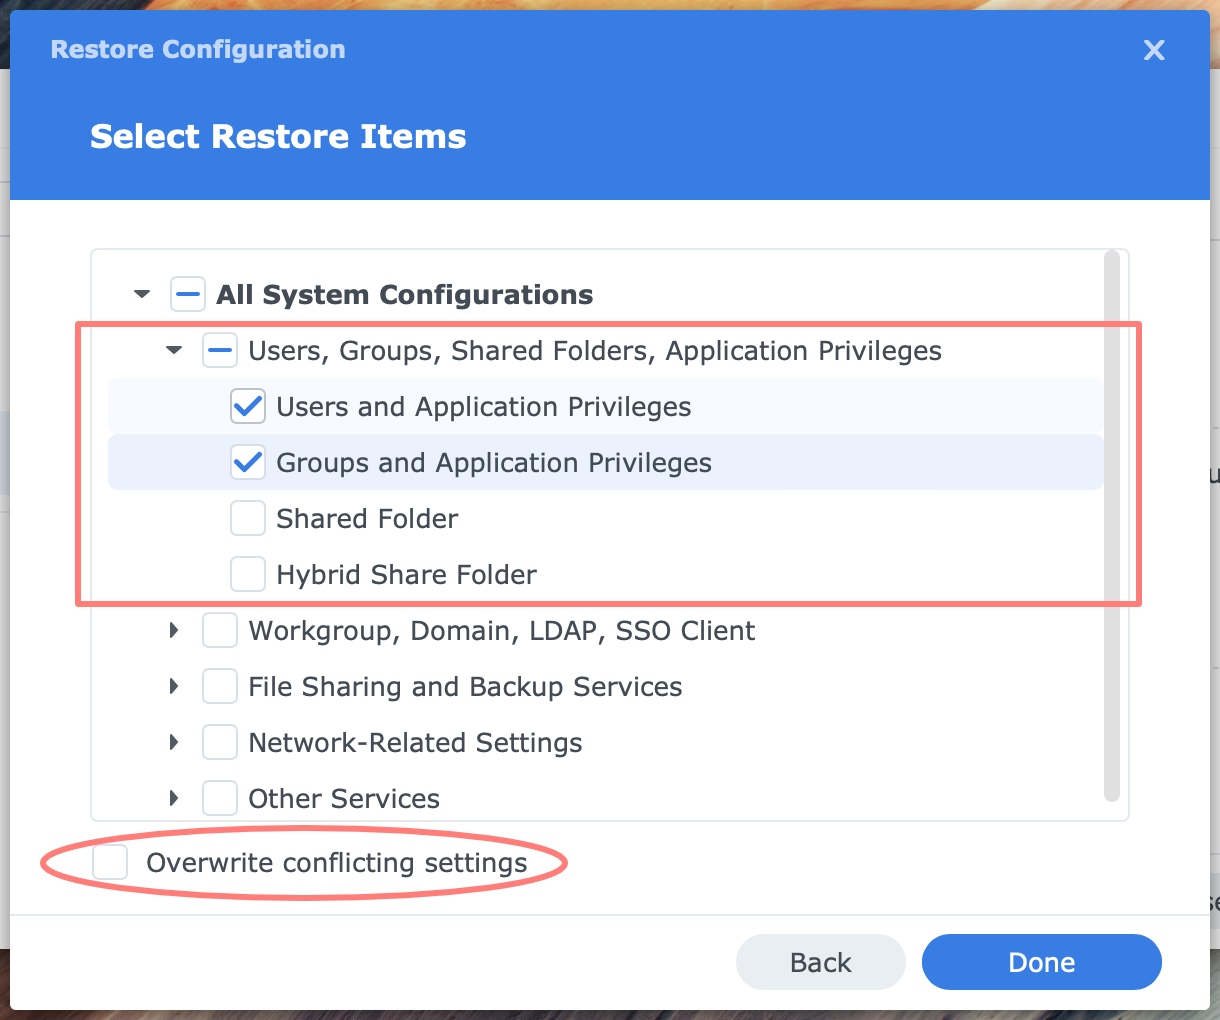
Note the option at the bottom: Overwrite conflicting settings.
Some items can show the values in the backup. For example, open File Sharing and Backup Services > SMB.
Click Done when all settings to restore are enabled, and follow the instructions on the screen. A restore takes only a few seconds. The DSM desktop page may refresh after the restore.
Restore from Hyper Backup
Log in to the DSM desktop and open Hyper Backup. Click on the Restore icon to start a restore. The Restoration Wizard opens:
- Select a Restoration Type
- Folders and Packages
- Select Restoration Task
- select a task or restore from existing repositories (link at the bottom of the screen)
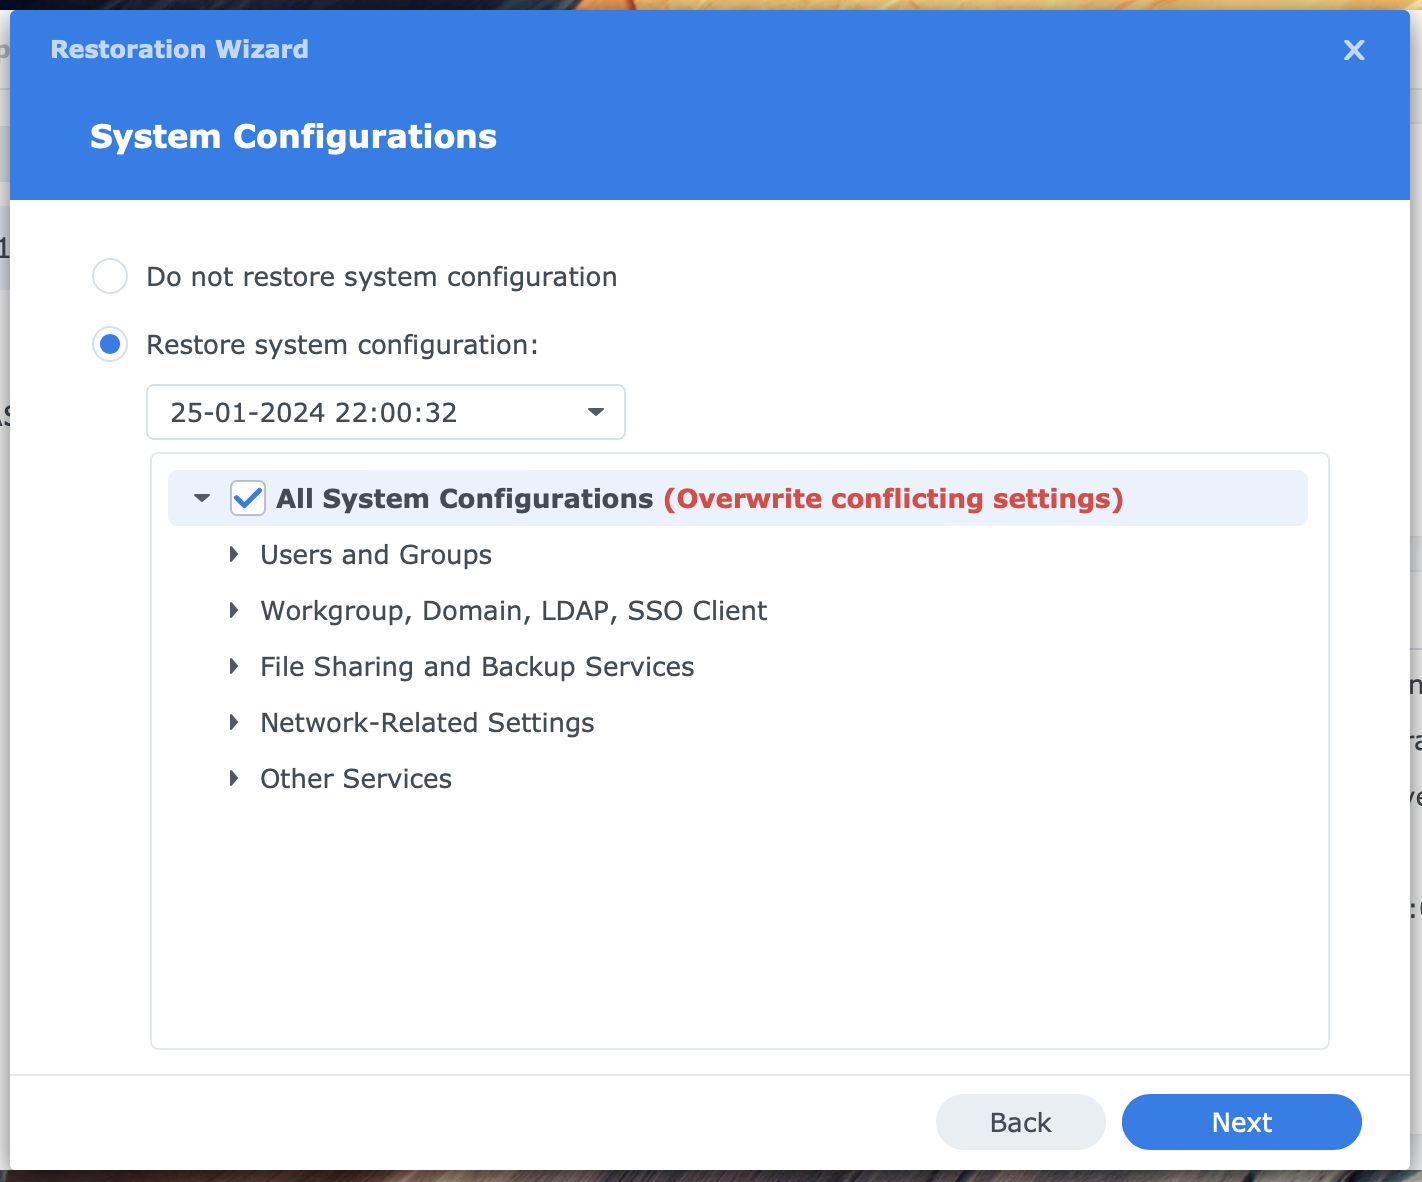
- System Configurations
- Restore system configuration
- select a backup from the drop-down list
- enable: All System Configurations
Note the remark in red: Overwrite conflicting settings. Disabling this is impossible as with a restore via Control Panel.
Continue with the Restoration Wizard and select shared folders and applications if desired.
Differences
Several significant differences exist between the configuration backup made via Control Panel and Hyper Backup.
- via Control Panel, you have more items in the backup (Shared folder and Hybrid Share Folder)
- via Control Panel, you can selectively restore the backup; via Hyper Backup, all settings are restored
- via Control Panel, where you optionally overwrite conflicting settings; via Hyper Backup, this option is permanent
I suggest creating your configuration backups with Control Panel rather than Hyper Backup.
Thanks for reading
This post is donation-ware, and I made it to help you. Please consider leaving a comment or even buying me a coffee if it did. I will be eternally grateful.
Paul Steunebrink / Storage Alchemist