This post is donation-ware. If it did help you, please consider leaving a comment or even buying me a coffee. I will be eternally grateful.

Primary objective
Learn how to configure a fixed IP address on the LAN interface instead of a dynamic address.
Secondary objective(s)
Allows running services on the NAS that require a fixed IP address. Make connections to the NAS easier and more reliable.
Background
Why should you give your NAS a static IP address? In general, servers on a local network have a fixed or static IP address, and clients have a dynamic address. Dynamic addresses are easier to maintain, but the server’s fixed address makes it easier to find and more reliable to connect.
Like any server on the internet, a fixed address links to a hostname. A system called DNS stores this combination. But why is it beneficiary or even necessary for your NAS on your local network? There are several reasons for that.

- It makes finding your NAS easier
Whether you log in to DSM or connect to network shares, you can use the NAS’ IP address or the server name. In the case of the IP address, it makes it a lot easier if it is a static address; - It helps maintain reliable connections
If you create mappings based on an IP address, your connection will fail when the address changes. Therefore a fixed address increases the reliability of the link; - Several network services require a fixed IP address
If you run IP related services like DHCP or DNS server, or a Directory or LDAP server on your NAS, it is a requirement that your NAS has a static IP address; - When you use port forwarding
If you host services on your NAS like a website, a VPN server, a reverse proxy server, or another service that relies on port forwarding to a specific address – that from your NAS – the service will fail if the NAS’ IP address changes. Therefore a fixed address is mandatory for these services to operate reliably.

How do you configure a static IP address? There are two different approaches, and you can do either one. In this example, I assume that your router is the DHCP server in your local network.
The DHCP server provides IP addresses dynamically to devices on your network like your NAS, computers, smartphones, and tablets. This range of addresses, a.k.a. the DHCP range, covers a part of available addresses on your subnet.
Note that the DHCP server also provides properties to its clients like the IP address of the DNS server and the default gateway.
- Configure the static address at your NAS
Make sure you use an address outside of the DHCP address range of your router but within the same subnet. This configuration prevents duplicate IP addresses on the network. You have to keep an IP address administration to avoid duplicate IP addresses. - Configure the static address at your router or another device that is your DHCP server
Make a dynamic address within the DHCP range static by turning it into a reservation. The dynamic address is permanently assigned to your NAS and does not become available for devices. This configuration prevents duplicate IP addresses and propagates DHCP options like DNS server and default gateway to your NAS. If you replace your internet router annex DHCP server, the fixed IP address is lost, and you have to reconfigure it again.
Actions
As mentioned earlier, there are two ways to configure a fixed IP address.
Configure the static address at your NAS
Log in to your DSM desktop with administrative privileges. Open Control Panel > Network > Network Interface tab. Select the interface for which you like to configure a static address. Typically this is LAN 1. Click on the Edit button.

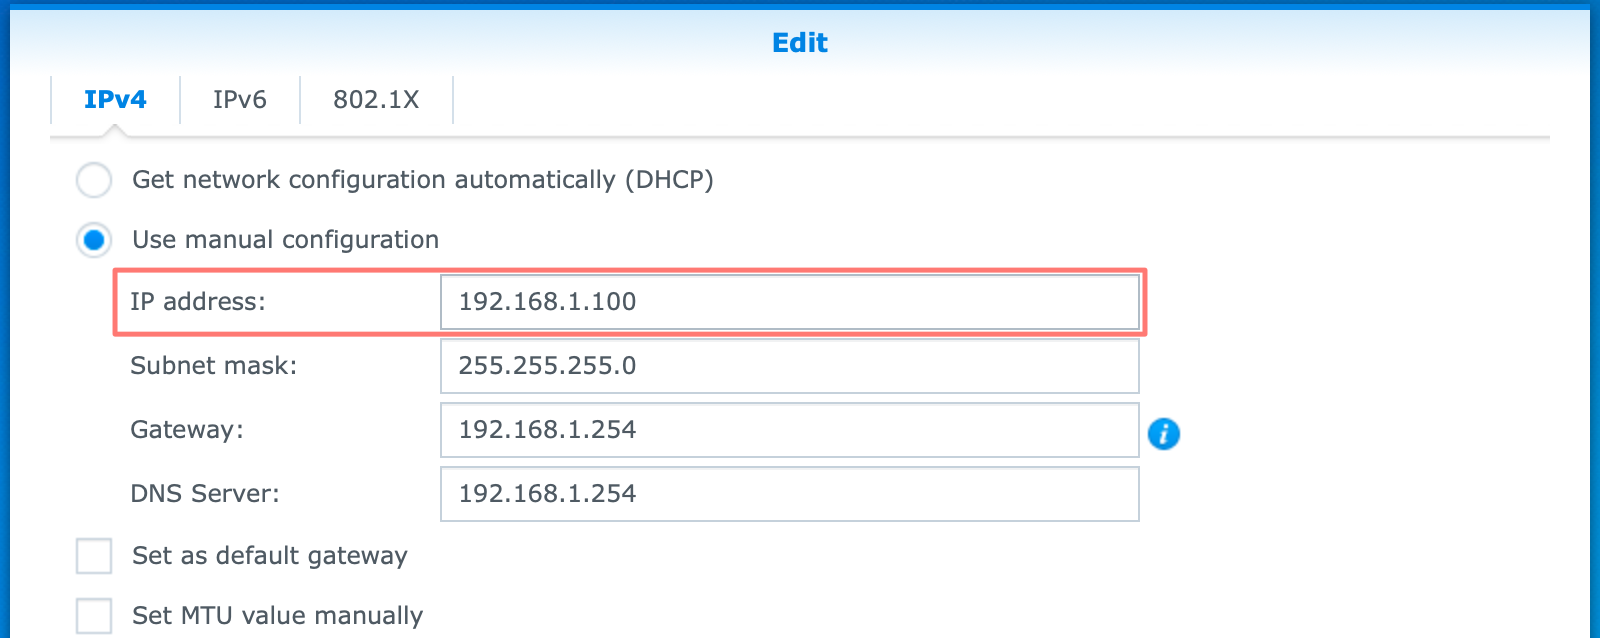
On the IPv4 tab of the Edit screen, change the radio button from Get network configuration automatically (DHCP) to Use manual configuration. The dialog copies the automatically acquired information to the manual setup. You may change the IP address to another value not part of the DHCP range. When ready, click OK.
If you changed the IP address, you lost connection with your NAS and might want to log in again on the new address. Create a bookmark or favorite in your browser of this new address.
Note: to know the DHCP range or your router, log in to the router if it is the DHCP server on your local network.
Configure the static address at your router
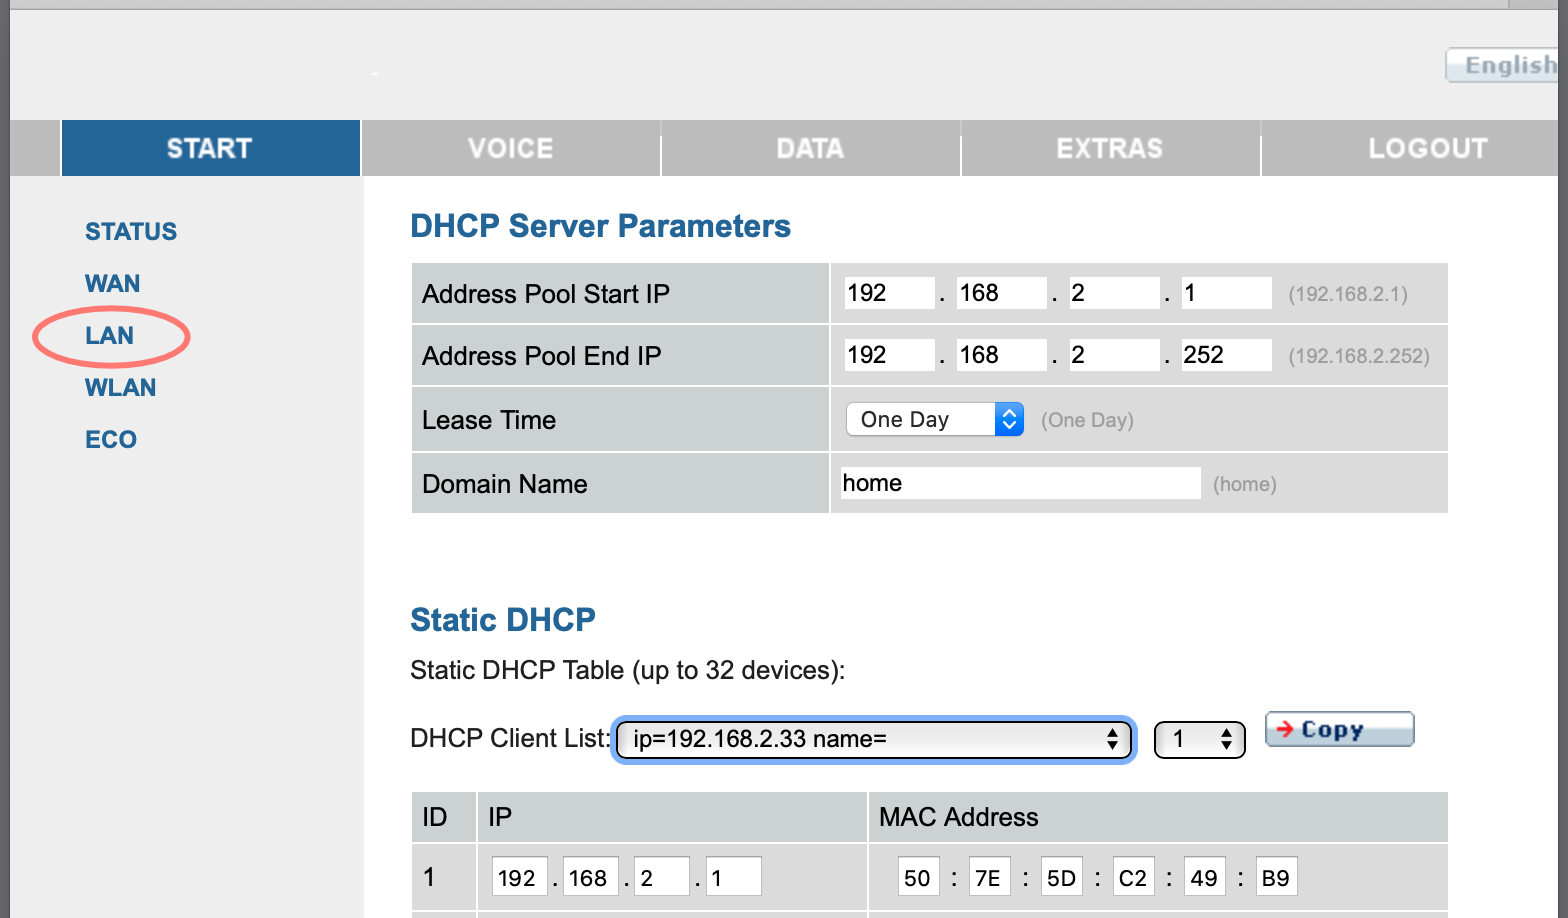
Every brand and model router is different. You can look on the internet for a user guide for your router. Log in to your router. Look for the LAN section. In the LAN section, look for DHCP Server to see the DHCP range.

Next to the DHCP Server is often the Static DHCP section, also known as DHCP Reservations. Here you can link an IP address from the DHCP range to a so-called MAC Address. A MAC Address or hardware address is a unique hexadecimal number.

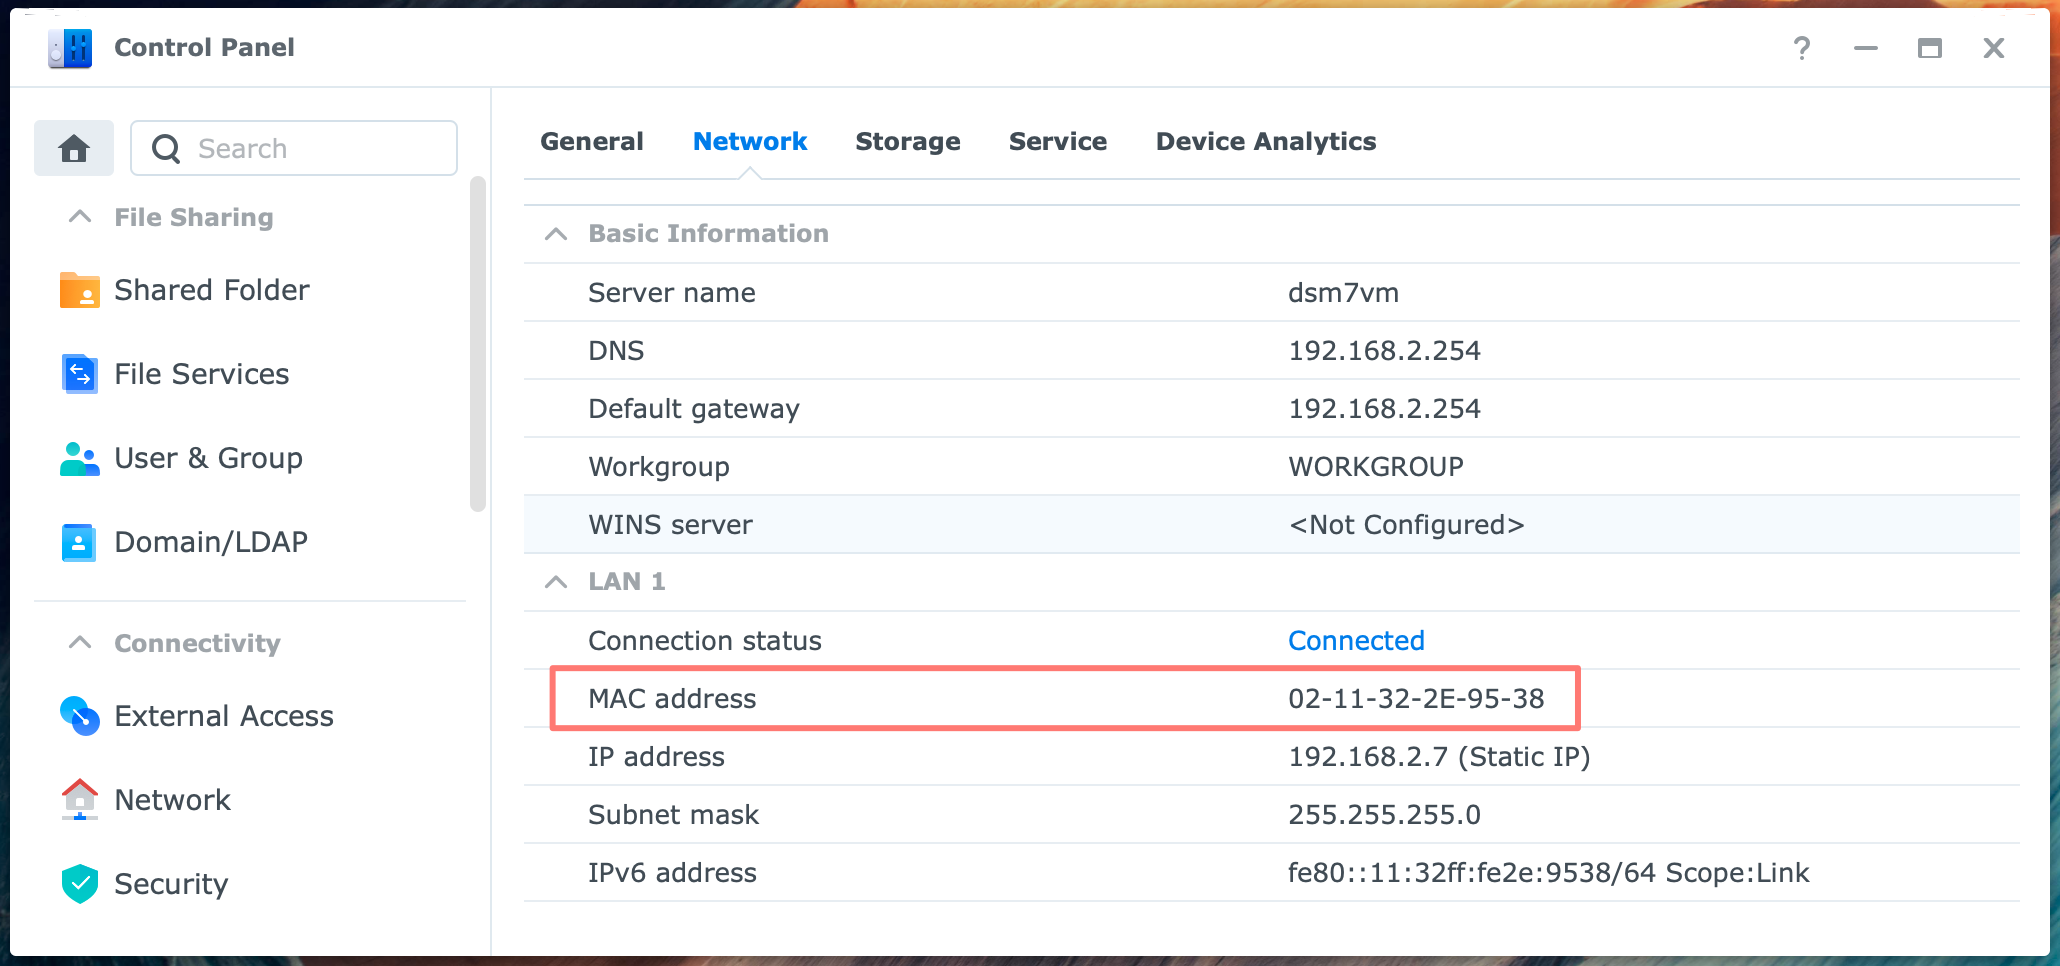
Look up the MAC Address of your LAN interface in your NAS via DSM > Control Panel > Info > Network. After you fill in the MAC address in your router, you save the settings and log out from your router.
Next, start your NAS again. Check the IP address in the NAS. The router should now have assigned the IP address that you configured.
Note that a DHCP static or reservation reserves the address for your NAS. The IP address is marked as reserved, even if you switch off the NAS, and the router will never assign it to another computer.
Congrats, you achieved the primary objective.
Thanks for reading
This post is donation-ware. If it did help you, please consider leaving a comment or even buying me a coffee. I will be eternally grateful.
Paul Steunebrink / Storage Alchemist
